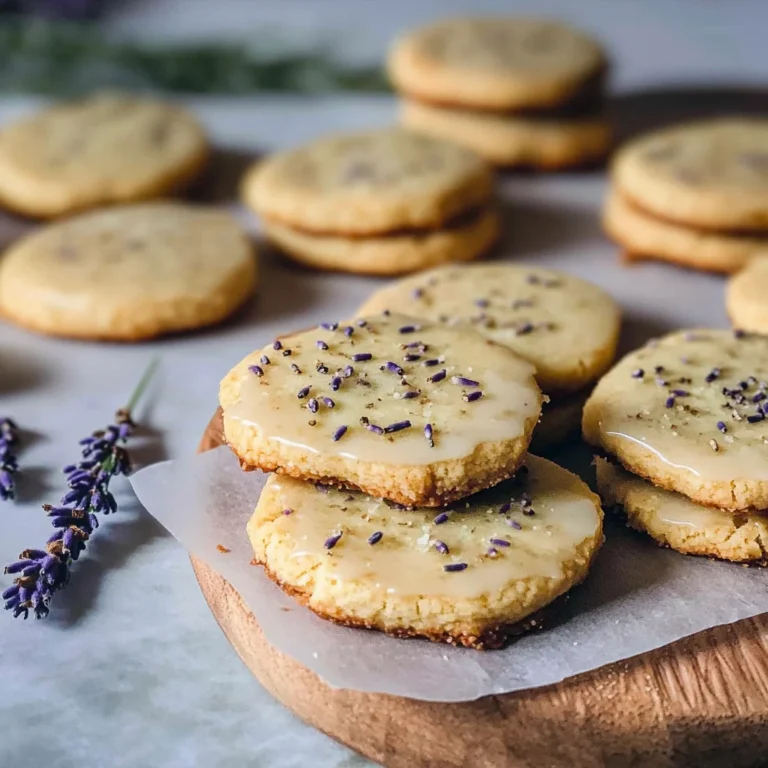
Maple Cream Cookies: Soft, Chewy, and Irresistible Treats
It all started one chilly afternoon when I wandered into a cozy café that boasted the most incredible Maple Cream Cookies. As soon as I took a bite, the soft, chewy texture paired with the creamy maple frosting sent my taste buds into a frenzy. I knew I had to recreate that magic at home—not only because they were to die for, but also because let’s be real, who doesn’t love saving a few bucks while indulging in homemade treats? Plus, I figured I could make them even better; after all, my kitchen is my happy place!
Little did I know, perfecting these Maple Cream Cookies would take me on quite the journey. It wasn’t just a simple “mix and bake” situation; oh no! After four attempts (and a few cookie catastrophes that should have been illegal), I finally honed in on the right balance of flavors and textures. Each batch taught me something new—like how not to confuse baking soda with baking powder (yikes!)—but it was all worth it for that heavenly combination of soft cookie and rich frosting.
And let me tell you, the payoff was absolutely worth every trial and error! The final Maple Cream Cookies are nothing short of perfection: they’re delightfully soft and chewy with that luxurious cream filling that makes you want to dance with joy. Not only do they look impressive, but they also boast an irresistible flavor that can brighten any day. So grab your apron and get ready—I can’t wait for you to experience these cookies just as much as I did!
These Maple Cream Cookies are….
….the ultimate treat for anyone who loves a perfect balance of sweetness and texture!
1. They deliver a delectable maple flavor that is truly exceptional, thanks to the rich maple syrup in the filling. This not only enhances their sweetness but brings a warm, comforting aroma that fills your kitchen as they bake, making every bite feel like a cozy hug.
2. Irresistibly chewy texture – the combination of both granulated and brown sugars creates cookies that are soft on the inside with just the right amount of chew. The use of softened butter ensures they spread perfectly during baking, giving you a delightful experience in every mouthful.
3. Expertly balanced technique – chilling the cookie dough before baking allows the flavors to meld beautifully and prevents spreading too much. This step is crucial because it results in cookies that maintain their shape while still being soft and tender inside, elevating them above ordinary cookie recipes.
4. Incredible value – making these Maple Cream Cookies at home means you can enjoy high-quality treats without breaking the bank. With simple ingredients like butter and sugar, this recipe is not only accessible but also yields plenty to share (or keep all to yourself!).
PS These cookies are soft and delightful! Perfectly sized for sharing, they make a sweet addition to any gathering or just a cozy night in.
Ingredients You’ll Need
Each ingredient in this dish plays an essential role in flavor and texture. Here’s what you’ll need:
- 1 cup unsalted butter (softened): Provides rich flavor and a tender texture.
- 1 cup granulated sugar: Sweetens the cookies and helps create a soft structure.
- 1/2 cup brown sugar (packed): Adds moisture and a hint of caramel flavor.
- 1 large egg: Binds the ingredients together and contributes to the cookie’s chewiness.
- 1 teaspoon vanilla extract: Enhances the overall sweetness with a warm aroma.
- 2 cups all-purpose flour: Forms the base of the dough, giving structure to the cookies.
- 1 teaspoon baking soda: Acts as a leavening agent for a light, fluffy texture.
- 1/2 teaspoon salt: Balances sweetness and enhances all the flavors in the cookies.
You must cream the butter and sugars until light and fluffy. No shortcuts!
I’ll be honest — I tried to rush this step more times than I care to admit, hoping it wouldn’t make a difference. Spoiler alert: it did. My cookies were fine, but they lacked that dreamy soft texture and rich flavor that makes these Maple Cream Cookies truly special. So trust me, don’t skip this crucial step!
Creaming the butter and sugars together not only incorporates air into the mixture but also creates a smooth, cohesive dough. Think of it like whipping air into a cake batter; without it, your cookies will fall flat—literally! This step is essential for achieving that delightful soft and chewy interior while allowing the flavors to meld beautifully.
What does creaming do?
- Texture — Creates a lighter, fluffier cookie by incorporating air, resulting in a soft and chewy bite.
- Flavor — Enhances sweetness as the sugars dissolve into the butter, allowing for a richer taste profile.
- Spread — Helps control how much your cookies spread during baking; properly creamed dough holds its shape better.
- Moisture retention — Aids in trapping moisture within the cookie, keeping them fresh for longer.
- Color development — Promotes browning during baking, giving your cookies a lovely golden hue.
Different creaming times
- 1 minute (good) — Butter and sugar are mixed but still grainy; cookies will be denser with less chew.
- 2 minutes (better) — Mixture is creamy but not fully aerated; will yield decent cookies, though not optimal.
- 3 minutes (great) — Light and fluffy consistency achieved; perfect for airy cookies with great texture.
- ⭐️ 4 minutes ⭐️ — Ideal; maximum incorporation of air results in the best flavor and texture combination.
Don’t even think about skimping on this vital step! The most common mistake I see is rushing through the creaming process or using cold butter straight from the fridge. This can lead to dense, disappointing cookies instead of the delightful treats you’re aiming for. Trust me, take your time here!
How to make Maple Cream Cookies
Are you ready to see how straightforward it is to make the Maple Cream Cookies of your dreams??
1. PREPARE THE COOKIE DOUGH
Let’s kick things off with a buttery, sweet cookie dough that will be the base for our delicious sandwiches!
1. Preheat – Preheat the oven to 350°F (175°C). This ensures your cookies bake evenly and achieve that perfect golden edge.
2. Cream – In a mixing bowl, cream together the softened butter, granulated sugar, and brown sugar until light and fluffy. This process incorporates air into the mixture, giving your cookies a lovely texture.
3. Beat – Beat in the egg and vanilla extract until well combined. The egg adds richness while vanilla enhances the flavor profile.
4. Whisk – In a separate bowl, whisk together the flour, baking soda, and salt. This step helps distribute the leavening agent evenly throughout the flour for consistent rising.
5. Combine – Gradually add the dry ingredients to the wet ingredients, mixing until just combined. Be careful not to overmix; you want your cookies soft and chewy!
HANDY TIPS
- 💡 TIP: Make sure your butter is truly softened (not melted!) to achieve that fluffy texture when creaming with sugar.
- ⚠️ Watch for clumps of flour — if you see them after mixing, gently fold them in without overworking the dough.
2. BAKE THE COOKIES
Now it’s time to transform that dough into delicious cookies!
6. Drop – Drop rounded tablespoons of dough onto a baking sheet lined with parchment paper, spacing them about 2 inches apart. This gives them room to spread while baking!
7. Bake – Bake in the preheated oven for 8-10 minutes or until the edges are lightly golden. You’ll know they’re done when they’re fragrant and just set in the middle.
8. Cool – Remove from the oven and let cool on the baking sheet for a few minutes before transferring to a wire rack to cool completely. This helps them firm up so they don’t break when you move them.
HANDY TIPS
- 💡 TIP: If you prefer smaller cookies, roll your dough into balls instead of discs; bake for about 12-14 minutes for perfect mini treats!
- ⚠️ Cooling — Don’t skip letting them cool on the baking sheet first; this prevents them from breaking apart.
3. MAKE THE MAPLE CREAM FILLING
While those cookies cool, let’s whip up an irresistible filling!
9. Beat – In a mixing bowl, beat together the softened butter, powdered sugar, maple syrup, and vanilla extract until smooth and creamy. This filling should be thick but spreadable—perfectly sweet with that lovely maple flavor.
HANDY TIPS
- 💡 TIP: For an extra maple kick, adjust the amount of maple syrup based on your taste preference — it can be just as sweet!
- ⚠️ Make sure your butter is softened enough; if it’s too hard, it won’t blend smoothly with the powdered sugar.
4. ASSEMBLE THE COOKIES
Final step: let’s bring these delightful treats together!
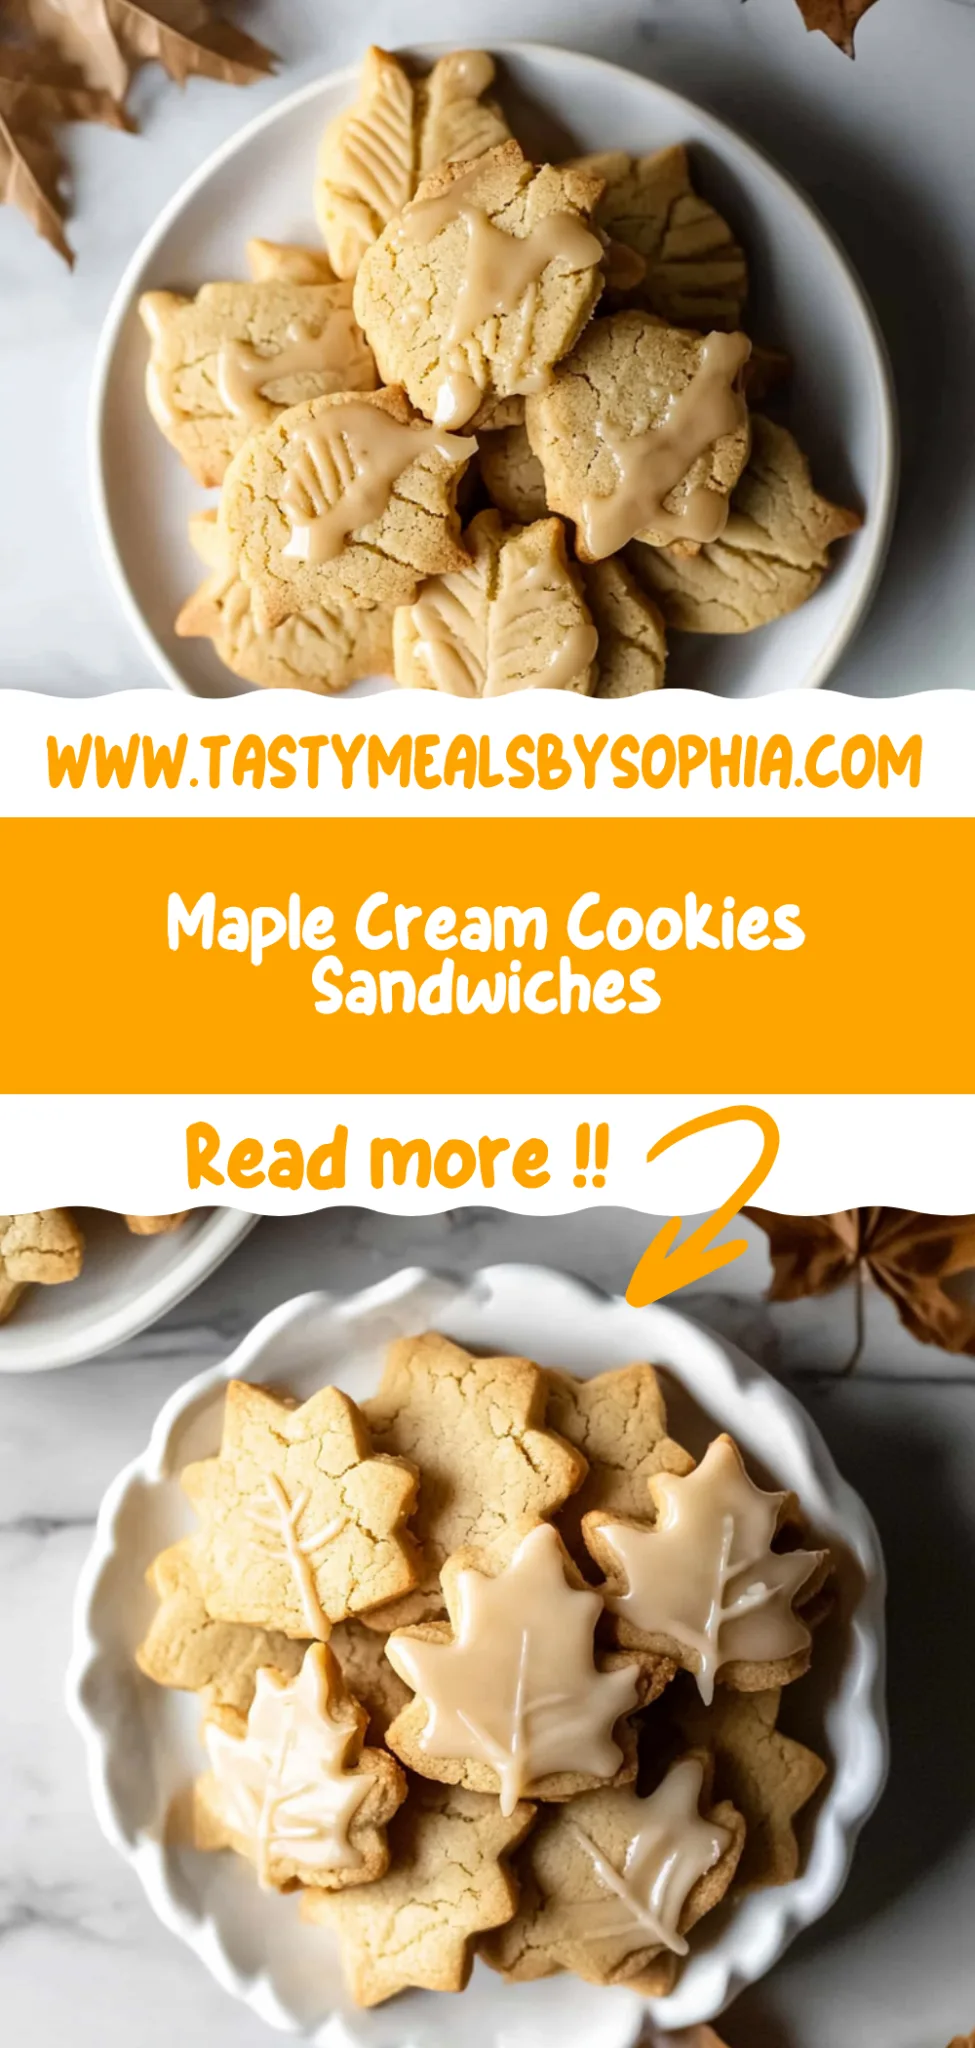
10. Spread – Once the cookies are completely cool, spread a generous amount of maple cream filling on the flat side of one cookie and top with another cookie to create a sandwich.
11. Repeat – Repeat with the remaining cookies and filling until all are assembled.
HANDY TIPS
- 💡 TIP: Feel free to decorate with additional sprinkles or crushed nuts on top of your filled cookies for added flair!
- ⚠️ Ensure all cookies are fully cooled before assembly; warm cookies can cause melting filling disaster!
You’ve just created scrumptious Maple Cream Cookies that are soft, chewy, and filled with creamy goodness! Whether it’s for a special occasion or just because you deserve a treat today, these cookies are ready to impress! Make these once, and I wager they will invade your dreams every night too! – Nagi x
FAQ – Maple Cream Cookies
How long will these cookies keep?
These Maple Cream Cookies will stay fresh for about 3-5 days at room temperature in an airtight container. After day 3, their texture may start to change slightly, but they’ll still be around 97% as good! If you want to extend their shelf life, you can refrigerate them for up to a week. Just make sure to allow them to come back to room temperature before serving for the best taste and texture.
❄️ Do I really have to chill? YES YOU DO.
No, you don’t need to chill the dough for these cookies! I’ve tested this recipe multiple times without refrigeration, and it works perfectly every time. Chilling can help with some cookies by preventing spreading, but here the combination of softened butter and the right amount of flour keeps them from becoming flat, so feel free to skip that step and go straight to baking!
🥶 Can I freeze these cookies?
Absolutely! You can freeze both the unbaked cookie dough and the assembled cookies. For unbaked dough, scoop it into balls and place them on a baking sheet lined with parchment paper. Freeze until solid, then transfer them to a freezer-safe bag. They’ll keep well for up to 3 months. When you’re ready to bake, just add an extra minute or two to the baking time without thawing. For assembled cookies, freeze them in a single layer before transferring to a container — they’ll last about a month!
🌾 Can these be made gluten free?
Yes! You can easily make these Maple Cream Cookies gluten-free by substituting all-purpose flour with a 1: 1 gluten-free flour blend. Make sure your blend contains xanthan gum for better structure; otherwise, your cookies might turn out a bit crumbly. I’ve tested this swap successfully and found no significant difference in taste or texture — they’re just as delicious!
Can I reduce the sugar or substitute with sweeteners?
No, you cannot reduce the sugar — I tried adjusting it several times and it just doesn’t work! The balance of granulated sugar and brown sugar is crucial for both flavor and texture. If you’re looking for alternatives, consider using natural sweeteners like honey or maple sugar at a ratio of about 3/4 cup for every cup of sugar called for; however, this will change the cookie’s texture quite a bit.
Why do we need to cream the butter and sugars together?
Creaming butter with sugars is essential because it incorporates air into the mixture, which helps create a light and fluffy cookie texture. This process also begins to dissolve the sugars, contributing to that perfect chewy consistency we love in cookies. If you skip this step or rush through it, your cookies may end up dense rather than soft and chewy — trust me; I’ve made that mistake more times than I’d like to admit!
💡 Can I add nuts or chocolate chips?
Definitely! Feel free to customize your Maple Cream Cookies by adding in chopped nuts like pecans or walnuts for added crunch or chocolate chips if you want a sweeter twist. Just fold in about 1 cup of your chosen mix-ins after combining all your wet and dry ingredients. You might even consider drizzling some melted chocolate on top of the finished cookie sandwiches for an extra special touch!
Troubleshooting
I will continue to add more to this Troubleshooting section as I start seeing questions coming through from people who have made the recipe.
Troubleshooting tips
“My cookies were not as thick as yours!” 😭
- Your dough might have been too warm when you placed it on the baking sheet. If your butter was too soft, it can cause the cookies to spread more than desired as they bake.
- You may have overmixed your flour into the wet ingredients, which can lead to a denser dough that doesn’t hold its shape well. Remember to mix until just combined!
- Lastly, if you didn’t scoop rounded tablespoons of dough but rather flattened them out, they will naturally bake thinner. I bet they were still YUM though!
“My cookies came out wonky!” 🍪
- If your cookies are misshapen, it’s often because the dough wasn’t rolled or scooped evenly. Try using a cookie scoop for consistent sizes next time!
- Another reason could be that you didn’t space them properly on the baking sheet; if they’re too close together, they can merge while baking. I bet they were still YUM though!
“The edges of my cookies got too dark!” 🔥
- This can happen if your oven runs hot; an oven thermometer can help ensure you’re baking at the right temperature. If they’re browning too fast, try lowering your oven temperature by 25°F (about 10°C).
- Additionally, if you used a darker baking sheet instead of a light-colored one, it can absorb more heat and cause uneven browning. I bet they were still YUM though!
“My cookies are too dry!” 😩
- If your cookies turned out dry, it’s likely that you added too much flour when measuring. Make sure to spoon the flour into your measuring cup and level it off without packing it down.
- Also, overbaking can lead to dryness; keep an eye on them and take them out as soon as the edges are lightly golden! I bet they were still YUM though!

Maple Cream Cookies
Ingredients
Method
- Preheat the oven to 350°F (175°C).
- In a mixing bowl, cream together the softened butter, granulated sugar, and brown sugar until light and fluffy.
- Beat in the egg and vanilla extract until well combined.
- In a separate bowl, whisk together the flour, baking soda, and salt.
- Gradually add the dry ingredients to the wet ingredients, mixing until just combined.
- Drop rounded tablespoons of dough onto a baking sheet lined with parchment paper, spacing them about 2 inches apart.
- Bake in the preheated oven for 8-10 minutes, or until the edges are lightly golden.
- Remove from the oven and let cool on the baking sheet for a few minutes before transferring to a wire rack to cool completely.
- In a mixing bowl, beat together the softened butter, powdered sugar, maple syrup, and vanilla extract until smooth and creamy.
- Once the cookies are completely cool, spread a generous amount of maple cream filling on the flat side of one cookie and top with another cookie to create a sandwich.
- Repeat with the remaining cookies and filling.