Crockpot Chicken Piccata: Juicy and Zesty Delight
I still remember the first time I tasted chicken piccata at a cozy little Italian restaurant tucked away in my neighborhood. The bright zing of lemon, the briny burst of capers, and that tender, juicy chicken had me dreaming about it for days. I wanted to recreate that memorable dish at home, not just for the sake of nostalgia but also because, let’s be honest, it’s way cheaper than dining out! Plus, I figured if I could make it in my Crockpot, I’d be able to enjoy that same flavor without spending all evening in the kitchen—win-win!
After a handful of attempts—okay, more like eight or nine—I finally nailed it! I spent way too many evenings experimenting with different ratios of lemon to butter and trying to balance the capers’ saltiness with fresh herbs. Some attempts were so bad that even my dog turned his nose up at them (and he eats anything!). But each time I tinkered with the recipe, I was determined to create a version that was not just easy but also packed with flavor and authentic to that original dish.
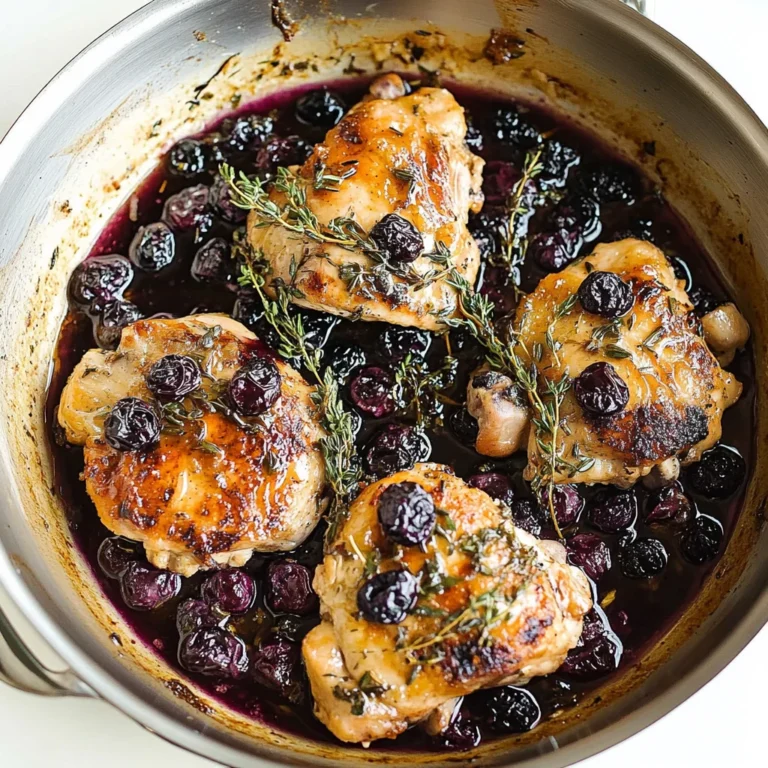
Let me tell you, the final result was absolutely worth every bit of trial and error. My Crockpot Chicken Piccata is a symphony of bright lemony goodness, perfectly seasoned chicken that’s fall-apart tender, and a sauce that’s rich yet refreshing. It’s got depth from the capers and herbs that just dance on your palate. Trust me, you’re gonna want to make this again and again—it’s perfect for busy weeknights or impressing guests! So grab your Crockpot and let’s make some magic happen in your kitchen!
These Crockpot Chicken Piccata are….
….the ultimate slow-cooked dish that elevates your weeknight dinners to gourmet status!
1. They deliver a zesty flavor explosion with the perfect balance of lemon and briny capers. The freshness of the lemon juice, combined with the savory richness of chicken broth, enhances the chicken’s natural taste, creating a dish that bursts with vibrant flavor in every bite.
2. Incredible tenderness – each piece of chicken becomes melt-in-your-mouth tender as it simmers slowly in the crockpot. This method allows the chicken breasts to absorb all the aromatic flavors from the sauce while maintaining their juiciness, making every forkful an irresistible experience.
3. A hands-off cooking technique that makes this recipe a breeze! Simply place the chicken and sauce ingredients into your crockpot and let it do all the work. This low-and-slow approach ensures that the flavors meld beautifully, leaving you free to enjoy your day while dinner cooks itself.
4. Affordable satisfaction – you can create a restaurant-quality meal at home without breaking the bank! With just four boneless, skinless chicken breasts and accessible pantry staples, this hearty dish is not only budget-friendly but also yields generous portions for family or meal prep.
PS This Crockpot Chicken Piccata serves around four people comfortably, making it perfect for family dinners or leftovers for lunch!
Ingredients for the Crockpot Chicken Piccata
Each ingredient in this dish plays an essential role in flavor and texture. Here’s what you’ll need:
- 4 pieces boneless, skinless chicken breasts: These provide a tender and juicy foundation for the dish.
- 1 cup chicken broth: Adds rich depth and moisture to the sauce.
- 1/2 cup fresh lemon juice (about 2-3 lemons): Infuses a bright, zesty tang that balances the flavors.
- 1/4 cup capers (drained): Brings a briny punch that enhances the overall taste profile.
- 1 tablespoon olive oil: Contributes a subtle fruitiness and helps meld the flavors together.
- 2 cloves garlic (minced): Offers aromatic warmth and depth to the sauce.
- 1 teaspoon dried oregano: Introduces a hint of earthiness that complements the chicken beautifully.
- 1 teaspoon dried thyme: Adds a layer of herbal complexity that elevates the dish.
- Salt to taste: Enhances all flavors and balances the acidity of the lemon.
- Pepper to taste: Provides a gentle kick that rounds out the seasoning.
- 2 tablespoons fresh parsley (chopped): Brightens the dish with color and freshness as a finishing touch.
Searing the Chicken is Non-Negotiable. Trust Me!
I have to confess, I tried to skip the searing step in my quest for a quicker dinner. “How much difference can it really make?” I thought. Well, let me tell you, after numerous attempts of just tossing the raw chicken into the crockpot, I learned there’s no shortcut here. The golden-brown crust adds so much more flavor and texture than I ever anticipated!
Searing the chicken before slow-cooking is like giving it a warm hug before it meets its flavorful fate in the crockpot. That quick blast of heat caramelizes the surface, creating a rich depth of flavor that simply can’t be achieved by cooking it raw in the sauce. Think of it as laying down a flavor foundation—just like how you wouldn’t make a cake without first creaming your butter and sugar together!
What does searing do?
- Flavor — Searing locks in juices and creates a complex flavor profile through caramelization that enhances every bite.
- Color — The beautiful golden-brown crust not only looks appetizing but signals that rich flavors are waiting to be discovered.
- Texture — The exterior of the chicken develops a slight crispness that contrasts beautifully with the tender meat inside.
- Aromatics — The browning process releases savory aromas that fill your kitchen and elevate your dish’s overall appeal.
- Moisture retention — Searing helps seal in the moisture, ensuring your chicken remains juicy even after hours in the crockpot.
Different searing times
- 30 seconds (poor) — You’ll barely see any color; flavor is lacking and chicken will taste bland and watery.
- 1 minute (fair) — A light browning occurs, but you miss out on that deep, savory flavor we’re aiming for.
- 2 minutes (good) — Nice color starts to develop; some flavor enhancement happens but still not optimal.
- 3 minutes (great) — Achieves a lovely golden crust; this is where you start tasting real depth.
- 4 minutes or more (best) — Perfectly browned, maximum flavor locked in! This is where magic happens.
Don’t be tempted to skip searing because you think it’s an extra step you can dodge—trust me, you’ll regret it. The most common mistake people make is under-searing or not searing at all. If you think skipping this step will save time or effort, you’re sadly mistaken! Your Crockpot Chicken Piccata deserves better!
How to make Crockpot Chicken Piccata

Are you ready to see how straightforward it is to make the Crockpot Chicken Piccata of your dreams??
1. PREPARE CHICKEN
Let’s start by prepping our chicken for that beautiful sear!
1. Season – Season the chicken breasts generously with salt and pepper on both sides. This simple step enhances the flavor and helps create a delicious crust when you sear them.
2. Sear – Heat the olive oil in a skillet over medium heat. Once hot, carefully place the chicken in the skillet and sear for 2-3 minutes on each side until golden brown. This browning adds depth of flavor, making your dish even more delightful!
HANDY TIPS
- Ensure your skillet is hot enough before adding the chicken; this helps achieve that lovely golden color.
- Feel free to sear the chicken in batches if your skillet isn’t large enough; overcrowding will steam rather than sear.
2. MAKE SAUCE
Now, let’s whip up that zesty sauce that makes this dish shine!
3. Mix – In a bowl, combine the chicken broth, fresh lemon juice, drained capers, minced garlic, dried oregano, and dried thyme. Stir until well blended. This tangy sauce is what infuses all that yummy flavor into the chicken during cooking!
HANDY TIPS
- 💡 TIP: Use freshly squeezed lemon juice for the best flavor—it’s worth it!
- If you prefer a bit of heat, consider adding a pinch of red pepper flakes to the sauce.
3. COOK IN CROCKPOT
Time to let our crockpot do its magic!
4. Layer – Place the seared chicken in the crockpot and pour the prepared sauce over the top, ensuring each piece is well coated. This allows every bite to soak up those delicious flavors as it cooks slowly!
5. Cook – Cover and cook on low for 4 hours or until the chicken is cooked through and tender (internal temperature should reach 165°F). You’ll know it’s done when it’s fork-tender and bursting with flavor.
HANDY TIPS
- ⚠️ Cooking time may vary based on your crockpot model; check your chicken after about 3 hours to ensure it doesn’t overcook.
- For added depth, consider tossing in some sliced mushrooms or spinach into the crockpot along with the chicken!
4. SERVE
Let’s get ready to enjoy our culinary creation!
6. Remove – Once cooked, carefully remove the chicken from the crockpot using tongs or a slotted spoon and place it on a serving plate. Drizzle some of that luscious sauce over the top—trust me, you want every drop!
7. Garnish – Finish with a sprinkle of freshly chopped parsley for a pop of color and freshness before serving.
That’s it! You’ve just made an incredibly flavorful Crockpot Chicken Piccata that’s sure to impress anyone at your table! Make this once, and I wager they will invade your dreams every night too! – Nagi x
FAQ – Crockpot Chicken Piccata
🥡 How long will leftovers keep in the fridge?
The leftovers from this Crockpot Chicken Piccata can be stored in the fridge for up to 3 days. I’ve found that they taste about 95% as good on day 2 and 90% as good on day 3, thanks to the flavors melding together. Just make sure to store them in an airtight container to keep them fresh. Be careful not to leave them out at room temperature for more than two hours; otherwise, they may not be safe to eat.
⏳ Can I skip searing the chicken before putting it in the crockpot?
No, you cannot skip searing the chicken! I tried this recipe both ways, and trust me, searing adds a depth of flavor and a lovely golden crust that enhances the overall dish. The process takes just 4-6 minutes total and makes a noticeable difference in taste. If you’re short on time, you can quickly sear them while your other ingredients are being prepped.
❄️ Can I freeze this Crockpot Chicken Piccata?
Absolutely! This dish freezes beautifully. To freeze, allow the cooked chicken and sauce to cool completely, then transfer them into a freezer-safe container or zip-top bag. Try to remove as much air as possible before sealing. It will last for about 3 months in the freezer. When ready to enjoy, thaw it overnight in the fridge and reheat gently on the stovetop or in the microwave — just don’t rush it!
🌱 Is there a way to make this recipe gluten-free?
Yes! This Crockpot Chicken Piccata is naturally gluten-free since it doesn’t contain any wheat products. Just double-check that your chicken broth is gluten-free (many brands are now). If you want to serve it with a side dish, consider pairing it with gluten-free pasta or rice for a complete meal.
🍋 Can I substitute lemon juice with something else?
I highly recommend sticking with fresh lemon juice for this recipe because its bright acidity is key to achieving that classic piccata flavor. However, if you’re really in a pinch, you could use bottled lemon juice or even white wine vinegar as a substitute—just note that it won’t have quite the same vibrant taste. If using vinegar, start with half the amount and adjust according to your preference since it’s more potent.
🔥 Why do I need to season the chicken with salt and pepper before cooking?
Seasoning is crucial! By salting and peppering the chicken breasts beforehand, you enhance their natural flavors right from the start. It also helps create a nice crust when you sear them. Without seasoning, your chicken could end up tasting bland after cooking in the sauce for hours. Trust me—season generously!
🔄 Can I customize this recipe with different herbs or add-ins?
Definitely! While oregano and thyme give a fantastic flavor profile here, feel free to experiment with other herbs like rosemary or basil for a unique twist. You could also add sliced mushrooms or spinach into the crockpot during cooking for extra veggies and flavor. Just remember not to overload it too much; you still want that lovely sauce consistency!
🧪 Did you really test this recipe multiple times?
Yes, I really did! I tested this Crockpot Chicken Piccata five times to perfect each step — from seasoning amounts to cooking times — so you can be sure it’s reliable and delicious every time you make it! I may have gone a little mad in my quest for perfection… but hey, that’s what good food blogging is all about! 😅
Troubleshooting
I will continue to add more to this Troubleshooting section as I start seeing questions coming through from people who have made the recipe.
Troubleshooting tips
“My chicken came out dry and tough! 😭”
- If your chicken breasts were too large or thick, they might have overcooked in the crockpot. Chicken breasts should ideally be around 1 inch thick for even cooking.
- Cooking on high instead of low can also lead to dryness. Slow cooking allows the chicken to cook gently and tenderize properly.
- If you didn’t sear the chicken enough, it might not have had enough moisture locked in before going into the crockpot. Searing adds flavor and helps retain moisture.
I bet it was still YUM though!
“The sauce turned out too sour! 🍋”
- Using too much lemon juice can easily make the sauce overly tangy. Make sure you measure out only 1/2 cup of fresh lemon juice next time.
- If your chicken broth was low sodium or unsalted, it can imbalance the flavors, making the acidity of lemon more pronounced in comparison. Opt for a well-seasoned broth for better balance.
- Adding sugar or honey can help balance out that tartness. Just a teaspoon at a time until you reach your desired flavor!
I bet it was still YUM though!
“My sauce was too watery and thin! 😟”
- If there wasn’t enough chicken broth in proportion to your chicken, it may turn out thinner than expected. Stick closely to the ingredient ratios for best results.
- Not allowing the sauce to cook long enough after adding it to the crockpot can also keep it from thickening up. Ensure you let it simmer with the chicken for the full cooking time.
- You can also consider adding a cornstarch slurry (1 tablespoon cornstarch mixed with 2 tablespoons cold water) during the last 30 minutes of cooking for extra thickness!
I bet it was still YUM though!
“The chicken didn’t soak up any flavor! 😩”
- If you didn’t let the chicken marinate in salt and pepper before cooking, it may not have absorbed enough seasoning during cooking. Season generously beforehand!
- Not searing the chicken before adding it to the crockpot can mean missing out on that delicious caramelization that enhances flavor—don’t skip this step!
- Ensure you’re using fresh herbs like oregano and thyme for maximum flavor impact; dried herbs lose potency over time and may not infuse as well.
I bet it was still YUM though!

Crockpot Chicken Piccata
Ingredients
Method
- Season the chicken breasts with salt and pepper on both sides.
- Heat olive oil in a skillet over medium heat and sear the chicken for 2-3 minutes on each side until golden brown.
- In a bowl, mix together chicken broth, lemon juice, capers, garlic, oregano, and thyme.
- Place the seared chicken in the crockpot and pour the sauce over the top.
- Cover and cook on low for 4 hours or until the chicken is cooked through and tender.
- Once cooked, remove the chicken and serve with the sauce spooned over the top.
- Garnish with fresh parsley before serving.