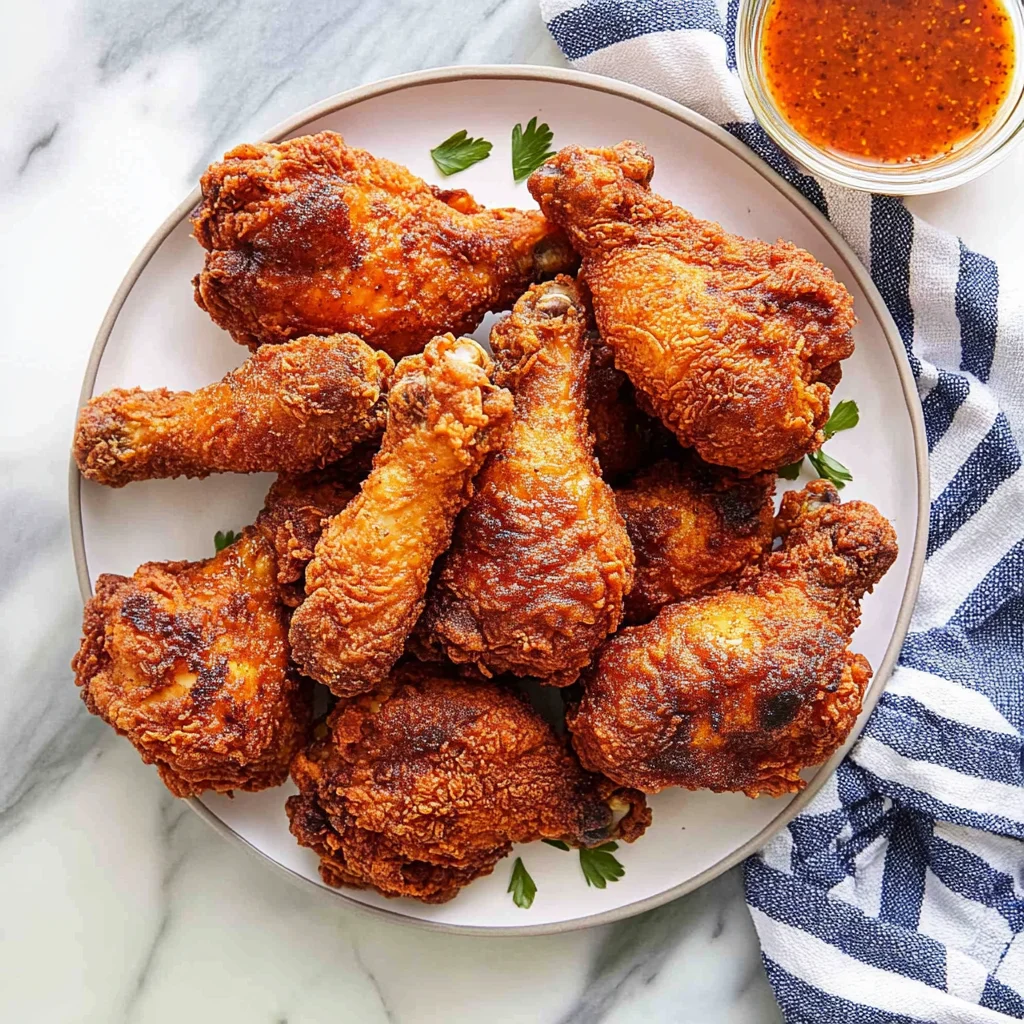
Crispy Spicy Buttermilk Fried Chicken: A Flavor Explosion
When I first tasted the crispy spicy buttermilk fried chicken at a little Southern diner during a road trip, I swear my taste buds threw a party. The crunch, the heat, the juicy tenderness—it was love at first bite! I knew right then and there that I had to recreate this magic in my own kitchen. Plus, let’s be honest, nothing beats making your favorite comfort food at home where you can control every delicious detail and save a few bucks in the process.
I dove headfirst into perfecting my version of this dish, and let me tell you, it wasn’t all smooth sailing. After what felt like a hundred attempts—okay, maybe it was more like ten—I had a pretty epic fail that involved what can only be described as “chicken bricks.” But each iteration brought me closer to that ideal crispy coating and the perfect spicy kick. I experimented with different marinating times and seasoning blends, all while trying not to set off the smoke alarm (again).
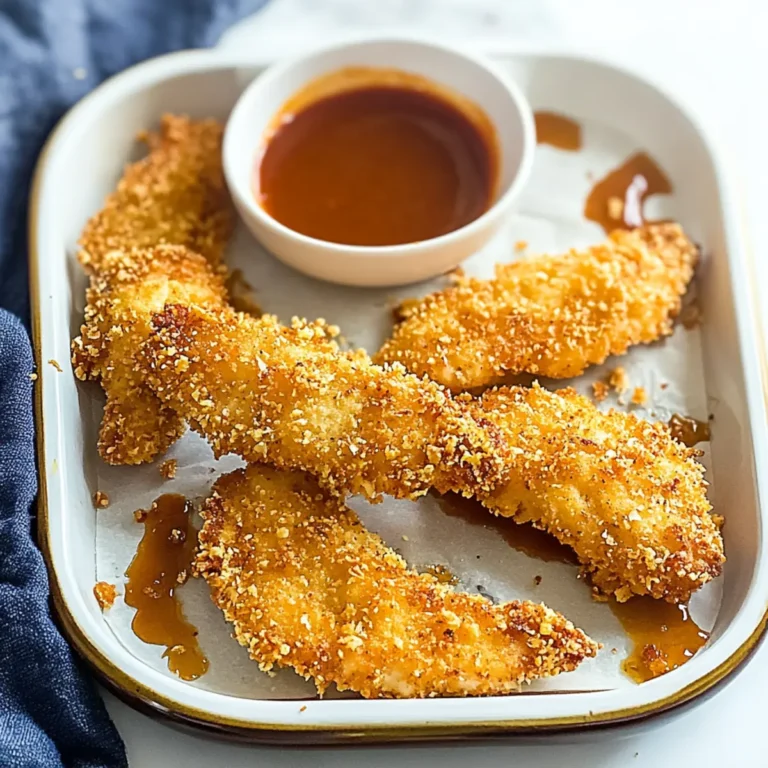
But oh boy, was it worth it! The final result is nothing short of spectacular: crispy spicy buttermilk fried chicken that boasts an addictive crunch and layers of flavor that dance on your palate. Every bite is juicy and tender, with just the right amount of spice to keep things interesting. Trust me, once you make this dish, you’ll want to whip it up again and again. So grab your apron—let’s get frying!
These Crispy Spicy Buttermilk Fried Chicken are…
….the ultimate comfort food that will have you coming back for seconds!
1. They deliver an explosive flavor thanks to the spicy buttermilk marinade infused with hot sauce. This not only adds heat but also tenderizes the meat, ensuring each bite is packed with a bold taste that lingers beautifully.
2. The irresistible crunch of the coating is achieved through a careful dredging process using seasoned flour. This creates a thick, crispy crust that contrasts perfectly with the juicy, succulent chicken thighs beneath, elevating your fried chicken experience to new heights.
3. The marination technique sets these chicken pieces apart as it allows the buttermilk to permeate deep into the meat. By letting them soak for several hours (or overnight!), you’re guaranteed a level of tenderness and flavor infusion that standard frying methods simply can’t match.
4. A fantastic value proposition — making Crispy Spicy Buttermilk Fried Chicken at home means you can enjoy restaurant-quality flavors without breaking the bank. With just a few simple ingredients, you can whip up a hearty meal that serves multiple people, perfect for gatherings or family dinners.
PS These chicken thighs are bone-in and skin-on for maximum flavor and juiciness, ensuring every piece is delectable!
Ingredients for the Crispy Spicy Buttermilk Fried Chicken
Each ingredient in this dish plays an essential role in flavor and texture. Here’s what you’ll need:
- 4 pieces chicken thighs (bone-in, skin-on): These bring deep flavor and juicy texture.
- 2 cups buttermilk: Tenderizes the chicken while adding a tangy richness.
- 2 tablespoons hot sauce: Infuses the marinade with a spicy kick that elevates the dish.
- 1 teaspoon salt: Enhances all the flavors and balances the spice.
- 1 teaspoon black pepper: Adds a warm, fragrant note to the marinade.
- 1 cup all-purpose flour: Creates a crispy coating that seals in moisture during frying.
- 1 tablespoon paprika: Provides a smoky depth and vibrant color to the crust.
- 1 teaspoon cayenne pepper: Packs an extra punch of heat; adjust for your spice preference.
- 1 teaspoon garlic powder: Contributes savory complexity to the coating.
- 1 teaspoon onion powder: Adds a subtle sweetness and depth to the flavor profile.
- 1 teaspoon salt: Ensures even seasoning throughout the crispy outer layer.
- 1 teaspoon black pepper: Complements other spices with its distinctive warmth.
- 4 cups vegetable oil: Essential for frying, achieving that perfect golden crispiness.
You MUST marinate the chicken overnight. Trust me!
I know, I know—marinating chicken for a whole night sounds like a tedious commitment, and I was tempted to skip it too. I tried rushing the process a few times, thinking I could get away with just a couple of hours. Spoiler alert: every time I did, my crispy fried chicken turned out lackluster. So trust me when I say that this step is essential for achieving that mouthwatering flavor and juicy texture.
Why is marinating the chicken in spicy buttermilk so crucial? Well, think of it like soaking beans for chili—without enough time to absorb all that goodness, they just won’t have the same depth of flavor! In this case, the buttermilk not only tenderizes the chicken but also infuses it with richness from the fats and tanginess from the acidity. The longer you let it sit, the more flavorful and succulent your chicken will be when it hits that hot oil.
What does marinating do?
- Flavor explosion — The buttermilk mixed with hot sauce penetrates deeply into the chicken, making each bite burst with deliciousness.
- Tenderness — The acidity in buttermilk breaks down proteins, ensuring your chicken thighs are juicy and fork-tender.
- Crispiness — A longer marinade gives flour more time to cling to wet chicken, resulting in an extra-crispy crust after frying.
- Seasoning — Salt in the marinade enhances flavor throughout instead of just on the surface; no bland bites here!
- Moisture retention — Extended soaking helps maintain moisture during frying, preventing dry or overcooked meat.
Different marinating times
- 30 minutes (okay) — You’ll get some flavor, but the chicken will still taste quite plain and dry.
- 2 hours (good) — Better than nothing! You’ll notice improved flavor and tenderness compared to no marinating at all.
- ⭐️ 8 hours⭐️ (great) — This is where things start to get seriously tasty! The flavors deepen significantly.
- ⭐️ 12 to 24 hours⭐️ (best) — Pure bliss! Optimal flavor infusion and incredible tenderness make every bite unforgettable.
Don’t even think about skipping or skimping on this marination step! The most common mistake is underestimating how much time you need—trust me, anything less than 8 hours will leave your crispy fried chicken lacking in both flavor and juiciness.
How to make Crispy Spicy Buttermilk Fried Chicken

Are you ready to see how straightforward it is to make the Crispy Spicy Buttermilk Fried Chicken of your dreams??
1. MARINATE THE CHICKEN
Start by infusing the chicken with flavor and tenderness!
WHISK – In a large bowl, whisk together the buttermilk, hot sauce, salt, and black pepper until well combined. This spicy buttermilk will not only tenderize the chicken but also impart a delightful zing.
ADD – Carefully place the chicken thighs into the buttermilk mixture, ensuring they are fully submerged. The more time they spend soaking up those flavors, the better!
COVER – Seal the bowl with plastic wrap or a lid and refrigerate for at least 2 hours; overnight is even better for maximum flavor absorption.
HANDY TIPS
- For Extra Spice: Adjust the amount of hot sauce based on your heat preference; I often use a bit more for an extra kick!
- Make Ahead: Marinating overnight is ideal if you’re planning this dish for a gathering.
2. PREPARE THE COATING
Get ready for that crispy crunch!
COMBINE – In another bowl, mix together the all-purpose flour, paprika, cayenne pepper, garlic powder, onion powder, salt, and black pepper. This blend will create a flavorful crust that complements the spicy chicken perfectly.
HANDY TIPS
- Smoky Flavor: Using smoked paprika will add an extra layer of flavor to your coating.
- Batch Size: If you plan to make extra chicken for later, double the coating mix so you’re always ready!
3. COAT THE CHICKEN
Let’s get that chicken nice and crispy!
REMOVE – Take each piece of marinated chicken from the buttermilk mixture, allowing any excess marinade to drip off. This step is crucial as it prevents clumping when you coat them in flour.
DREDGE – Dip each thigh into the flour mixture, pressing down firmly to ensure a good coating sticks to every inch of chicken. Shake off any excess flour – we want crispy, not doughy!
HANDY TIPS
- Double Dipping: For an even thicker crust, consider dipping back into the buttermilk before dredging again in the flour mixture.
- Keep it Fluffy: When dredging, don’t rush – take your time to press down firmly; this helps achieve that coveted crunchy texture.
4. FRY THE CHICKEN
Time to bring on the heat!
HEAT – In a frying pan or deep skillet, pour in vegetable oil and heat over medium-high until it reaches 350°F (175°C). Use a thermometer if you have one—this is key for perfect frying! ⚠️ Always be cautious with hot oil!
ADD – Carefully place the coated chicken pieces in the oil without overcrowding; cook in batches if necessary. Fry each piece for about 10-12 minutes per side or until golden brown and cooked through (internal temperature should be at least 165°F/74°C). You’ll know it’s done when they’re beautifully golden and fragrant!
HANDY TIPS
- Batch Cooking: If you’re cooking multiple pieces and need to keep them warm while finishing up cooking, place cooked chicken in a warm oven (around 200°F/90°C) on a wire rack.
- Oil Quality: Make sure your oil maintains its temperature—too low will lead to greasy chicken; too high can burn your coating before cooking through!
5. DRAIN AND SERVE
Finish strong with some final touches!
REMOVE – Once cooked perfectly golden brown, carefully remove each piece from the oil using tongs or a slotted spoon and place them on paper towels to drain excess oil. This helps maintain their crispy texture!
REST – Let them sit for a few minutes before serving; this little pause allows juices to redistribute for maximum juiciness.
That’s it – you’ve just made Crispy Spicy Buttermilk Fried Chicken that’s bursting with flavor and crunch! Make these once, and I wager they will invade your dreams every night too! – Nagi x
FAQ – Crispy Spicy Buttermilk Fried Chicken
How long will leftover fried chicken keep in the fridge? 🍗
Leftover Crispy Spicy Buttermilk Fried Chicken will maintain its quality for about 3-4 days in the refrigerator. After day 1, I’d say it’s still around 95% as good, but by day 3, it drops to about 85%. To maximize freshness, store it in an airtight container or tightly wrapped in foil. Just remember that after reheating, the skin may not be as crispy as when freshly fried — but it’s still delicious!
❄️ Can I freeze the fried chicken for later?
Absolutely! You can freeze your fried chicken for up to 2 months. To do this, let it cool completely first. Then, wrap each piece tightly in plastic wrap and place them in a freezer-safe bag or container. When you’re ready to enjoy it again, thaw it in the refrigerator overnight and reheat in the oven at 375°F (190°C) until heated through and crispy again. Just a friendly reminder: avoid microwaving if you want to keep that crunch intact!
🌾 Can I make this recipe gluten-free?
Yes! To make your Crispy Spicy Buttermilk Fried Chicken gluten-free, simply substitute regular all-purpose flour with a gluten-free flour blend. I’ve had great success using almond flour or a chickpea flour blend too; just keep an eye on the frying time as they might cook slightly differently. Also, ensure your hot sauce and other seasonings are gluten-free as well. It’s a small change that still delivers on flavor!
Can I use boneless chicken instead of bone-in thighs?
While I prefer bone-in, skin-on chicken thighs for their juiciness and flavor, you can certainly use boneless thighs or even chicken breasts if that’s what you have! Just note that boneless pieces will cook faster — aim for about 6-8 minutes per side instead of the full 10-12 minutes. Always check with a meat thermometer; you want an internal temperature of 165°F (74°C).
Why is marinating the chicken important? 🤔
Marinating the chicken in spicy buttermilk is crucial because it tenderizes the meat and infuses it with flavor. The acidity from the buttermilk breaks down proteins, making your chicken juicy and flavorful while also enhancing that crispy coating you’ll achieve later during frying. Trust me, skipping this step will result in a much less satisfying dish — so let those flavors mingle for at least 2 hours (or better yet, overnight!).
How can I adjust the spice level of this recipe? 🌶️
You can easily customize the heat level by adjusting the amount of hot sauce and cayenne pepper used in both the marinade and coating. If you prefer milder flavors, reduce cayenne to half a teaspoon or omit it altogether. For more heat, feel free to add an extra tablespoon of hot sauce or increase cayenne pepper incrementally until you hit your desired spice level. Just be cautious — sometimes less really is more!
Did you really test this recipe multiple times?
Oh yes! 😅 I tested this Crispy Spicy Buttermilk Fried Chicken at least ten times to perfect the marinade ratio and frying technique. Each batch was lovingly critiqued by my family (they didn’t mind). It’s safe to say that I’ve nailed down how to achieve that perfect crispy exterior while ensuring juicy meat on the inside — all thanks to those test runs!
Troubleshooting
I will continue to add more to this Troubleshooting section as I start seeing questions coming through from people who have made the recipe.
Troubleshooting tips
“My chicken turned out too dry! 😭”
- You may have marinated the chicken for too long, which can cause it to lose moisture. While buttermilk is great for tenderizing, leaving it too long can lead to dryness.
- If your frying oil wasn’t hot enough (below 350°F/175°C), the chicken can absorb excess oil and lose its natural juices. Always ensure your oil is at the right temperature before adding the chicken.
- I bet it was still YUM though!
“My coating didn’t stick properly! 😩”
- If you didn’t let the excess marinade drip off adequately, the flour won’t adhere well to the chicken. Make sure to shake off the extra marinade before dredging.
- It’s possible that your flour mixture wasn’t seasoned enough. Without enough salt or spices mixed in, it might not cling as well or taste as good.
- I bet they were still YUM though!
“The color of my fried chicken is uneven! 🔥”
- Not fully coating your chicken with the flour mixture can lead to patches that don’t fry evenly. Be sure to press firmly when dredging!
- If you overcrowded the frying pan, it could lower the oil temperature and result in uneven cooking and browning. Always fry in batches if needed.
- I bet it was still YUM though!
“My chicken looks pale and unappetizing! 🤷♂️”
- If you didn’t use enough paprika or cayenne pepper in your flour mixture, your chicken may lack that beautiful golden color. Adjust these spices according to your preference next time!
- Frying at a temperature lower than 350°F (175°C) will prevent proper browning. Use a thermometer to check your oil’s temp for best results.
- I bet they were still YUM though!
Crispy Spicy Buttermilk Fried Chicken
Ingredients
Method
- In a large bowl, whisk together buttermilk, hot sauce, salt, and pepper. Add chicken thighs, ensuring they are fully submerged. Cover and refrigerate for at least 2 hours, preferably overnight.
- In another bowl, combine flour, paprika, cayenne pepper, garlic powder, onion powder, salt, and black pepper. Mix well.
- Remove chicken from the marinade, allowing excess to drip off. Dredge each piece in the flour mixture, pressing to adhere. Shake off excess flour.
- In a frying pan, heat vegetable oil over medium-high heat until it reaches 350°F (175°C). Carefully add chicken pieces, cooking in batches if necessary. Fry for about 10-12 minutes per side, or until golden brown and cooked through (internal temperature should reach 165°F/74°C).
- Remove chicken from oil and place on paper towels to drain excess oil. Let rest for a few minutes before serving.