Cheesy Garlic Butter Rollups: Irresistibly Gooey Delight
I first stumbled upon the idea for these Cheesy Garlic Butter Rollups during a late-night snack run to my favorite local café. They had this irresistible dish on the menu that was just bursting with gooey cheese and infused with the heavenly aroma of garlic butter. It was one of those moments where I thought, “Why not make this at home?” The convenience of whipping up something so decadent without having to fork over a small fortune or wait in line was too good to resist, and I knew I could add my own little twist to make it even better.
Let me tell you, perfecting these rollups turned into quite the adventure. After about six attempts (yes, six!), I finally settled on the right balance of ingredients and technique. Each time I tried, I found myself battling with overcooked dough or cheese that refused to melt properly – it was a comedy of errors! But with each iteration, I learned something new, tweaking the garlic butter and adjusting the baking time until I finally hit that cheesy, buttery jackpot.
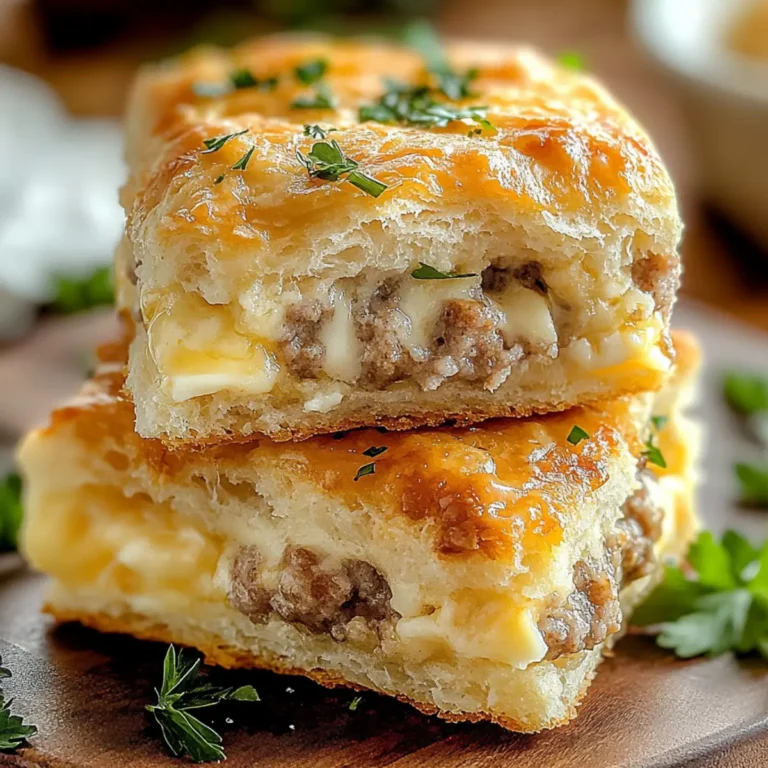
And oh boy, was it worth every bit of effort! The final Cheesy Garlic Butter Rollups are everything you’d hope for: crispy on the outside with an ooey-gooey cheese center that just oozes flavor. They’re incredibly satisfying, packed with rich garlic notes that elevate each bite to pure bliss. Trust me, once you pop one of these beauties in your mouth, you’ll be hooked! So grab your apron and get ready to impress – you won’t want to miss this deliciousness!
These Cheesy Garlic Butter Rollups are….
….the ultimate indulgence for cheese lovers and garlic enthusiasts alike!
1. They deliver a mouthwatering flavor explosion thanks to the rich combination of mozzarella and cream cheese. The melted mozzarella provides that classic cheesy goodness, while the cream cheese adds a creamy tang that elevates each bite, making these rollups utterly irresistible.
2. Perfectly gooey texture – Each rollup features a beautifully crispy exterior with an irresistibly soft and stretchy inside. This delightful contrast is achieved by wrapping the dough tightly around the cheese filling, ensuring it bakes to golden perfection while keeping the center wonderfully melty.
3. With a simple yet impactful technique, brushing on the garlic butter before baking takes these rollups to another level. The melted butter infused with fresh garlic and parsley not only enhances the aroma but creates a golden crust that locks in moisture, making every bite heavenly.
4. A fantastic value option compared to store-bought snacks, as these Cheesy Garlic Butter Rollups are made using just one package of refrigerated pizza dough and common ingredients. They’re easy to whip up at home, saving you money while delivering an impressive appetizer or snack that rivals anything from a fancy bakery.
PS These rollups are bite-sized delights — perfect for sharing at parties or enjoying all by yourself!
Ingredients for the Cheesy Garlic Butter Rollups
Each ingredient in this dish plays an essential role in flavor and texture. Here’s what you’ll need:
1 package Refrigerated Pizza Dough: Provides a soft, chewy base for the rollups.
1 cup Shredded Mozzarella Cheese: Delivers gooeyness and that classic cheesy flavor.
1/2 cup Cream Cheese (Softened): Adds creaminess and richness to the filling.
1/4 cup Unsalted Butter (Melted): Coats the rollups for a golden, buttery finish.
3 cloves Garlic (Minced): Infuses the rollups with aromatic, savory depth.
1 tablespoon Fresh Parsley (Chopped): Brightens the dish with fresh herbal notes.
Roll the Dough Thin — No Exceptions!
I know, I know — rolling out dough can feel like a chore that adds extra time to your cooking process. Believe me, I tried to shortcut this step by skipping it altogether, and let’s just say my rollups turned into cheesy explosions rather than delightful bites. So trust me when I say, rolling the dough thin is essential for achieving that perfect Cheesy Garlic Butter Rollup!
When you roll out the refrigerated pizza dough into a nice, thin rectangle, it allows for even cooking and ensures that each bite has just the right amount of cheese filling. Think of it as crafting the perfect canvas for your masterpiece; if your canvas is too thick, you won’t get that beautifully gooey cheese experience. Plus, a thinner dough means crispier edges and a lovely golden color — all things we want on our plate!
What does rolling the dough thin do?
- Flavour — A thinner layer allows the garlic butter to infuse more deeply into the crust, creating an irresistible aroma and taste.
- Texture — Rolling it out thin gives you that delightful contrast between a crispy exterior and a gooey cheese inside; if it’s too thick, it ends up more chewy than enjoyable.
- Colour — The dough cooks more evenly and browns beautifully when rolled thinly, giving you those golden-brown edges we all crave.
- Cooking Time — Thinner dough cooks faster and avoids sogginess from excess moisture in the cheese filling.
- Portion Control — Each rollup becomes perfectly sized; if they’re too thick, you might end up with awkwardly large bites that take away from their snackable charm.
Different rolling times
- 1/4 inch thickness (good) — You’ll still get some crispiness but note that it could be a bit chewy with less garlic butter infusion.
- 1/8 inch thickness (better) — This is where things start to improve; more crunch on the outside while keeping that gooey middle intact!
- 1/16 inch thickness (best) — Perfect! You get a satisfyingly crispy outside with a delicate balance of flavors as the garlic butter seeps in beautifully.
- Too thin (risky) — If you roll too thinly, you risk tearing the dough; this could lead to leaks during baking and less enjoyable rollups.
A common mistake I’ve seen is not rolling out the dough enough or skipping this step entirely. Don’t make my mistake! A thicker roll leads to disappointing results—trust me when I say no one wants sad, soggy rollups!
How to make Cheesy Garlic Butter Rollups

Are you ready to see how straightforward it is to make the Cheesy Garlic Butter Rollups of your dreams??
1. PREPARE THE DOUGH
Let’s get that dough ready for some cheesy goodness!
1. Preheat – Preheat your oven to 375°F (190°C). This ensures a perfect bake and that golden brown color we all love.
2. Roll out – On a floured surface, roll out the refrigerated pizza dough into a rectangle. Aim for about ¼ inch thick; this will help the rollups bake evenly and hold all that delicious filling.
HANDY TIPS
- For best results, let the refrigerated pizza dough sit at room temperature for about 10 minutes before rolling it out. It makes stretching easier!
- If you’re using homemade pizza dough, ensure it’s well-kneaded and rested so it rolls out smoothly.
2. MAKE THE CHEESE FILLING
Now, let’s whip up that ooey-gooey cheese filling!
3. Combine – In a mixing bowl, combine the shredded mozzarella and softened cream cheese until well mixed. The softer cream cheese will help bind everything together, creating a luscious filling.
HANDY TIPS
- Make sure your cream cheese is fully softened; this makes it easier to blend with the mozzarella.
- You can customize your filling by adding herbs or spices like garlic powder or Italian seasoning for an extra flavor boost!
3. ASSEMBLE THE ROLLUPS
This is where the magic happens—let’s roll!
4. Spread – Take your cheese filling and spread it evenly over the rolled-out dough, leaving a small border around the edges. This helps prevent any filling from leaking out while baking!
5. Roll tightly – Starting from one end, roll the dough tightly into a log shape. The tighter you roll, the better your rollups will hold together during baking!
6. Cut – Using a sharp knife, cut the log into 1-inch pieces and place them on a baking sheet lined with parchment paper for easy cleanup.
HANDY TIPS
- If you want to make larger rollups, simply cut them thicker—just be mindful they might need an extra minute or two in the oven.
- To keep your rolls from sticking together while baking, make sure they’re spaced apart on the baking sheet.
4. PREPARE GARLIC BUTTER
Garlic butter makes everything better—trust me on this!
7. Mix – In a small bowl, mix together the melted butter, minced garlic, and chopped parsley until combined. This mixture will infuse your rollups with aromatic flavors as they bake!
8. Brush – Generously brush each rollup with the garlic butter mixture before placing them in the oven to bake.
HANDY TIPS
- For an added kick, consider using roasted garlic instead of fresh for a sweeter flavor profile.
- If you have leftover garlic butter after basting, save it! It’s fantastic drizzled over cooked pasta or veggies.
5. BAKE
Time to transform these beauties into golden goodness!
9. Bake – Place your baking sheet in the preheated oven and bake for 15-20 minutes or until golden brown and puffed up beautifully. Keep an eye on them during the last few minutes—they’ll be hard to resist when that cheesy aroma fills your kitchen!
10. Cool slightly – Once baked, remove from the oven and let cool slightly before serving; this allows them to set up just right.
HANDY TIPS
- If you notice they are browning too quickly but aren’t fully cooked inside, cover them loosely with foil during baking.
- These rollups are best served warm for maximum cheesiness!
Make these Cheesy Garlic Butter Rollups once, and I wager they will invade your dreams every night too! – Nagi x
FAQ – Cheesy Garlic Butter Rollups
🧀 Can I use a different type of cheese for the filling?
Yes, you can definitely experiment with different cheeses in your rollups! While I love the gooeyness of mozzarella and the creaminess of cream cheese, here are some great alternatives:
- Cheddar: A sharp cheddar will give a nice bite to your rollups.
- Monterey Jack: Offers a milder flavor but melts beautifully.
- Parmesan: Add it for a salty kick, but consider mixing it with another cheese for better melting.
Remember that if you substitute, the texture and flavor profile might shift slightly, but it’s all about finding what you love!
❄️ Can I make these rollups ahead of time and freeze them?
Absolutely! These cheesy rollups can be frozen both before and after baking. To freeze them before baking:
1. Assemble and cut the rollups as instructed.
2. Place them in a single layer on a baking sheet and freeze until solid.
3. Transfer to an airtight container or freezer bag, separating layers with parchment paper.
When you’re ready to bake, just preheat your oven (375°F/190°C) and bake from frozen for an additional 5–8 minutes until golden brown. They’ll retain about 90% of their quality after a month in the freezer—perfect for spontaneous snack attacks!
🚫 Are these rollups suitable for a gluten-free diet?
Unfortunately, traditional pizza dough is not gluten-free. However, you can definitely use gluten-free pizza dough as a substitute! There are several high-quality gluten-free options available at grocery stores nowadays. Just ensure that the brand you choose has good reviews regarding taste and texture—trust me, I’ve tested quite a few! Just keep in mind that you may need to adjust the baking time slightly as gluten-free doughs can behave differently.
💡 Can I skip letting the dough rest before rolling it out?
Nope! Skipping this step is not advisable. Allowing the dough to rest helps relax the gluten structure, making it easier to roll out without springing back on you. If you’re short on time, even letting it rest for just 10 minutes can help immensely; otherwise, you’ll find yourself wrestling with stubborn dough that doesn’t want to cooperate. Trust me—I learned this through some serious kitchen battles!
🤔 What can I substitute for cream cheese in the filling?
If you’re looking for alternatives to cream cheese due to dietary restrictions or personal preference, here are some options:
- Ricotta Cheese: It’s creamy but has a slightly grainy texture; blend it well first!
- Greek Yogurt: This will provide tanginess; use full-fat for best results.
- Vegan Cream Cheese: There are great plant-based options available that work well too!
Each option will alter the flavor profile slightly—so be ready for some delicious experimentation.
🔍 Why do I need to brush garlic butter on before baking?
Brushing garlic butter over your rollups before baking enhances their flavor and promotes browning! The melted butter creates a beautiful golden crust while infusing each bite with savory garlic goodness. Plus, it adds moisture so they don’t dry out during cooking. I swear by this trick—it’s like giving your rollups a spa day right before they hit the oven!
⏲️ How do I know when my rollups are fully baked?
You’ll want to look for that perfect golden-brown color on top! Generally, they should take about 15–20 minutes at 375°F (190°C). If you’re unsure, insert a toothpick into one; if it comes out clean (and maybe some gooey cheese), they’re good to go! The internal temperature should be around 190°F (88°C) if you’re using an instant-read thermometer. Trust me—I’ve made these enough times to know when they’re truly ready!
Troubleshooting
- I will continue to add more to this Troubleshooting section as I start seeing questions coming through from people who have made the recipe.
Troubleshooting tips
“My rollups came out too flat! 😩”
- Your dough might have been rolled out too thin. Aim for a thickness of about 1/4 inch to ensure they rise and hold their shape while baking.
- You may not have allowed your pizza dough to rest before rolling it out. Letting it rest helps relax the gluten, making it easier to roll without losing volume.
- I bet they were still YUM though!
“My rollups are too dry and tough! 😢”
- If you overbaked them, the moisture can evaporate, resulting in dry rollups. Keep an eye on them towards the end of baking; they should be golden but not dark.
- Using low-fat cream cheese or mozzarella can also lead to drier results. Stick with full-fat versions for that creamy, gooey filling!
- I bet they were still YUM though!
“The tops of my rollups are unevenly browned! 🔥”
- Make sure you’re brushing an even layer of garlic butter on each rollup before baking. Not enough butter can lead to uneven browning.
- If your oven is running hot or has hot spots (which can happen!), try rotating the baking sheet halfway through baking for more consistent coloring.
- I bet they were still YUM though!
“My rollups split open while baking! 😱”
- Rolling your dough too tightly can cause stress on the seams, leading to splits during baking. Ensure you’re rolling it just snug enough without overdoing it.
- If your cheese filling was too cold when spread onto the dough, it might not have melded properly, causing pressure and splits. Let it soften a bit more next time!
- I bet they were still YUM though!

Cheesy Garlic Butter Rollups
Ingredients
Method
- Preheat the oven to 375°F (190°C).
- Roll out the refrigerated pizza dough on a floured surface into a rectangle.
- In a mixing bowl, combine the shredded mozzarella and softened cream cheese until well mixed.
- Spread the cheese filling evenly over the rolled-out dough.
- Roll the dough tightly from one end to the other to form a log.
- Cut the log into 1-inch pieces and place them on a baking sheet lined with parchment paper.
- In a small bowl, mix the melted butter, minced garlic, and chopped parsley.
- Brush the garlic butter mixture generously over each rollup.
- Bake in the preheated oven for 15-20 minutes, or until golden brown.
- Remove from oven and let cool slightly before serving.