Best Birthday Cake Protein Balls: Guilt-Free Indulgence
It all started with a craving for something sweet yet guilt-free. I was at my favorite café, enjoying their decadent birthday cake protein balls, and I couldn’t help but think how much I’d love to whip up a batch at home. The convenience of having a healthy snack on hand is unbeatable, plus let’s be real — I wanted to make them even better than the ones from the café! With a few simple ingredients, I figured I could create the Best Birthday Cake Protein Balls that would satisfy my sweet tooth without sabotaging my health goals.
After a few too many attempts (let’s just say my kitchen looked like a confetti explosion), I finally nailed the recipe. It took me about five tries to get the balance just right — too dry, too sweet, or not enough birthday cake flavor; you name it, I tried it. Each round was an experiment in texture and taste, and while I joked about considering a career as a professional taste tester (not exactly a tough job!), I knew it was all worth it to create something that truly captured that joyous birthday cake essence.
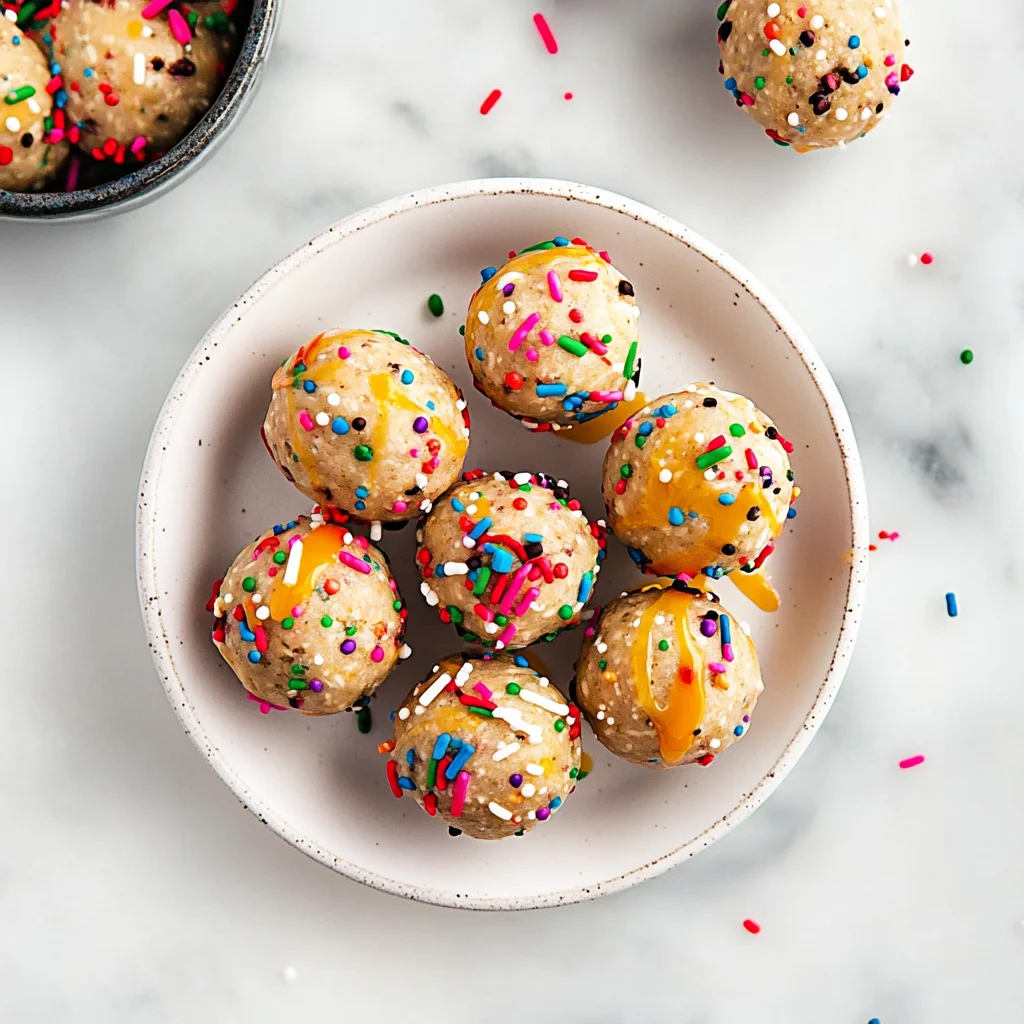
And oh boy, was it worth every messy moment! These Best Birthday Cake Protein Balls turned out to be deliciously soft, bursting with flavor, and they’ve got that playful sprinkle crunch that makes every bite feel like a celebration. Plus, they’re incredibly nutritious — perfect for post-workout fuel or when those afternoon cravings hit. Trust me, once you try these little bites of joy, you’ll be hooked! Can’t wait for you to dive in and enjoy them as much as I do!
These Best Birthday Cake Protein Balls are…
….the ultimate guilt-free treat that brings the joy of birthday cake into every bite!
1. They deliver a delightfully sweet flavor reminiscent of classic birthday cake, thanks to the combination of vanilla protein powder and almond butter. This carefully selected protein powder not only complements the nutty undertones but also adds a creamy richness that makes each bite feel indulgent, without any added sugars.
2. A perfectly chewy texture – these protein balls strike a balance between soft and satisfying. The rolled oats provide just the right amount of chewiness, ensuring they’re hearty enough to satisfy your cravings while still being easy to pop in your mouth as a snack or post-workout boost.
3. The no-bake technique ensures these protein balls are quick and easy to make, with no oven required! By simply mixing together dry ingredients like oats and almond flour with wet ingredients like honey and almond butter, you achieve a cohesive dough that holds together beautifully, saving time and effort while still delivering exceptional taste.
4. An incredible cost-effective option – making these Best Birthday Cake Protein Balls at home is not only healthier but also far more economical than buying similar snacks from stores. With ingredients like oats and almond flour being budget-friendly staples, you can whip up a batch of these delicious bites without breaking the bank.
PS These protein balls yield about 12 generous servings, making them perfect for meal prep or sharing with friends!
Ingredients for the Best Birthday Cake Protein Balls
Each ingredient in this dish plays an essential role in flavor and texture. Here’s what you’ll need:
1 cup oats (rolled or quick oats): Provides a hearty base for texture and energy.
1/2 cup vanilla protein powder (whey or plant-based): Boosts protein content while enhancing the cake-like flavor.
1/4 cup almond flour: Adds a nutty richness and contributes to a moist texture.
1/4 cup sprinkles: Brings fun and festive color, mimicking the essence of birthday cake.
1 teaspoon baking powder: Helps create a light and airy texture in each bite.
1/4 cup almond butter (or peanut butter): Introduces creaminess and healthy fats for satiety.
1/4 cup honey (or maple syrup): Acts as a natural sweetener, balancing flavors beautifully.
1 teaspoon vanilla extract: Enhances the overall sweetness with warm, aromatic notes.
Chilling the Protein Balls is Non-Negotiable. Trust Me!
I know, I know—waiting 30 minutes feels like an eternity when all you want to do is dive into those delicious protein balls! But trust me, I tried to skip this step and ended up with a sad, sticky mess that was more blob than ball. Believe me when I say, this technique is a total game-changer!
Chilling the protein balls helps them firm up and hold their shape, much like how dough needs time to rest before baking. When you refrigerate these beauties, the almond butter and honey bind the dry ingredients together, creating a cohesive texture that makes each bite satisfying. Without this chilling time, you’re left with a gooey mishmash instead of perfectly shaped treats!
What does chilling do?
- Texture — The chilling process allows the oats and almond flour to absorb moisture from the wet ingredients, resulting in a firmer and more stable protein ball.
- Shape retention — Cold protein balls hold their shape better, preventing them from flattening into sad puddles once they’re out of the fridge.
- Flavor melding — Chilling allows the flavors from the vanilla extract and almond butter to meld together, creating a richer taste experience.
- Bite appeal — A chilled protein ball has a delightful bite that’s not too soft or crumbly; it strikes the perfect balance for snacking.
- Sustained freshness — Refrigerating helps extend shelf life by slowing down spoilage processes that can occur when they’re kept at room temperature.
Different chilling times
- 15 minutes (okay) — The protein balls will be slightly firmer but may still be too soft for optimal texture.
- 30 minutes (good) — A solid chill; you’ll get a nice balance of firmness and flavor. This is your sweet spot!
- 1 hour (great) — Even better! The flavors develop more deeply, and the texture becomes even firmer.
- Overnight (amazing) — Best results! The flavors have fully integrated, making every bite taste like birthday cake perfection.
Don’t even think about skipping the chilling step! The most common mistake is assuming they’ll hold their shape without it. I tried that route—and let’s just say my kitchen looked like a colorful disaster zone. You need those 30 minutes for success!
How to make Best Birthday Cake Protein Balls
Are you ready to see how straightforward it is to make the Best Birthday Cake Protein Balls of your dreams??
1. MIX DRY INGREDIENTS
First things first, we need to create the flavorful base for our protein balls!
Bold action label: Combine – In a mixing bowl, combine 1 cup of oats, ½ cup of vanilla protein powder, ¼ cup of almond flour, 1 teaspoon of baking powder, and ¼ cup of sprinkles. Mix well until all the dry ingredients are evenly distributed. The oats add texture, while the protein powder provides that birthday cake flavor we all love!
HANDY TIPS
- Use rolled oats for a chewier texture or quick oats for a smoother bite.
- Choose your favorite sprinkles; they’ll not only add color but also a fun crunch!
2. ADD WET INGREDIENTS
Now it’s time to bring everything together with some gooey goodness!
Bold action label: Add – Add ¼ cup of almond butter (or peanut butter), ¼ cup of honey (or maple syrup), and 1 teaspoon of vanilla extract to the dry mixture. Stir thoroughly until everything is well combined and forms a thick dough-like consistency. You might need to use your hands here for the best mix!
HANDY TIPS
- For a nut-free version, opt for sunflower seed butter instead of almond or peanut butter.
- If the mixture feels too dry, add a splash more honey or a bit of water until it holds together.
3. FORM BALLS
Let’s get rolling—literally!
Bold action label: Shape – Using your hands, form the mixture into small balls about 1 inch in diameter. Make sure they’re compact enough so they won’t fall apart later. It’s okay if they’re not perfectly round; they’ll still taste amazing!
HANDY TIPS
- If you want larger snacks, feel free to roll them into bigger balls—just adjust your serving size accordingly!
- Wear slightly damp hands while shaping; this can help prevent sticking.
4. CHILL
The final step before indulging!
Bold action label: Refrigerate – Place the formed protein balls on a baking sheet lined with parchment paper and refrigerate them for at least 30 minutes to firm up. This chilling step helps solidify the mixture and enhances their flavor as it melds together.
HANDY TIPS
- Store any leftovers in an airtight container in the fridge for up to one week—if they last that long!
- You can also freeze these protein balls; simply place them in a freezer-safe bag for up to three months.
Make these once, and I wager they will invade your dreams every night too! – Nagi x
FAQ – Best Birthday Cake Protein Balls
🥳 How long will these protein balls keep?
These delicious protein balls can last up to 1 week in the fridge if stored in an airtight container. However, their quality may diminish slightly over time: approximately 97% as good on day 3, and around 90% by day 7. If you notice any change in texture or smell, it’s best to toss them out. For longer storage, consider freezing!
❄️ Do I really have to chill? YES YOU DO.
Absolutely! Chilling the protein balls for at least 30 minutes is crucial for helping them firm up and hold their shape. If you skip this step, you’ll likely end up with a gooey mess instead of perfectly formed bites of birthday cake delight. Trust me—I’ve tried it both ways, and the difference is night and day!
🥶 Can these be frozen for later?
Yes, you can absolutely freeze these protein balls! To do so, place them in a single layer on a baking sheet and freeze until solid (about 1-2 hours). Then transfer them to a freezer-safe bag or container. They’ll stay fresh for about 3 months. When you’re ready to enjoy, simply thaw them in the fridge overnight or at room temperature for about 30-60 minutes.
🌾 Can I make these gluten-free?
Yes! To make these protein balls gluten-free, just ensure that your oats are labeled as gluten-free. Most brands offer certified gluten-free oats that work perfectly in this recipe. The almond flour used is already gluten-free too, so no worries there! Enjoy your guilt-free treats!
🍯 Can I use a different nut butter or sweetener?
Definitely! If almond butter isn’t your thing or you have allergies, you can substitute it with peanut butter or even sunflower seed butter for nut-free options. As for the sweetener, maple syrup works great as a vegan alternative to honey. Just remember that using different nut butters might slightly alter the flavor profile—peanut butter will give it a more robust nutty flavor!
🔍 Why do we mix dry ingredients first?
Mixing the dry ingredients before adding wet ones helps ensure that everything is evenly distributed from the get-go. This prevents clumping of protein powder or baking powder throughout your mixture. I’ve tested this method countless times and found that it leads to a much better texture overall—no one wants a protein ball with random pockets of dry powder!
🌈 Can I add other mix-ins or flavors?
Absolutely! Feel free to customize your protein balls by adding mix-ins like chopped nuts, dried fruit, or even chocolate chips if you’re feeling indulgent. You could also experiment with flavored protein powders (like chocolate or cookies and cream) for different taste profiles! Just keep in mind that adding too many extras may require slight adjustments in wet ingredients—so don’t hesitate to play around until you find your perfect combo!
Troubleshooting
I will continue to add more to this Troubleshooting section as I start seeing questions coming through from people who have made the recipe.
Troubleshooting tips
“My protein balls are too dry and crumbly! 😩”
- You may have added too much almond flour. Almond flour is quite absorbent, and using more than 1/4 cup can create a dry texture.
- If you didn’t use enough wet ingredients like almond butter or honey, that could also lead to dryness since they help bind the mixture together.
- I bet they were still YUM though!
“My protein balls are way too sticky and falling apart! 🤦♀️”
- If you used too much honey or almond butter, that could cause your mixture to be overly sticky. Make sure to measure accurately!
- Using quick oats instead of rolled oats can sometimes result in a stickier texture, as they absorb moisture differently.
- I bet they were still YUM though!
“My protein balls are uneven in size! 😅”
- Not forming the balls with equal amounts of mixture can lead to uneven sizes. Try using a small cookie scoop for uniformity!
- If your mixture is too soft, it might be hard to shape them evenly; chilling it a bit longer may help firm it up for better shaping.
- I bet they were still YUM though!
“My protein balls came out too flat! 😲”
- If you didn’t mix the wet and dry ingredients thoroughly, this could cause the mixture not to hold its shape when formed into balls.
- Adding too little baking powder can also prevent them from puffing up slightly, leading to a flatter appearance.
- I bet they were still YUM though!
Best Birthday Cake Protein Balls
Ingredients
Method
- In a mixing bowl, combine oats, protein powder, almond flour, baking powder, and sprinkles.
- Add almond butter, honey, and vanilla extract to the dry ingredients and mix until well combined.
- Using your hands, form the mixture into small balls, about 1 inch in diameter.
- Place the protein balls on a baking sheet lined with parchment paper and refrigerate for at least 30 minutes to firm up.