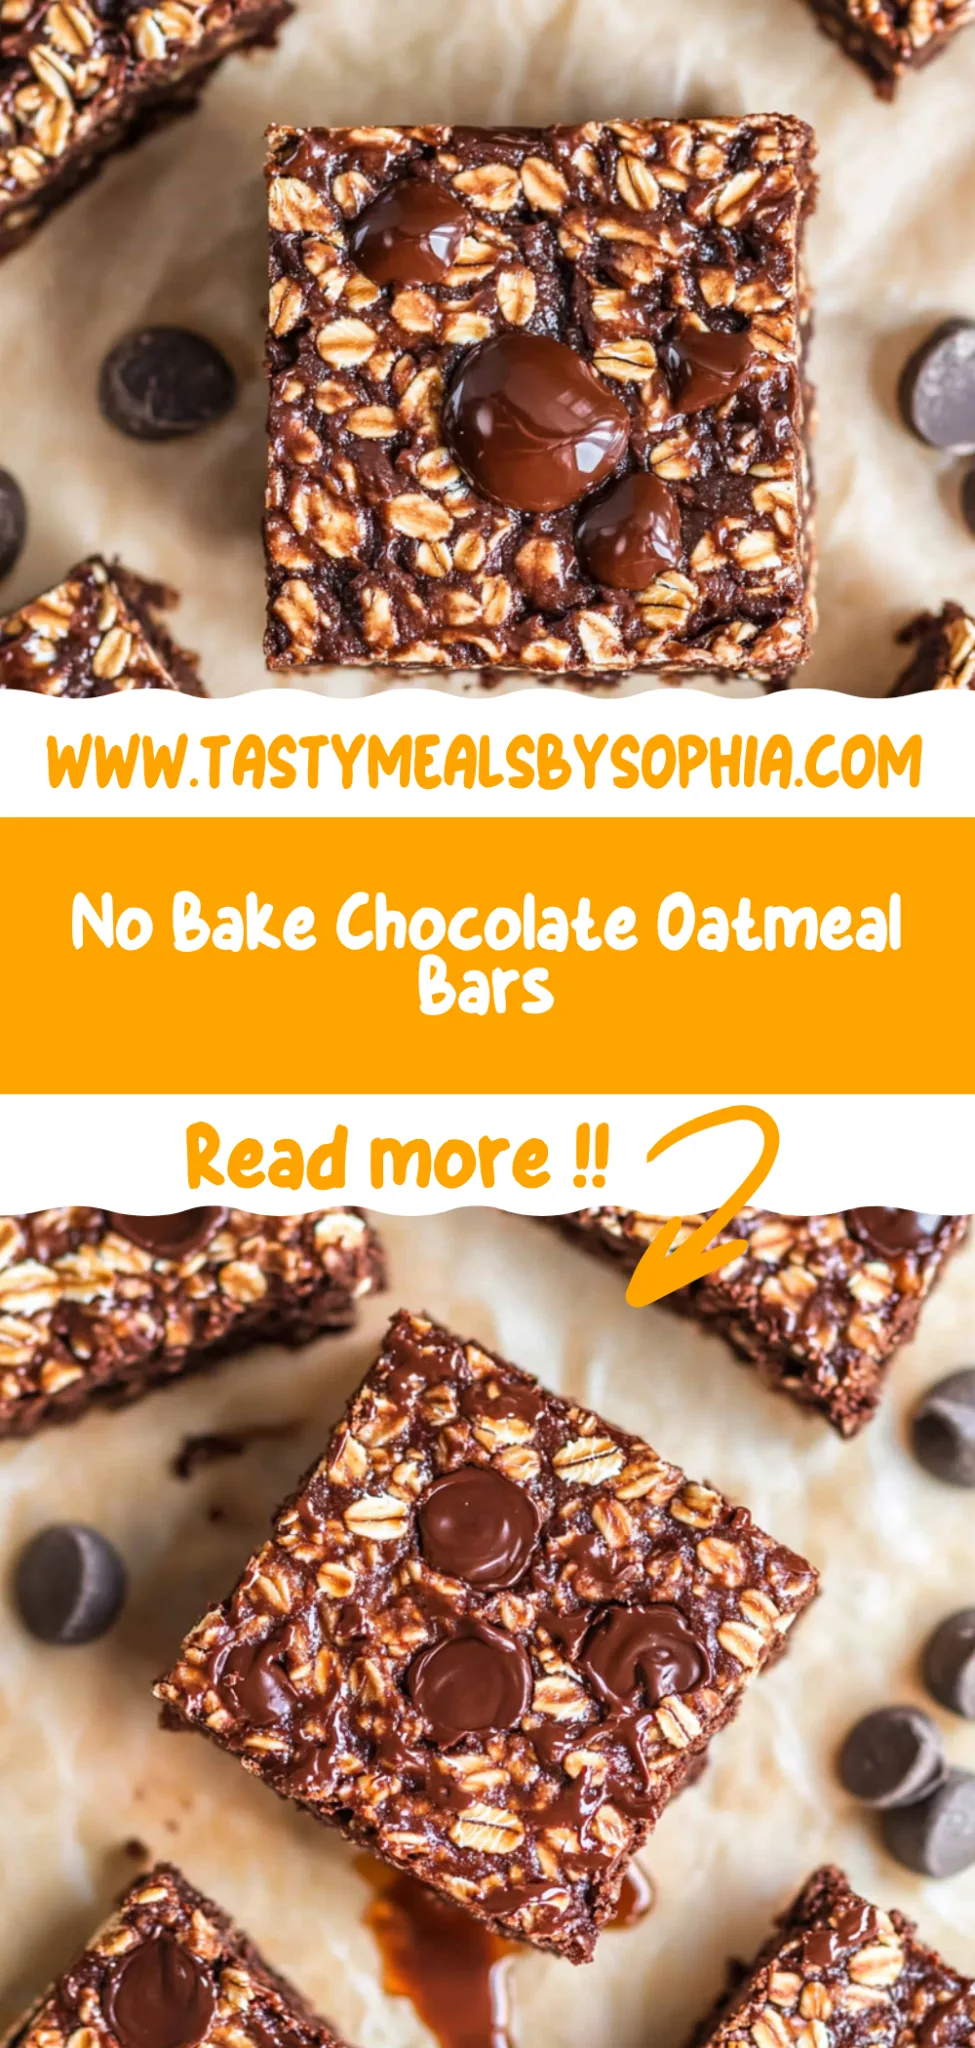
No Bake Chocolate Oatmeal Bars: Irresistibly Gooey Treats
I remember the first time I had a no-bake chocolate oatmeal bar at a cozy little café in my neighborhood. It was a rainy afternoon, and I was looking for something sweet to brighten my day. The moment I took a bite, I was smitten—the rich chocolate paired with chewy oats created this delightful combination that felt like a warm hug. However, my wallet wasn’t as thrilled after seeing the price tag for such a simple treat! So, I thought, why not recreate this deliciousness at home?
After several (okay, more than several) attempts that ranged from crumbly disasters to overly gooey messes, I finally nailed the recipe for these No Bake Chocolate Oatmeal Bars. Let me tell you, there were moments where I questioned if I’d ever get it right. I was on a mission to find the perfect balance of texture and flavor—something that wouldn’t fall apart when you picked it up but still melted in your mouth. Who knew that getting the ratio of oats to chocolate could be so tricky?
But oh boy, was it worth every failed batch! The final result is nothing short of heavenly—these bars are rich yet not too sweet, with a satisfyingly chewy texture that keeps you coming back for more. Plus, they come together in mere minutes and require zero baking skills (which is great for someone like me who once tried to bake cookies and ended up with a blackened tray). I can’t wait for you to whip up these No Bake Chocolate Oatmeal Bars—trust me, they’ll become your new go-to snack!
These No Bake Chocolate Oatmeal Bars are….
….the ultimate indulgence for chocolate lovers seeking a quick and satisfying treat!
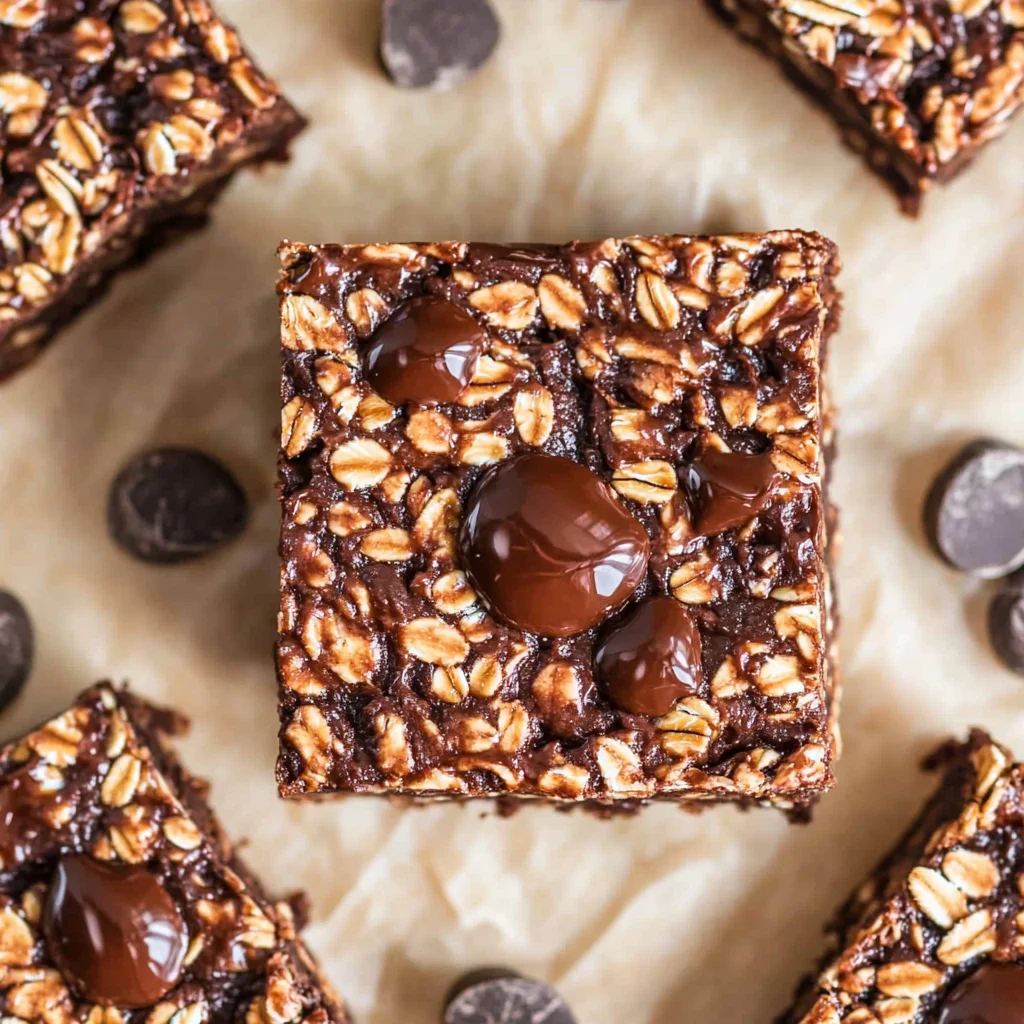
1. They deliver an irresistibly rich chocolate flavor that’s both deep and satisfying, thanks to the unsweetened cocoa powder. This ingredient not only enhances the chocolatey taste but also balances the sweetness from honey or maple syrup, creating a perfect harmony of flavors.
2. Incredible chewy texture – each bite offers a delightful combination of firm yet soft oats and creamy peanut butter. The rolled oats provide a hearty chewiness that pairs beautifully with the smoothness of peanut butter, making these bars just as enjoyable to eat as they are to make.
3. Effortless preparation technique – no baking means you can whip up these bars in no time! By simply mixing together all the base ingredients, you get to skip the oven while still achieving a perfectly set bar that’s ready to satisfy your cravings in under 30 minutes.
4. Budget-friendly delight – these No Bake Chocolate Oatmeal Bars are made with pantry staples like oats, peanut butter, and honey, making them not only easy on the wallet but also accessible any day of the week. Compared to store-bought snacks, you’ll enjoy more servings at a fraction of the cost without compromising on taste or quality.
PS These bars yield about 12 generous squares, perfect for sharing or stashing for later when those chocolate cravings strike!
Ingredients You’ll Need
Each ingredient in this dish plays an essential role in flavor and texture. Here’s what you’ll need:
2 cups rolled oats (old-fashioned): Provide a hearty base and chewy texture.
1 cup peanut butter (smooth or crunchy): Adds richness and creaminess to bind the bars.
1/2 cup honey (or maple syrup): Acts as a natural sweetener and helps hold everything together.
1/2 cup cocoa powder (unsweetened): Infuses deep chocolate flavor without added sweetness.
- 1/2 cup chocolate chips (semi-sweet or dark): Brings melty indulgence and enhances the chocolate experience.
You MUST Chill These Bars! Trust Me on This One!
I know, I know—waiting is the hardest part, right? But I tried to find a shortcut with these No Bake Chocolate Oatmeal Bars, and let me tell you, I was wrong. I thought I could rush the chilling process and still get perfect bars—spoiler alert: it didn’t work out!
The science behind chilling is simple: our base ingredients—rolled oats, peanut butter, honey, cocoa powder, and chocolate chips—need that time in the fridge to meld together properly. Think of it like letting a good stew sit; the flavors deepen and the texture improves. Without this crucial step, your bars risk being crumbly instead of chewy and delicious.
What does chilling do?
- Texture — Chilling helps the bars firm up, ensuring they hold their shape when cut into squares.
- Flavor — The flavors blend beautifully as they chill, making every bite more harmonious than if you dive in too soon.
- Sweetness balance — The cold sets the sweetness from the honey or maple syrup into a pleasant background note instead of an overwhelming punch.
- Moisture retention — Chilling allows the oats to absorb moisture from the peanut butter and honey, resulting in a chewy texture rather than a dry one.
- Shelf life — Properly chilled bars last longer in the fridge without becoming mushy or stale.
Different chilling times
- 1 hour (good) — The minimum time needed; bars will hold together but may be slightly too soft for my liking.
- 2 hours (better) — A noticeable improvement; the bars are firmer and easier to cut into neat squares.
- 3 hours (great) — Perfectly set! This is when the flavors really come together for optimal taste and texture.
- Overnight (best) — Pure bliss! The ultimate chewiness and flavor depth awaits if you can resist until morning.
Just a heads-up: don’t skip or skimp on that chilling time! The most common mistake I see is people trying to cut corners by not giving these bars enough time to set. Trust me—you’ll end up with a gooey mess instead of those delightful chocolatey squares you were hoping for!
How to make No Bake Chocolate Oatmeal Bars
Are you ready to see how straightforward it is to make the No Bake Chocolate Oatmeal Bars of your dreams??
1. PREPARE THE PAN
To get started, we need to create a perfect base for our delicious bars!
Bold Action Label – Line a 9×9 inch baking pan with parchment paper, leaving some overhang for easy removal. This will help you lift the bars out easily once they’re set and will prevent sticking.
HANDY TIPS
- If you don’t have a 9×9 inch pan, an 8×8 inch pan works too; just keep an eye on the setting time as it may take a bit longer.
- For easier cutting later, you can lightly grease the parchment paper with a bit of peanut butter.
2. MIX INGREDIENTS
Now let’s bring all those tasty ingredients together!
Bold Action Label – Combine rolled oats, peanut butter, honey, and cocoa powder in a mixing bowl. Stir until well combined. You want everything to be evenly mixed so that every bite is chocolatey and satisfying.
Bold Action Label – Fold in the chocolate chips until evenly distributed throughout the mixture. This adds melty pockets of chocolate goodness that will make these bars irresistible!
HANDY TIPS
- If you prefer a sweeter bar, feel free to add an extra tablespoon of honey or maple syrup!
- For a crunchier texture, use crunchy peanut butter instead of smooth.
3. PRESS INTO PAN
Let’s shape our mixture into bars!
Bold Action Label – Transfer the mixture to the prepared baking pan and press it down firmly into an even layer. Use your hands or the back of a spatula to ensure it’s compact; this helps the bars hold together once set.
HANDY TIPS
- Make sure to press down hard; this prevents crumbling when you cut them later!
- You can sprinkle some extra chocolate chips on top before chilling for an added treat!
4. CHILL AND SET
Time to let our creation firm up!
Bold Action Label – Refrigerate the bars for at least 1 hour to allow them to set. This chilling period is crucial as it gives your bars the right texture — firm but chewy!
HANDY TIPS
- If you’re in a hurry, you can pop them in the freezer for about 30 minutes instead.
- Check after an hour; if they’re still too soft, give them additional time in the fridge.
5. CUT AND SERVE
The moment we’ve been waiting for!
Bold Action Label – Lift out the bars using the parchment paper and cut into squares using a sharp knife. Serve immediately or store in an airtight container for snacks throughout the week!
HANDY TIPS
- These bars can be stored in the fridge for up to two weeks — if they last that long!
- For fun variations, try adding nuts or dried fruit into the mixture before pressing into the pan.
Make these once, and I wager they will invade your dreams every night too! – Nagi x
FAQ – No Bake Chocolate Oatmeal Bars
🕒 How long will these bars keep?
These No Bake Chocolate Oatmeal Bars can be stored in the refrigerator for up to 1 week. After that, their quality starts to decline, and they’ll be about 80% as good by day 10. I’ve found that they hold their flavor and texture best when consumed within the first 5 days. If you see any signs of moisture or odd smells, it’s best to toss them out—better safe than sorry!
❄️ Do I really have to chill? YES YOU DO.
Yes, chilling is absolutely essential! It allows the bars to set properly and firm up so you can cut them into neat squares. If you skip this step, you might end up with a gooey mess instead of delicious bars. I recommend at least 1 hour in the fridge; however, if you’re patient enough to wait longer (like 2-3 hours), they’ll be even better!
❄️ Can I freeze these bars for later?
Absolutely! These bars freeze beautifully. To freeze, simply wrap them tightly in plastic wrap or aluminum foil after they’ve been cut into squares. Place them in an airtight container or freezer bag, and they’ll last for about 3 months in the freezer. When you’re ready to enjoy them, just thaw them in the refrigerator overnight for the best texture.
🌾 Can these be made gluten free?
Yes! To make these No Bake Chocolate Oatmeal Bars gluten-free, simply use certified gluten-free rolled oats. This is important because traditional oats can often be contaminated with gluten during processing. I’ve made these with both regular and gluten-free oats, and honestly, I couldn’t tell much difference—both versions were delicious!
🍯 Can I substitute honey with something else?
Yes, you can substitute honey with maple syrup if you prefer a vegan option or simply want a different flavor profile. You can also use agave syrup or brown rice syrup as alternatives; however, keep in mind that these may slightly alter the sweetness level of your bars. In my opinion, maple syrup adds a delightful flavor that pairs wonderfully with chocolate!
🤔 Why do I need to press the mixture firmly into the pan?
Pressing the mixture firmly into the pan is crucial for ensuring that your bars hold together once set. This helps create a compact structure so they don’t crumble when you cut into them later. If you don’t press hard enough, you’ll end up with loose bars that fall apart—trust me; I’ve been there!
🍫 Can I add other ingredients like nuts or dried fruit?
Absolutely! Feel free to customize your No Bake Chocolate Oatmeal Bars by adding nuts like almonds or walnuts for extra crunch and protein. Dried fruits such as cranberries or raisins also work well for added sweetness and texture. Just remember to keep the total quantity similar so that the balance of wet to dry ingredients remains intact—typically around 1 cup of add-ins works perfectly!
Troubleshooting
I will continue to add more to this Troubleshooting section as I start seeing questions coming through from people who have made the recipe.
Troubleshooting tips
“My bars turned out too thin! 😩”
- You may not have pressed the mixture down firmly enough into the pan. It’s essential to compact it well so that it sets properly.
- If you used a larger pan than the recommended 9×9 inch, this could lead to thinner bars because the mixture spreads out more.
I bet they were still YUM though!
“My chocolate oatmeal bars are too crumbly!” 😟
- If you didn’t use enough peanut butter or honey, the mixture may lack the moisture needed to hold together. Make sure you’re measuring accurately!
- Overmixing can also dry out the texture; just combine until everything is evenly mixed.
I bet they were still YUM though!
“The surface of my bars cracked when I pressed them down!” 😲
- If your cocoa powder was too dry, it might absorb moisture from the other ingredients, leading to a crumbly texture that cracks. Try using a slightly less dry cocoa powder next time.
- Not pressing the mixture down firmly enough can create air pockets, which can lead to cracks on the surface as they set.
I bet they were still YUM though!
“My bars are way too sweet!” 🍯
- If you used a sweeter peanut butter or added extra honey or chocolate chips beyond what’s specified, that could push the sweetness overboard. Always stick to the measurements listed for balance!
- You could also try using unsweetened cocoa powder if you want more chocolate flavor without additional sweetness.
I bet they were still YUM though!
No Bake Chocolate Oatmeal Bars
Ingredients
Method
- Line a 9x9 inch baking pan with parchment paper, leaving some overhang for easy removal.
- In a mixing bowl, combine rolled oats, peanut butter, honey, and cocoa powder. Stir until well combined.
- Fold in the chocolate chips until evenly distributed throughout the mixture.
- Transfer the mixture to the prepared baking pan and press it down firmly into an even layer.
- Refrigerate the bars for at least 1 hour to allow them to set.
- Once set, lift the bars out of the pan using the parchment paper. Cut into squares and serve.