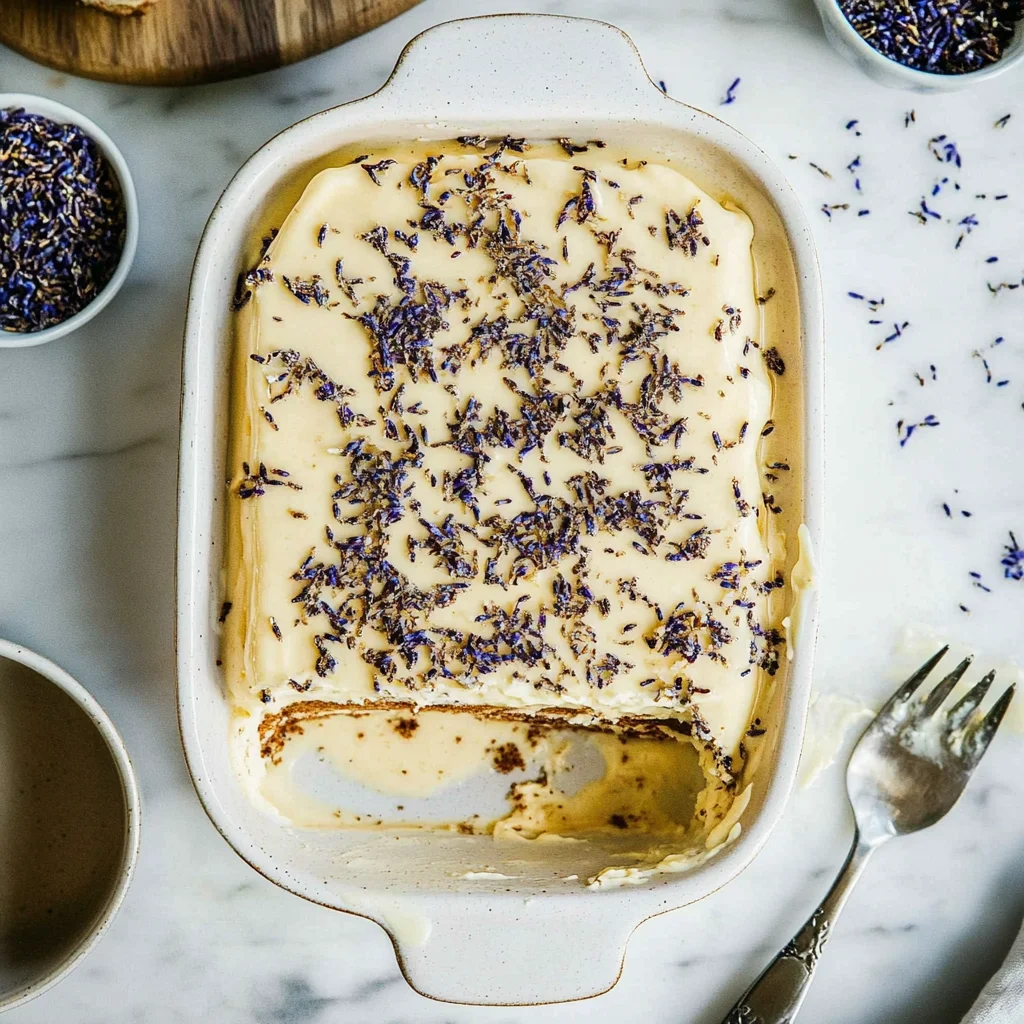
Earl Grey Tea Tiramisu: A Delightful Twist on Classic
I stumbled upon the idea for this Earl Grey Tea Tiramisu when I was enjoying a delightful afternoon at my favorite café, where they served a stunning dessert infused with Earl Grey tea. The combination of the fragrant bergamot and creamy mascarpone had me swooning, and I knew right then that I had to recreate it at home. But let’s be honest—who wouldn’t want to whip up a gourmet dessert without the café price tag? Plus, I figured I could make it even better with my own twists (and maybe sneak in some extra tea!).
After diving headfirst into my kitchen experiments, it took me a solid week and five rather embarrassing attempts before I finally nailed the recipe. Each round was filled with mishaps, like the time I accidentally used salt instead of sugar (don’t ask), but each flop taught me something new about balancing flavors and perfecting textures. My goal was simple: to create an Earl Grey Tea Tiramisu that captured those enchanting café vibes while still being easy enough to whip up at home.
But oh boy, was it worth the effort! The final result is nothing short of dreamy—imagine layers of delicate sponge soaked in aromatic Earl Grey tea, interlaced with velvety mascarpone that just melts in your mouth. It’s got this wonderful balance of subtle floral notes and rich creaminess that makes every bite feel like a hug from the inside out. Trust me, you’re going to love making (and devouring) this dessert as much as I do!
These Earl Grey Tea Tiramisu are…
…a luxurious dessert that elevates the classic tiramisu to new aromatic heights!
1. They offer a delicate floral aroma that transforms each bite into an experience. The rich notes of bergamot from the Earl Grey tea create a fragrant backdrop, making this dessert not just tasty but also a delightful sensory journey that lingers long after the last forkful.
2. Heavenly creaminess — each layer is a velvety delight thanks to the combination of mascarpone cheese and heavy cream. The use of room temperature mascarpone allows for a smoother blend, creating a luscious filling that perfectly contrasts with the crisp ladyfingers, resulting in a melt-in-your-mouth texture.
3. I’ve perfected the steeping technique, which is crucial for infusing the tiramisu with authentic Earl Grey flavor. By steeping the tea leaves in boiling water before adding sugar, we extract all those aromatic oils, ensuring every layer bursts with that signature taste that makes this version stand out from traditional ones.
4. This recipe offers fantastic value compared to restaurant options, as it allows you to enjoy an impressive dessert at home without breaking the bank. With basic ingredients like tea leaves, sugar, and mascarpone, you can whip up this indulgent treat for family and friends without sacrificing quality or flavor.
PS This Earl Grey Tea Tiramisu serves about 8 generous portions, making it perfect for gatherings or special occasions!
Ingredients for the Earl Grey Tea Tiramisu
Each ingredient in this dish plays an essential role in flavor and texture. Here’s what you’ll need:
2 cups water: Essential for steeping the tea to extract its aromatic flavors.
4 teaspoons Earl Grey tea leaves (or 4 tea bags): Infuses the dessert with distinctive bergamot notes.
1/4 cup granulated sugar: Sweetens the tea mixture, balancing the bitterness of the Earl Grey.
1 cup mascarpone cheese (room temperature): Provides a rich, creamy texture that is key to tiramisu.
1 cup heavy cream (cold): Adds lightness and stability to the mascarpone mixture when whipped.
1/2 cup powdered sugar (sifted): Ensures a smooth sweetness that blends seamlessly into the cream.
1 teaspoon vanilla extract: Enhances the overall flavor profile with warm undertones.
24 pieces ladyfingers (savoiardi): These absorb the tea mixture, contributing to the classic tiramisu texture.
1 tablespoon cocoa powder: Offers a decadent finish and a touch of bittersweet contrast on top.
1 teaspoon grated lemon zest (optional): Brightens the dish with a hint of citrus freshness.
You MUST Steep the Earl Grey Tea Properly! No Shortcuts!
I’ll confess — I tried to rush this step. With the clock ticking and my sweet tooth begging for satisfaction, I thought maybe a quick dip would do the trick. But after several rounds of testing (and a few regrettable tiramisu disasters), I realized there’s no way around it: proper steeping is non-negotiable for that rich, aromatic flavor we crave in this Earl Grey Tea Tiramisu.
Steeping the tea allows the leaves to release their essential oils and flavors into the water, creating a beautifully fragrant mixture. Think of it like making a good cup of coffee; if you don’t let the grounds soak long enough, you miss out on those deep, robust flavors. The same principle applies here — it’s all about coaxing out the best from those Earl Grey leaves, and trust me, your tiramisu will thank you.
What does steeping the Earl Grey tea do?
- Flavor — Proper steeping extracts all those delicate notes of bergamot and floral undertones, transforming an ordinary dessert into something extraordinary.
- Aroma — The aromatic compounds are released during steeping, giving your tiramisu that enticing scent that makes it irresistible.
- Sweetness — Dissolving sugar into the warm tea creates a perfectly balanced sweetness that integrates beautifully with the mascarpone mixture.
- Color — A good steep produces a lovely golden-brown hue in your liquid, which adds visual appeal to each layer of your tiramisu.
- Moisture — The right infusion ensures the ladyfingers absorb just enough liquid without becoming soggy, maintaining their structure while soaking up flavor.
Different steeping times
- 1 minute (very weak) — Barely any flavor extracted; you might as well use plain water.
- 3 minutes (good) — Some flavor begins to emerge but lacks depth; not quite what you want for an indulgent dessert.
- 5 minutes (ideal) — Perfectly balanced! This time extracts rich flavors without bitterness, giving you that delicious Earl Grey taste.
- 7+ minutes (oversteeped) — Risk of bitterness creeps in; not pleasant for a dessert.
To put it bluntly: do NOT skimp on time when steeping your tea! The most common mistake is rushing this step or using water that’s too hot. If you don’t get it right, you’ll end up with a bland tiramisu lacking that unique Earl Grey kick. Trust me; take the time to do it properly!
How to make Earl Grey Tea Tiramisu

Are you ready to see how straightforward it is to make the Earl Grey Tea Tiramisu of your dreams??
1. PREPARE THE EARL GREY TEA
Let’s start with the aromatic foundation!
1. Boil – In a saucepan, bring 2 cups of water to a rolling boil. This hot water is essential for extracting all the beautiful flavors from the Earl Grey tea.
2. Steep – Once boiling, remove the saucepan from heat and add in 4 teaspoons of Earl Grey tea leaves or 4 tea bags. Allow it to steep for 5 minutes to really develop that rich, fragrant flavor.
3. Strain and Sweeten – After steeping, strain the tea to remove the leaves or simply take out the tea bags. While the tea is still warm, stir in 1/4 cup of granulated sugar until fully dissolved. Then, let this flavorful mixture cool down to room temperature.
HANDY TIPS
- For a stronger flavor, you can steep for a few extra minutes—just be careful not to overdo it as it may become too bitter.
- If you prefer a less sweet tiramisu, reduce the sugar in your tea mixture.
2. MAKE THE MASCARPONE MIXTURE
Now, we’re diving into creamy goodness!
1. Whisk – In a mixing bowl, combine 1 cup of room temperature mascarpone cheese, 1 cup of cold heavy cream, 1/2 cup of sifted powdered sugar, and 1 teaspoon of vanilla extract. Use a whisk or electric mixer to blend these ingredients together until smooth and creamy. This should take about 2-3 minutes; you want it thick but not overly stiff.
HANDY TIPS
- Make sure your mascarpone is at room temperature for easy mixing—this helps avoid lumps.
- If you’d like an extra hint of flavor, consider adding a splash more vanilla extract!
3. ASSEMBLE THE TIRAMISU
Time to layer up those delicious flavors!
1. Dip – Take each ladyfinger (24 pieces) and dip them briefly into the cooled Earl Grey tea mixture. Be sure they are soaked but not soggy; a quick dunk will do!
2. Layer – Begin by layering half of the soaked ladyfingers at the bottom of an 8×8 inch baking dish. This forms your first base layer.
3. Spread – Next, spread half of your mascarpone mixture over this layer of ladyfingers evenly.
4. Repeat – Layer again with the remaining soaked ladyfingers followed by the rest of the mascarpone mixture on top.
5. Chill – Cover your dish with plastic wrap and refrigerate for at least 4 hours—overnight is even better! This chilling time allows all those wonderful flavors to meld together beautifully.
HANDY TIPS
- For an elegant touch, consider arranging some finely crushed ladyfingers on top before refrigerating!
- If you’re short on time, you can use smaller individual serving dishes instead; just adjust cooling time accordingly.
4. SERVE THE TIRAMISU
The moment you’ve been waiting for!
1. Dust – Just before serving, dust the top generously with cocoa powder and sprinkle with grated lemon zest if desired—it adds a lovely citrusy brightness!
2. Cut and Serve – Cut into squares and serve chilled for that perfect creamy bite full of Earl Grey goodness.
HANDY TIPS
- Use unsweetened cocoa powder for an authentic taste that balances well with the sweetness.
- If you’re feeling adventurous, try using different flavored teas like chai or green tea for unique variations!
You’ve just mastered a delightful twist on tiramisu that will impress everyone at your next gathering! With its aromatic layers and creamy texture, this Earl Grey Tea Tiramisu is bound to become a new favorite dessert in your repertoire! Make this once, and I wager they will invade your dreams every night too! – Nagi x
FAQ – Earl Grey Tea Tiramisu
☕ Can I use a different type of tea instead of Earl Grey?
Absolutely! While Earl Grey adds that distinct bergamot flavor, you can experiment with other teas. Consider using chai for a spiced twist, green tea for a lighter option, or even a fruity herbal tea. Just remember to adjust the sugar levels accordingly, as some teas might be sweeter than others. I’ve tried chai, and it brings an exciting warmth to the dessert – definitely worth a shot!
🥄 How long should I chill the tiramisu before serving?
You need to chill the tiramisu for at least 4 hours, but I highly recommend letting it rest overnight. This allows the flavors to meld beautifully, and trust me, it’s worth the wait! If you try to cut into it too soon, you’ll miss out on that perfect creamy texture. In my experience, chilling for 24 hours yields the best results—so maybe consider making it a day ahead!
❄️ Can I freeze leftover tiramisu?
Yes, you can freeze tiramisu! To do so, wrap it tightly in plastic wrap and then in aluminum foil to prevent freezer burn. It can be stored for up to 3 months. When you’re ready to enjoy it again, thaw it overnight in the refrigerator. However, do note that the texture may change slightly; the cream might not be as fluffy as when freshly made. But hey, still delicious!
🌾 Is there a gluten-free option for ladyfingers?
Yes! You can find gluten-free ladyfingers in many stores or online. Make sure to check the packaging carefully—some brands use alternative flours that work well in desserts like tiramisu. If you’re feeling adventurous, you could also make your own using almond flour or gluten-free all-purpose flour. It’s a bit more effort but totally doable!
🍯 Can I reduce the sugar in this recipe?
Nope! Trust me on this one—I’ve tested this recipe countless times with various sugar levels, and reducing it affects both flavor and texture significantly. The sugar isn’t just sweetening; it helps stabilize the mascarpone mixture and balances the bitterness of the cocoa powder on top. If you’re looking for sweetness alternatives, consider using a granulated sugar substitute that measures like sugar.
🤔 Why do I need to let the tea cool before dipping ladyfingers?
Letting the tea cool is crucial because hot tea will make your ladyfingers soggy much quicker than you want! You want them to absorb just enough moisture without falling apart. Aim for room temperature—this will give you that perfect balance of soaked yet structured ladyfingers. Trust me; soggy tiramisu is not what we’re aiming for here!
🎉 Can I add any flavor variations or mix-ins?
Absolutely! Feel free to get creative with flavors. You can add a splash of orange liqueur or even espresso for an extra kick. For a chocolatey twist, consider folding some cocoa powder directly into your mascarpone mixture or layering with chocolate shavings between layers. The possibilities are endless—I once had a matcha version that was surprisingly delightful!
Troubleshooting
- I will continue to add more to this Troubleshooting section as I start seeing questions coming through from people who have made the recipe.
Troubleshooting tips
“My tiramisu is too soggy and falls apart! 😩”
- You may have soaked the ladyfingers in the Earl Grey tea mixture for too long. A brief dip is all they need; if they’re too wet, they won’t hold their shape.
- Using a high moisture content in your mascarpone mixture can also contribute to sogginess, so make sure your mascarpone cheese is well-mixed but not overwhipped.
- I bet it still tasted amazing despite the soggy situation!
“My tiramisu layers are uneven and messy! 😣”
- If the ladyfingers aren’t dipped evenly in the Earl Grey tea mixture, some pieces may be overly soaked while others remain dry. To fix this, ensure you dip them quickly and coat them evenly.
- You might have spread the mascarpone mixture too thickly or unevenly, which can lead to wonky layers. A gentle hand is key!
- I’m sure it was still delicious, even if it looked a little chaotic!
“The top of my tiramisu looks too pale! 🤔”
- The cocoa powder dusting may not have been applied evenly or generously enough, leaving some parts bare. Make sure to dust generously before serving for that beautiful finish.
- If your Earl Grey tea wasn’t strong enough in flavor or color, it could result in a lighter overall appearance as well. Ensure you steep the right amount of tea leaves for maximum flavor!
- Regardless of its looks, I bet it was still YUM!
“My tiramisu came out too thick! 😬”
- If your mascarpone mixture was overwhipped while mixing, it could become dense and thick instead of light and airy. Whisk just until smooth and creamy for the best texture.
- Not letting your layers chill correctly can also cause them to set up too firmly. Make sure you refrigerate for at least 4 hours or overnight.
- No worries though—I’m sure it tasted delightful regardless of its thickness!
Earl Grey Tea Tiramisu
Ingredients
Method
- Boil the water in a saucepan. Once boiling, remove from heat and add the Earl Grey tea leaves or tea bags. Steep for 5 minutes.
- Strain the tea to remove leaves or remove tea bags. Stir in granulated sugar until dissolved. Let cool to room temperature.
- In a mixing bowl, whisk together the mascarpone cheese, heavy cream, powdered sugar, and vanilla extract until smooth and creamy.
- Dip each ladyfinger briefly into the cooled Earl Grey tea mixture, ensuring they are soaked but not soggy.
- Layer half of the soaked ladyfingers in the bottom of an 8x8 inch baking dish.
- Spread half of the mascarpone mixture over the ladyfingers.
- Repeat the layers with the remaining ladyfingers and mascarpone mixture.
- Cover the dish with plastic wrap and refrigerate for at least 4 hours, preferably overnight.
- Before serving, dust the top with cocoa powder and sprinkle with grated lemon zest if desired.
- Cut into squares and serve chilled.