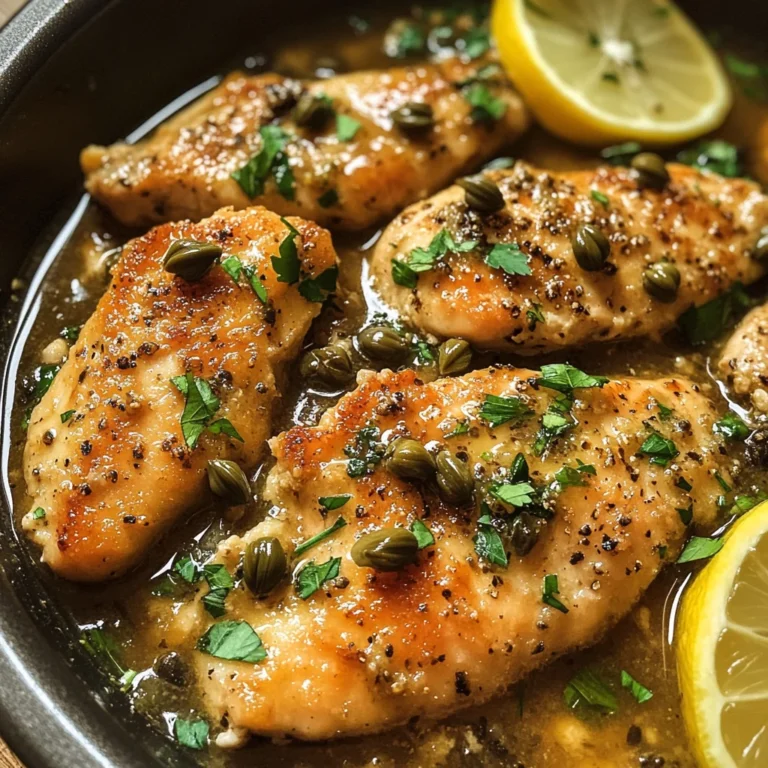
Crispy Greek Chicken Tenders: Flavor Explosion Awaits!
I’ve always had a soft spot for crispy chicken tenders, but when I tried a batch at this little Greek restaurant in my neighborhood, I was completely hooked. They were coated in this magical blend of herbs and spices that made each bite sing with flavor. I couldn’t shake the craving and thought, why not try to recreate those beautifully seasoned Crispy Greek Chicken Tenders at home? Not only would it save me some cash, but I was determined to make them even better than the ones that got away — and who doesn’t love a good kitchen challenge?
Let me tell you, perfecting this recipe was no walk in the park. I went through six iterations (yes, six!) of these tenders, trying to nail down that perfect crunch while ensuring the chicken stayed juicy inside. There were moments when I thought my kitchen might explode from the amount of flour and breadcrumbs flying around! Each attempt brought me closer to achieving that ideal balance of seasoning and texture, though there were definitely a few less-than-stellar batches that ended up as dog treats.
But oh boy, was it worth it! The final result is nothing short of spectacular — these Crispy Greek Chicken Tenders are so flavorful and have an irresistible crunch that keeps you coming back for more. They’re perfect for a quick meal or snack and can be enjoyed hot out of the oven or even cold as leftovers (if they last that long!). I can’t wait for you to try them; trust me, your taste buds are in for a treat!
These Crispy Greek Chicken Tenders are…
….the ultimate game-changer for quick meals or snacks that will have you coming back for seconds!
1. They deliver an explosion of flavor thanks to the combination of dried oregano, garlic powder, and onion powder in the breading. This Greek-inspired seasoning not only enhances the taste but also creates a delightful aroma that fills your kitchen while they cook, making every bite a little journey to the Mediterranean.
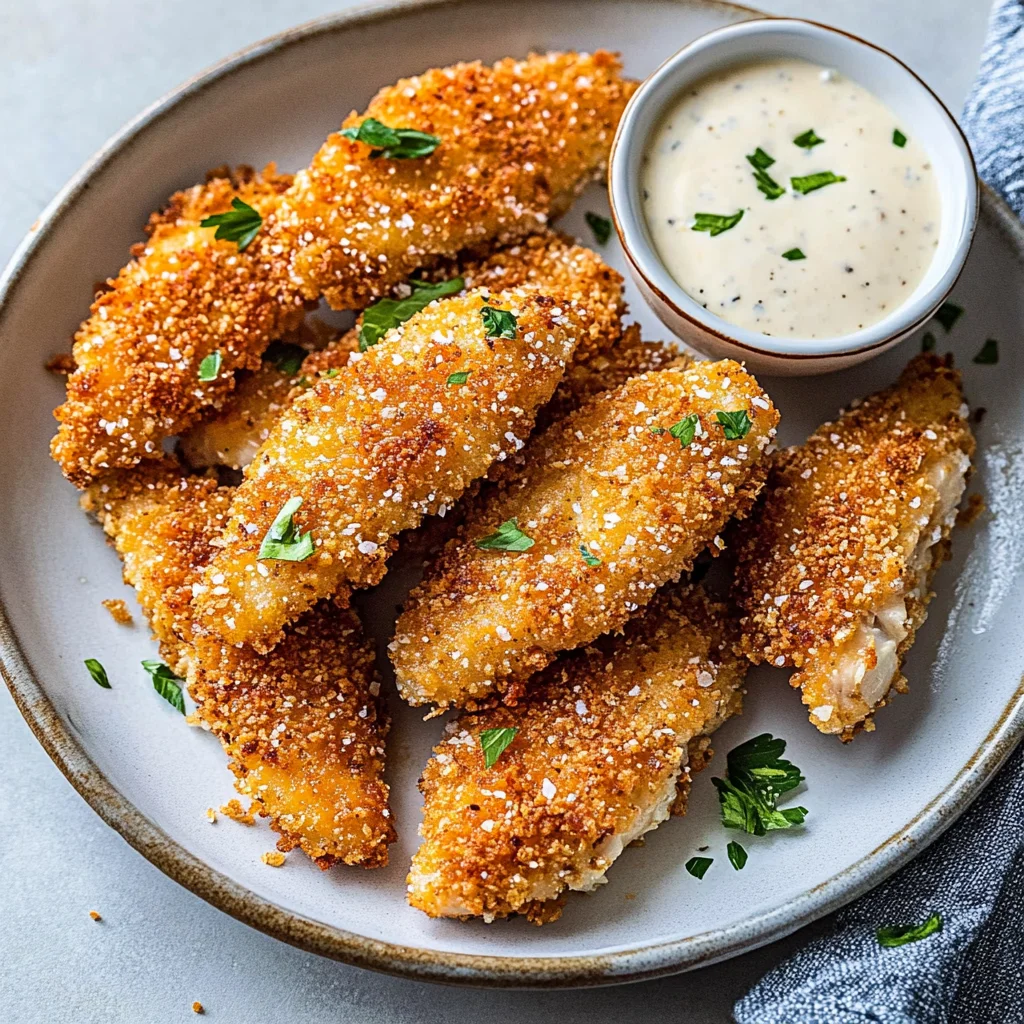
2. Incredible crunch – every tender boasts a thick, golden crust thanks to the panko breadcrumbs. This extra layer of texture makes each bite satisfying and crispy, creating that perfect contrast with the juicy chicken inside, ensuring you won’t be able to stop at just one!
3. Simple yet effective technique – by pounding the chicken tenders to an even thickness, I ensure they cook uniformly and stay tender while achieving that coveted crispiness on the outside. This method elevates these tenders above ordinary versions, guaranteeing a perfectly cooked piece of chicken every time.
4. Outstanding value – making these Crispy Greek Chicken Tenders at home is not only budget-friendly but also incredibly convenient compared to ordering from a restaurant. With just a few simple ingredients, you can whip up this crowd-pleaser anytime, saving both money and time without sacrificing flavor or quality.
PS These tenders yield about 4 servings, perfect for sharing or enjoying as leftovers throughout the week!
Ingredients for the Crispy Greek Chicken Tenders
Each ingredient in this dish plays an essential role in flavor and texture. Here’s what you’ll need:
1 pound chicken tenders: Trimmed and pounded for even cooking and tender bites.
1 cup panko breadcrumbs: Provides an extra crunch that makes these tenders irresistible.
1/2 cup all-purpose flour: Helps the breading adhere to the chicken for a perfect coating.
2 large eggs: Beaten to bind the breadcrumbs and flour together, ensuring a crispy exterior.
1 tablespoon dried oregano: Infuses the tenders with a distinct Greek flavor profile.
1 teaspoon garlic powder: Adds depth with a subtle, savory kick.
1 teaspoon onion powder: Enhances the overall taste with mild sweetness.
1 teaspoon salt: Elevates all the flavors and balances the seasoning.
1/2 teaspoon black pepper: Introduces a hint of warmth and spice to the mix.
1 cup Greek yogurt: Brings creaminess to the dipping sauce, making it rich and delicious.
1 tablespoon lemon juice: Freshly squeezed for brightness that cuts through richness.
1 teaspoon dried dill: Provides a fresh herbal note that complements the yogurt perfectly.
- 1 clove garlic: Minced for an aromatic punch in the dipping sauce.
Don’t Skip Pounding the Chicken Tenders!
I confess, I tried to shortcut this step when I was rushing through making these Crispy Greek Chicken Tenders. I thought, “Who has time for that?” But after multiple attempts, each resulting in uneven cooking and less crispy goodness, I realized that pounding the chicken is absolutely non-negotiable.
Pounding the chicken to an even thickness ensures that every tender cooks uniformly. It’s like making a pizza dough—if it’s thicker in some places, it won’t cook evenly. For our chicken tenders, this means a perfectly juicy interior with a crispy exterior all around. Trust me, your taste buds will thank you!
What does pounding the chicken do?
- Even Cooking — Ensures every tender is cooked through at the same rate, preventing dry patches while waiting for thicker areas to finish.
- Tender Texture — Breaking down the muscle fibers makes for softer bites; no one wants chewy chicken!
- Better Breading Adherence — Smooth, flat surfaces allow the breading to stick better, leading to a more satisfying crunch.
- Enhanced Flavor Absorption — Pounding opens up the meat’s fibers, allowing seasonings to penetrate deeper for a more flavorful bite.
- Consistent Size for Crispiness — Uniform thickness means each piece gets that golden-brown crispiness at the same time, rather than some being soggy while others are crunchy.
Different pounding times
- No pounding (poor) — The chicken will be unevenly cooked, leading to dry spots and undercooked areas.
- 1 minute per tender (okay) — A quick pound helps but may still leave some unevenness; might result in varying textures.
- 2 minutes per tender (good) — This gives a better result and ensures most pieces are evenly flattened; still not perfect.
- 3 minutes per tender (great) — Ideal for achieving uniform thickness across all tenders, guaranteeing optimal cooking and texture.
Don’t make the mistake of skipping or skimping on this step! If you don’t pound your chicken tenders to an even thickness, you risk ending up with unevenly cooked meat—some parts might be juicy while others could be disappointingly dry. It’s not worth it!
How to make Crispy Greek Chicken Tenders

Are you ready to see how straightforward it is to make the Crispy Greek Chicken Tenders of your dreams??
1. PREPARE THE CHICKEN
Start with prepping your chicken tenders for a perfectly crispy coating.
1. Preheat – Preheat the oven to 400°F (200°C). This ensures that your chicken tends will bake evenly and get that perfect golden color.
2. Pound – Pound the chicken tenders to an even thickness using a meat mallet. This step is crucial as it helps them cook uniformly, preventing any dry or undercooked parts.
HANDY TIPS
- Make sure the chicken is trimmed well to avoid any chewy bits.
- If you’re short on time, you can skip pounding for smaller tenders but be aware they may cook faster!
2. SET UP BREADING STATION
Time to get messy! Setting up your breading station will make the process so much smoother.
3. Combine – In one bowl, place the flour mixed with salt, pepper, garlic powder, and onion powder. This seasoned flour is key for ensuring every bite bursts with flavor.
4. Beat – In a second bowl, beat the eggs until smooth. The egg wash helps the breadcrumbs adhere perfectly.
5. Mix – In a third bowl, combine panko breadcrumbs with dried oregano. The panko gives that extra crunch we all love in these tenders!
HANDY TIPS
- You can prepare this station ahead of time and even refrigerate the breading for maximum freshness!
- Feel free to add extra spices to the breadcrumb mixture if you’re feeling adventurous!
3. BREAD THE CHICKEN
Get ready for some crispy magic as we coat our chicken in deliciousness!
6. Dredge – Dredge each chicken tender in the flour mixture, shaking off excess. This initial layer of flour helps create a barrier that keeps moisture in while allowing for a crispy outer layer.
7. Dip – Dip into the beaten eggs, making sure each piece is well-coated before moving on.
8. Coat – Coat with the panko mixture, pressing down gently to ensure it adheres well. This step guarantees an amazing crunch once baked!
HANDY TIPS
- For an even thicker crust, double dip! Repeat steps 6 and 7 before coating in panko.
- If you have leftover breading mix, sprinkle it over veggies for a crunchy side dish!
4. BAKE THE CHICKEN
The moment of truth! Let’s turn those breaded tenders into crispy golden delights.
9. Arrange – Place the breaded chicken tenders on a baking sheet lined with parchment paper. Ensure they are spaced out so they bake evenly and become nice and crisp.
10. Bake – Bake for 15 minutes or until golden brown and cooked through, flipping halfway through cooking time for even crispiness.
HANDY TIPS
- Use a wire rack on top of your baking sheet if you have one; this allows air circulation underneath for maximum crispiness!
- Keep an eye on them towards the end; ovens can vary and you don’t want them overcooked.
5. MAKE THE DIPPING SAUCE
While your chicken bakes, whip up this quick dipping sauce!
11. Mix – In a small bowl, mix together Greek yogurt, lemon juice, dill, and minced garlic until smooth. This refreshing sauce complements the crispy tenders perfectly!
HANDY TIPS
- Feel free to adjust the garlic based on your preference—more for bold flavors or less if you’re keeping it mild!
- This sauce works beautifully as a spread too — think wraps or sandwiches!
6. SERVE
Finally, it’s time to enjoy your creation!
12. Plate – Serve the crispy chicken tenders hot with the dipping sauce on the side for everyone to enjoy.
Make these once, and I wager they will invade your dreams every night too! – Nagi x
FAQ – Crispy Greek Chicken Tenders
🍗 How long will these chicken tenders keep?
Crispy Greek Chicken Tenders can be stored in an airtight container in the refrigerator for up to 3 days. However, I recommend consuming them within the first 2 days for the best quality—on day 2, they’ll still be about 90% as good as when you first made them. By day 3, you might notice a decline in crispness and flavor, dropping to around 80%. If you want to maintain their delightful crunch, consider reheating them in an oven rather than a microwave.
❄️ Can I freeze these chicken tenders?
Yes, you can absolutely freeze these chicken tenders! To do so, let them cool completely after baking, then place them in a single layer on a baking sheet and freeze until solid. Once frozen, transfer them to a zip-top freezer bag or an airtight container. They can be stored for up to 3 months. When you’re ready to enjoy them, simply reheat from frozen at 400°F (200°C) for about 20-25 minutes, or until heated through.
🌾 Are these chicken tenders gluten-free?
You can make these chicken tenders gluten-free by substituting the all-purpose flour with a gluten-free flour blend and using gluten-free panko breadcrumbs. Just ensure that all other ingredients are verified gluten-free. I tested this variation, and it turned out deliciously crispy! Just remember that the texture might differ slightly depending on the brand of gluten-free products used.
🥚 Can I substitute the eggs in the breading mixture?
If you’re looking for an egg substitute, you can use unsweetened applesauce or flaxseed meal mixed with water. For each egg, combine 1/4 cup of applesauce or 1 tablespoon of flaxseed meal with 2.5 tablespoons of water. Let it sit for about 5 minutes before using it in the breading process. Just keep in mind that while these substitutes work well, they may alter the flavor slightly—so if you love that rich taste from the eggs, it might not be quite the same!
🔄 Why do I need to pound the chicken tenders?
Pounding the chicken tenders to an even thickness ensures they cook uniformly and stay juicy. If some parts are thicker than others, they’ll take longer to cook through while thinner parts may overcook and dry out. Trust me; after testing various thicknesses, this step is non-negotiable for achieving tender results every time!
🎉 Can I add spices or herbs to customize the flavor?
Absolutely! Feel free to get creative with your seasoning mix by adding spices like paprika or cayenne pepper for heat or fresh herbs like parsley or thyme for a different flavor profile. I once added smoked paprika for a subtle smokiness and loved how it turned out! Just remember not to overdo it—balance is key!
🥣 What should I serve with these chicken tenders?
These crispy chicken tenders pair wonderfully with various sides! Consider serving them alongside a fresh Greek salad, roasted vegetables, or even sweet potato fries for a complete meal experience. For dipping sauces beyond the Greek yogurt option, BBQ sauce or honey mustard work beautifully too—your taste buds will thank you!
Troubleshooting
I will continue to add more to this Troubleshooting section as I start seeing questions coming through from people who have made the recipe.
Troubleshooting tips
“My chicken tenders are too dry! 😭”
- You may have overcooked the chicken tenders. Baking for too long can cause them to lose moisture, resulting in a dry texture. Always keep an eye on them and check for doneness around the 15-minute mark.
- If your chicken tenders were pounded too thin, they would cook faster and can easily become dry. Aim for an even thickness of about 1/2 inch when pounding.
- I bet they were still YUM though!
“My breading fell off during baking! 😩”
- If you didn’t press the panko mixture onto the chicken tenders firmly enough, it might not adhere well and could fall off during baking. Make sure to press down gently but firmly when coating.
- Not shaking off excess flour before dipping into egg can create a barrier that prevents the breadcrumbs from sticking properly. Be sure to shake off any excess flour!
- I bet they were still YUM though!
“The chicken turned out unevenly browned! 🔥”
- If the chicken tenders were crowded on the baking sheet, they may not have cooked evenly, leading to uneven browning. Give them enough space on the tray for hot air to circulate.
- Your oven temperature may be inconsistent. An oven thermometer can help ensure it’s actually at 400°F (200°C) as specified, so everything bakes evenly.
- I bet they were still YUM though!
“My tenders are way too thick! 🤔”
- If your chicken tenders weren’t pounded to an even thickness, some pieces might take longer to cook than others, resulting in uneven cooking. Make sure to pound them out evenly to about 1/2 inch thick.
- Using larger chicken breasts instead of tenders can also lead to thicker pieces. Stick with actual chicken tenders for the best results!
- I bet they were still YUM though!
Crispy Greek Chicken Tenders
Ingredients
Method
- Preheat the oven to 400°F (200°C).
- Pound the chicken tenders to an even thickness using a meat mallet.
- In one bowl, place the flour mixed with salt, pepper, garlic powder, and onion powder.
- In a second bowl, beat the eggs.
- In a third bowl, combine panko breadcrumbs with dried oregano.
- Dredge each chicken tender in the flour, shaking off excess.
- Dip into the beaten eggs, then coat with the panko mixture, pressing to adhere.
- Place the breaded chicken tenders on a baking sheet lined with parchment paper.
- Bake for 15 minutes or until golden brown and cooked through, flipping halfway.
- In a small bowl, mix together Greek yogurt, lemon juice, dill, and minced garlic until smooth.
- Serve the crispy chicken tenders hot with the dipping sauce on the side.