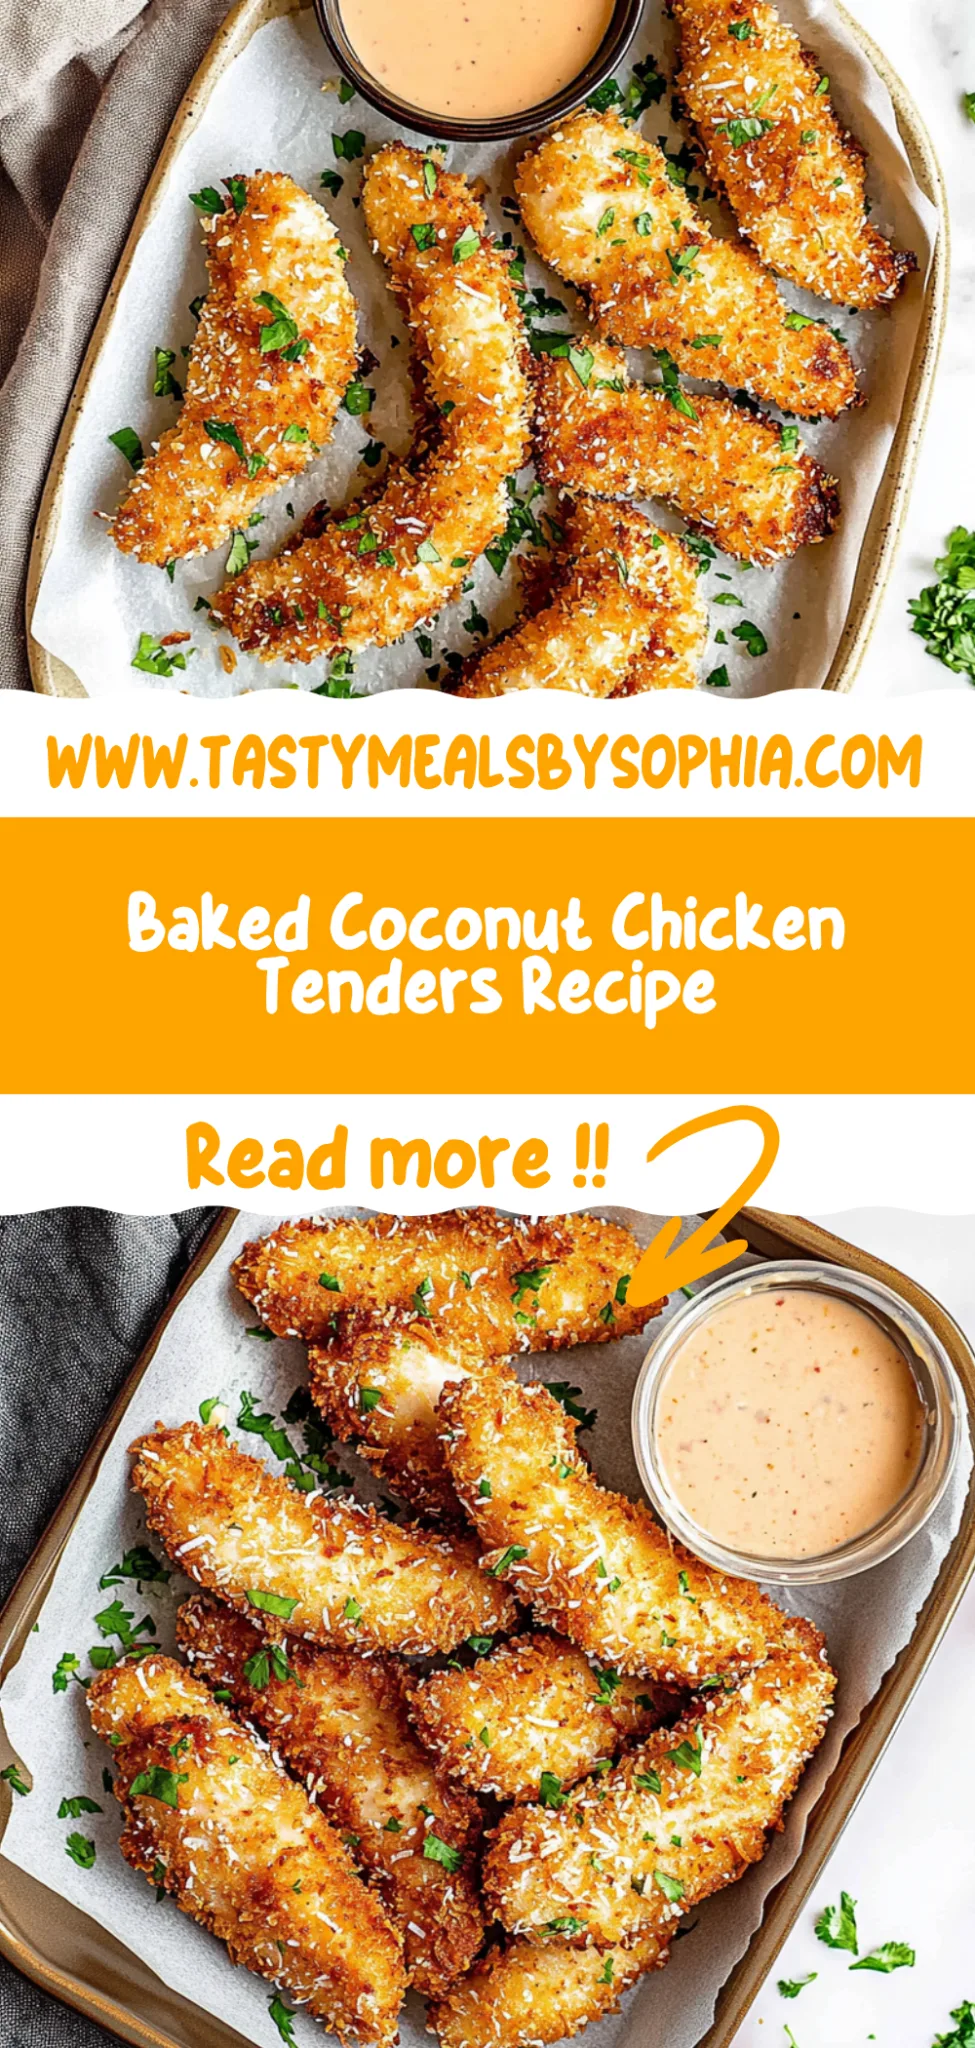
Baked Coconut Chicken Tenders Recipe: Crunchy Paradise Aw…
I first stumbled upon the idea for baked coconut chicken tenders during a visit to a cozy little beachside café that boasted an incredible take on fried chicken. Each bite was a crunchy, tropical delight that transported me straight to paradise. I couldn’t shake that craving as I left, but let’s be honest—dining out can get expensive! So, with a mission to recreate those crispy, flavorful treasures at home, I decided it was high time to whip up my own Baked Coconut Chicken Tenders Recipe.
After several hilarious—and let’s be real, sometimes disastrous—attempts in my kitchen, I finally nailed it! It took me about five tries (and a few too many burned batches) to find the perfect balance of crunch and flavor. I wanted these tenders to have that sought-after crispiness without the guilt of frying, so each iteration brought its own set of challenges. From tweaking the coconut coating to figuring out the ideal baking temperature, I learned more about what not to do than I’d care to admit!
But oh boy, was it worth every misadventure! The final result is nothing short of magical: these Baked Coconut Chicken Tenders are crispy on the outside and tender on the inside, bursting with flavor that’ll have you coming back for seconds (and thirds!). Plus, they’re way healthier than their fried counterparts—definitely a win-win situation! I can’t wait for you to try this recipe; trust me, you’re going to fall in love with every crunchy bite!
These Baked Coconut Chicken Tenders are….
…a game-changer in the world of healthy comfort food!
1. They deliver an incredible tropical flavor that transports you to a sunny beach with every bite. The combination of unsweetened shredded coconut and coconut milk not only enhances the chicken’s natural taste but also infuses it with a hint of sweetness and richness that elevates these tenders far above ordinary chicken.
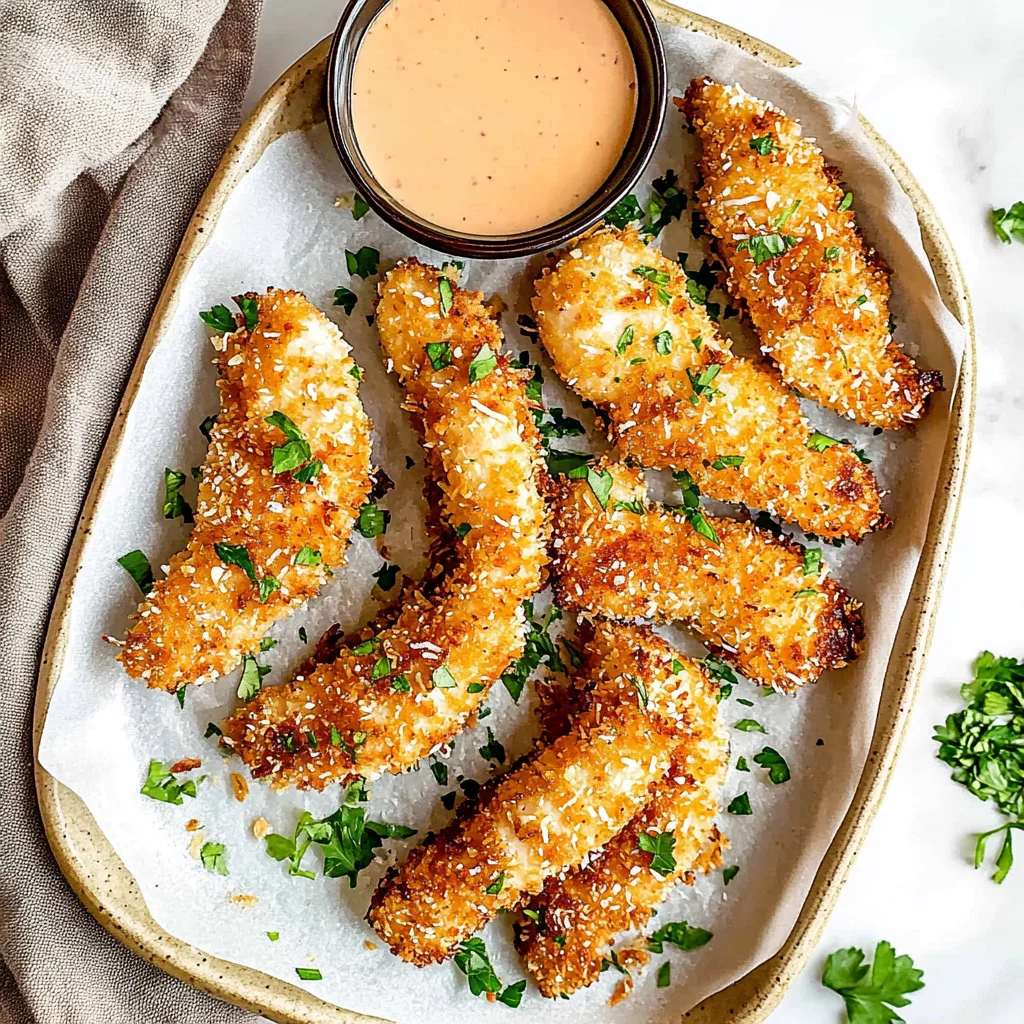
2. Irresistible crunch – these tenders feature a perfect golden-brown crust that’s both crispy and satisfying. By using panko breadcrumbs alongside shredded coconut, I achieved a delightful texture contrast, ensuring each bite has that satisfying crunch while the chicken stays tender and juicy inside.
3. A simple yet effective technique for breading keeps the coating intact and maximizes flavor. Dipping the chicken tenders first in a mixture of beaten eggs and coconut milk allows the dry ingredients to adhere better, creating an even crust that locks in moisture and ensures every piece is bursting with flavor.
4. They offer great value as a homemade alternative to fried chicken tenders. With just a pound of chicken tenders and pantry staples like coconut and panko, this Baked Coconut Chicken Tenders Recipe is not only cost-effective but also easy to whip up, making them perfect for weeknight dinners or meal prep.
PS These tenders are best served fresh from the oven for maximum crispiness, so plan to enjoy them right away!
Ingredients for the Baked Coconut Chicken Tenders
Each ingredient in this dish plays an essential role in flavor and texture. Here’s what you’ll need:
1 pound chicken tenders (skinless and boneless): Provides a tender and juicy base for the dish.
1 cup unsweetened shredded coconut: Adds a tropical sweetness and chewy texture.
1 cup panko breadcrumbs: Ensures extra crunchiness for a satisfying bite.
1 teaspoon salt: Enhances all the flavors in the dish.
1 teaspoon black pepper: Offers a subtle heat that complements the other spices.
1 teaspoon garlic powder: Infuses the chicken with a savory depth of flavor.
1 teaspoon paprika: Contributes a mild smokiness and vibrant color.
2 large eggs (beaten): Acts as a binding agent to help the breading adhere.
2 tablespoons coconut milk: Introduces a rich, creamy flavor that elevates the dish.
1 tablespoon cooking spray: Prevents sticking and promotes even browning on the baking sheet.
This baking step is crucial. Don’t skip it!
I get it; you’re eager to dive into those crispy coconut chicken tenders, and who wouldn’t be? But trust me when I say that taking a moment to preheat your oven properly and prepare the baking sheet is not just a minor detail—it’s essential! I tried to rush through this and ended up with soggy tenders that were nowhere near as delicious as they should have been. Lesson learned!
Preheating the oven allows the chicken tenders to start cooking immediately, giving them that golden brown crust we all crave. Think of it like getting a good sear on a steak; without that initial high heat, you lose out on the perfect texture. Properly preparing your baking sheet ensures that the breading doesn’t stick, allowing each tender to crisp up beautifully without turning into a mushy mess.
What does preheating the oven and preparing the baking sheet do?
- Crispiness: Starting in a hot oven helps create a crispy outer layer right away, locking in moisture while ensuring that irresistible crunch.
- Even Cooking: Preheating ensures that every piece cooks evenly, so you won’t end up with some tenders overcooked while others are still underdone.
- Color Development: The high heat promotes browning through the Maillard reaction, which gives those tenders their appealing golden color.
- Non-Stick Surface: Using parchment paper prevents sticking, so you can easily lift off your tenders without losing any of that hard-earned breading.
- Moisture Retention: A hot start helps seal in juices for tender, succulent chicken inside—a stark contrast to what happens when you start cooking in a cold oven.
Different preheating times
- 0 minutes (disastrous) — jumping straight into cooking means your chicken will steam rather than bake, leading to sad, soggy tenders.
- 5 minutes (okay) — just enough time for some initial heating; it may work but won’t give you optimal results.
- 10 minutes (good) — a solid choice for decent browning; however, it still doesn’t achieve maximum crispiness.
- 15 minutes or more (great) — ideal for achieving the perfect balance of crispy outside and juicy inside; this is where you want to be!
Be warned: skipping or skimping on preheating can lead to disappointment. Your chicken tenders might end up soft and sad instead of crispy and delightful. Don’t let that happen! Trust me on this one—your taste buds will thank you later!
How to make Baked Coconut Chicken Tenders
Are you ready to see how straightforward it is to make the Baked Coconut Chicken Tenders of your dreams??
1. PREPARE THE OVEN AND BAKING SHEET
Let’s set the stage for our crunchy chicken tenders!
Preheat – Preheat the oven to 400°F (200°C). This ensures that your chicken cooks evenly and becomes perfectly crispy.
Line and Spray – Line a baking sheet with parchment paper, then lightly spray it with cooking spray. This helps prevent sticking and keeps cleanup easy!
HANDY TIPS
- Use parchment paper instead of foil for a non-stick surface that promotes even browning.
- If you want extra crispiness, let the baking sheet cool for a few minutes after spraying before placing the tenders on it.
2. PREPARE THE BREADING
Now comes the fun part—creating that irresistible coating!
Mix Ingredients – In a mixing bowl, combine 1 cup of unsweetened shredded coconut, 1 cup of panko breadcrumbs, 1 teaspoon of salt, 1 teaspoon of black pepper, 1 teaspoon of garlic powder, and 1 teaspoon of paprika. The combination of coconut and panko will give your tenders an amazing crunch and flavor!
HANDY TIPS
- For an extra tropical twist, consider adding a pinch of cayenne pepper for some heat!
- Make sure to mix thoroughly so every piece is evenly coated.
3. PREPARE THE WET MIXTURE
Let’s get that chicken tenderized!
Whisk Together – In another bowl, whisk together 2 large beaten eggs and 2 tablespoons of coconut milk until well combined. The coconut milk not only adds flavor but also helps keep your chicken moist during baking.
HANDY TIPS
- You can substitute regular milk if you don’t have coconut milk on hand, but you’ll miss out on that lovely coconut flavor!
- Ensure the eggs are well beaten to create an even coating on your chicken.
4. COAT THE CHICKEN
Time to bring everything together!
Dip and Coat – Dip each chicken tender into the wet mixture, letting any excess drip off. Then coat it with the breading mixture by pressing gently to ensure it adheres well. This double-dipping method is key to achieving that crispy exterior you crave!
HANDY TIPS
- If you’re looking for a thicker coating, double dip in the wet mixture again before the breading.
- Use one hand for wet dipping and another for dry breading to keep things less messy!
5. BAKE THE CHICKEN TENDERS
Let those tenders work their magic in the oven!
Place on Baking Sheet – Arrange the coated chicken tenders on the prepared baking sheet in a single layer. Bake in the preheated oven for about 20-25 minutes or until they are golden brown and cooked through. Flip them halfway through for even cooking and browning.
HANDY TIPS
- Keep an eye on them during the last few minutes; every oven behaves differently!
- You’ll know they’re done when they’re golden brown and have an internal temperature of at least 165°F (75°C).
6. SERVE
The moment has arrived!
Cool Slightly – Remove from the oven and let cool slightly before serving. Pair them with your favorite dipping sauce—honey mustard or sweet chili sauce works wonderfully!
Make these once, and I wager they will invade your dreams every night too! – Nagi x
FAQ – Baked Coconut Chicken Tenders
🥥 Can I make these chicken tenders gluten-free?
Absolutely! To make these baked coconut chicken tenders gluten-free, simply substitute the panko breadcrumbs with gluten-free breadcrumbs or crushed gluten-free cornflakes. Ensure that your shredded coconut is also labeled gluten-free, as some brands may process their products in facilities that handle gluten. The texture will still be crispy and delightful, just as I love it!
❄️ How should I store leftover chicken tenders?
Store any leftover chicken tenders in an airtight container in the fridge for up to 3 days. They’ll remain about 90% as good on day 2 and around 85% on day 3. If you want to keep them longer, consider freezing! Just wrap each tender individually in plastic wrap before placing them in a freezer-safe bag. They’ll last for up to 2 months. When you’re ready to enjoy them again, thaw them overnight in the fridge and reheat in the oven at 375°F (190°C) for about 10-15 minutes until heated through.
⏲️ Do I need to chill the chicken tenders before baking?
No, chilling is not necessary for this recipe! You can bake these coconut chicken tenders right after coating them. However, if you have extra time and want to ensure an even crispier exterior, you can let them rest for about 15-20 minutes after coating. This allows the breading to adhere better during baking, resulting in a more satisfying crunch!
🥗 Can I make these tenders dairy-free?
Yes! In fact, this recipe is naturally dairy-free since it uses coconut milk instead of regular milk or cream. Just double-check that your panko breadcrumbs don’t contain any dairy ingredients if you’re particularly sensitive. Feel free to get creative with other non-dairy milks too—almond or cashew milk could work nicely!
🍗 What can I substitute for chicken tenders?
If you’re looking to switch things up, boneless skinless chicken breasts can be used instead of chicken tenders. Just cut them into strips roughly the same size as tenders for even cooking. Alternatively, you could use turkey breast strips or even firm tofu for a plant-based option. Just remember that cooking times may vary slightly depending on the thickness of what you’re using.
🔍 How many times did you test this recipe?
I tested this recipe seven times—yes, I might be a little mad! 😅 Each time I adjusted the seasonings and cooking time until I found the perfect balance of flavors and texture. Trust me; your taste buds will thank me for all that effort when you bite into these crispy delights!
🌶️ Can I add spices or other flavors to the breading?
Definitely! This recipe is super versatile when it comes to flavoring. You could add cayenne pepper for a spicy kick or Italian herbs like oregano and basil for a Mediterranean twist. If you’re feeling adventurous, try incorporating grated Parmesan cheese into the breadcrumb mixture (just keep in mind this will no longer be dairy-free). Experimenting with different spices can lead to your new favorite version!
Troubleshooting
I will continue to add more to this Troubleshooting section as I start seeing questions coming through from people who have made the recipe.
Troubleshooting tips
“My chicken tenders came out too dry! 😭”
- You may have overcooked the chicken tenders. Baking them for too long can lead to dryness, especially if they’re thin. Keeping an eye on their internal temperature is key; they should reach 165°F (74°C) but not much higher.
- You might not have used enough coconut milk in the wet mixture. This ingredient adds moisture, so ensure you’re using the full amount specified in the recipe.
- I bet they were still YUM though!
“The coating fell off my chicken tenders! 😩”
- If you didn’t let the excess wet mixture drip off before coating, it can make the breading too soggy to stick properly. Make sure to shake off any extra egg mixture.
- Pressing the breading onto the chicken tenders is essential. A gentle but firm press helps it adhere better. If you skipped this step, that could be why it didn’t stick!
- I bet they were still YUM though!
“My chicken tenders are unevenly browned! 🔥”
- If your oven isn’t properly preheated or if you overcrowded the baking sheet, it can cause uneven cooking and browning. Always preheat your oven fully and place the tenders with some space between them for even heat circulation.
- Not flipping them halfway through baking could also lead to one side being darker than the other. Be sure to turn them over as directed for consistent color!
- I bet they were still YUM though!
“The breading was too soft and mushy! 🤔”
- This might happen if you used wet or clumpy shredded coconut instead of fresh, dry coconut. Ensure your shredded coconut is unsweetened and not overly moist for that perfect crunch.
- If you skipped using panko breadcrumbs or didn’t use enough, it can affect texture. Panko provides that extra crunch, so don’t skip it next time!
- I bet they were still YUM though!
Baked Coconut Chicken Tenders
Ingredients
Method
- Preheat the oven to 400°F (200°C). Line a baking sheet with parchment paper and lightly spray with cooking spray.
- In a mixing bowl, combine shredded coconut, panko breadcrumbs, salt, black pepper, garlic powder, and paprika.
- In another bowl, whisk together the beaten eggs and coconut milk until well combined.
- Dip each chicken tender into the wet mixture, allowing excess to drip off, then coat with the breading mixture. Press gently to adhere.
- Place the coated chicken tenders on the prepared baking sheet. Bake in the preheated oven for 20-25 minutes, or until golden brown and cooked through, flipping halfway through.
- Remove from the oven and let cool slightly before serving. Enjoy with your favorite dipping sauce!