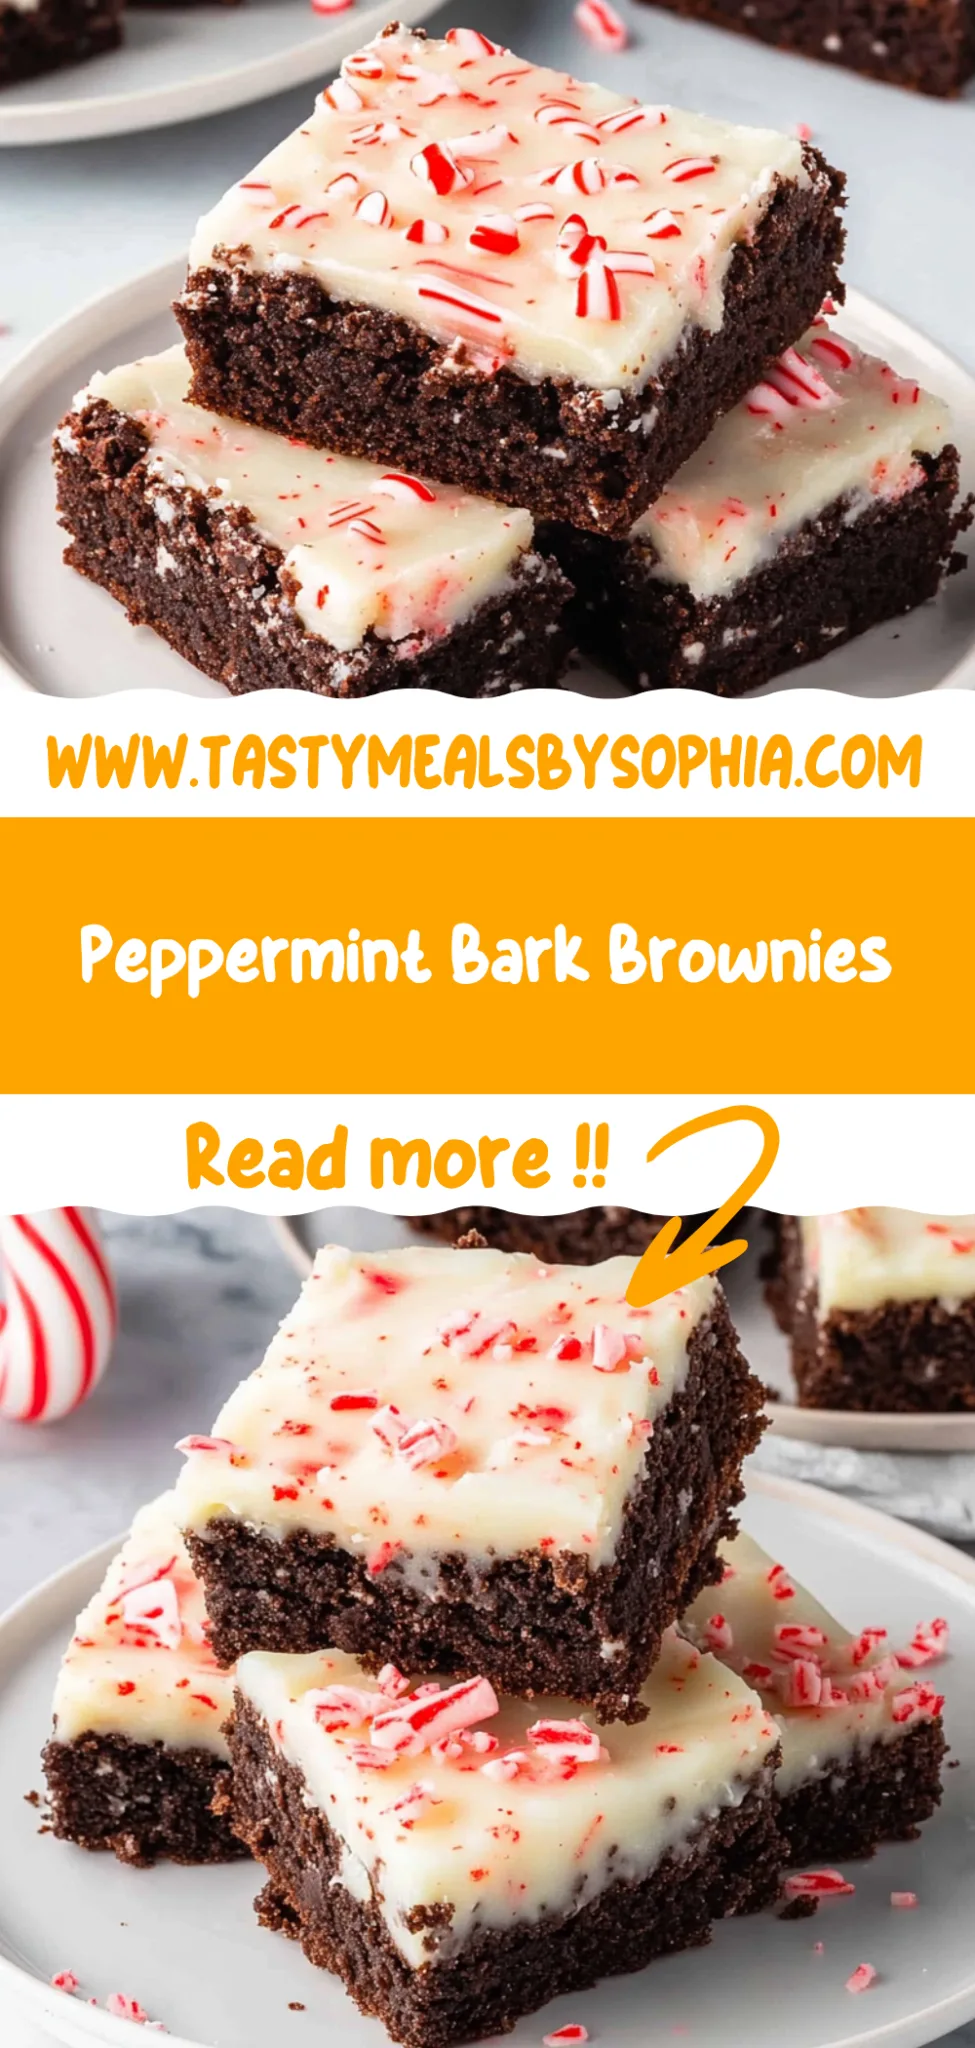
Peppermint Bark Brownies: Irresistibly Festive Treats
A few years back, I stumbled upon a cozy little café that had the most irresistible peppermint bark brownies. The moment I took a bite, my taste buds were singing! The combination of rich chocolatey goodness and that crisp, festive peppermint layer was just magical. I knew right then and there that I had to recreate this delightful treat at home. Plus, let’s be real—there’s nothing quite like the satisfaction of making a dessert that not only saves me some cash but also lets me put my personal touch on it!
After declaring war on my kitchen, I embarked on an epic journey to perfect my version of Peppermint Bark Brownies. Let me tell you, it wasn’t pretty—I think I nearly lost count after my fifth attempt! Each batch was a lesson in patience and resilience; I was tweaking the brownie texture, adjusting the sweetness, and trying to get that peppermint bark just right. At one point, I was convinced my oven had it out for me! But through all the trial and error, I kept dreaming about achieving that perfect balance of decadence and festive flair.
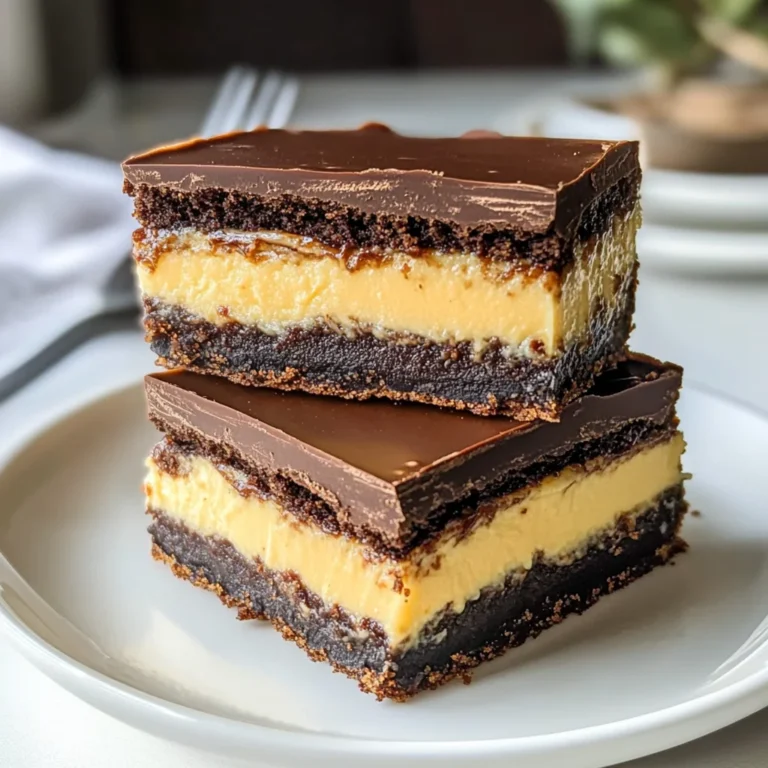
And oh boy, was it worth every bit of flour-covered chaos! The end result is a stunning brownie base that’s rich yet fudgy, topped with a glossy layer of peppermint bark that shatters beautifully with each bite. These Peppermint Bark Brownies have an incredible texture contrast—soft and chewy underneath with a crisp snap on top—and the flavor is pure holiday joy wrapped in chocolatey bliss. Trust me when I say you’re going to want to whip these up for your next festive gathering; they’ll vanish faster than you can say “more please!”
These Peppermint Bark Brownies are….
….the ultimate festive treat that combines rich chocolatey goodness with a refreshing peppermint twist!
1. They deliver an intense chocolate flavor that makes every bite a decadent experience. With 1 cup of unsweetened cocoa powder, the brownies are packed with deep chocolate richness that is perfectly balanced by the sweet and minty peppermint bark on top.
2. Irresistible texture – a perfect combination of chewy and fudgy. The melted butter and eggs create a moist brownie base that contrasts beautifully with the crisp layer of peppermint bark, resulting in an indulgent mouthfeel that’s hard to resist.
3. Elevated technique – I always melt the butter before mixing it into the batter, which not only enriches the flavor but also enhances the overall moisture of the brownies. This simple step ensures that every bite remains soft and gooey, setting these brownies apart from your average recipe.
4. Incredible value – making these Peppermint Bark Brownies at home is far more economical than purchasing gourmet versions from a bakery. With accessible ingredients like granulated sugar and all-purpose flour, you can whip up a batch that serves many without breaking the bank.
PS These brownies yield a generous 9×13 inch pan, perfect for sharing at holiday gatherings or enjoying throughout the week!
Ingredients for the Peppermint Bark Brownies
Each ingredient in this dish plays an essential role in flavor and texture. Here’s what you’ll need:
- 1 cup unsalted butter (melted): Creates a rich, moist base for the brownies.
- 2 cups granulated sugar: Sweetens the brownies and helps achieve a fudgy texture.
- 4 large eggs: Provides structure and richness to the brownie base.
- 1 teaspoon vanilla extract: Enhances the overall flavor with warm notes.
- 1 cup all-purpose flour: Adds stability while keeping the brownies soft and chewy.
- 1 cup unsweetened cocoa powder: Delivers a deep chocolate flavor that is essential to the brownies.
- 1 teaspoon baking powder: Helps the brownies rise slightly without losing their dense texture.
- 1/2 teaspoon salt: Balances sweetness and intensifies the chocolate flavor.
- 8 ounces white chocolate (chopped): Forms the creamy layer of peppermint bark on top.
- 1/2 cup crushed peppermint candies (for topping): Adds a delightful crunch and festive minty flavor.
- 1 teaspoon peppermint extract: Infuses the brownies with a refreshing peppermint essence.
Do NOT skip cooling the brownies! Trust me.
I’ll admit, I tried to rush this step because who has time to wait for brownies to cool? I thought, “They’re just brownies!” I was wrong. Cooling them completely is non-negotiable if you want that perfect texture and stunning presentation.
Here’s the scoop: allowing the brownies to cool properly lets them set and firm up, preventing that sad, gooey mess when you try to cut them. Think of it like letting a cake rest after baking—if you dive in too soon, it crumbles and falls apart. The same applies here; a little patience goes a long way in achieving those perfectly clean brownie squares topped with peppermint bark.
What does cooling the brownies do?
- Texture — Cooling allows the brownie structure to set, resulting in a firmer, more manageable texture when cutting.
- Cutting — It makes slicing easier and cleaner, preventing your beautiful peppermint bark layer from sliding off.
- Moisture retention — Proper cooling helps retain moisture within the brownies, creating that fudgy bite we all crave.
- Flavor development — Allowing them to rest enhances the chocolate flavor as it melds together with other ingredients.
- Presentation — A cooled brownie will hold its shape better, giving you those Instagram-worthy squares that are perfect for sharing!
Different cooling times
- 1 hour (good) — Brownies are still warm but have begun to set; cutting will result in some messy edges.
- 2 hours (better) — Sufficiently cooled for clean cuts while still retaining some delightful softness inside.
- 3 hours (best) — Achieves a perfect balance of fudginess and firmness; these are ready for that peppermint bark topping!
- Overnight (ultimate) — Intensifies flavor and texture even further; you’ll be rewarded with rich chocolatey goodness.
Don’t even think about cutting into those brownies before they’ve cooled completely! It’s a recipe for disaster—the topping will slide right off, leaving you with a sad pile of chocolate mush instead of beautiful squares. Trust me, wait it out!
How to make Peppermint Bark Brownies
Are you ready to see how straightforward it is to make the Peppermint Bark Brownies of your dreams??
1. PREPARE THE BROWNIE BASE
Let’s get started on those rich and fudgy brownies that will act as the perfect canvas for our peppermint bark topping!
1. PREHEAT – Preheat the oven to 350°F (175°C) and grease a 9×9 inch baking pan with parchment paper. This will ensure your brownies come out easily without any sticky bits left behind!
2. WHISK – In a mixing bowl, whisk together the melted butter and granulated sugar until smooth. This step is crucial because it helps to create a nice, glossy batter that will result in moist brownies.
3. ADD EGGS – Add the eggs one at a time, mixing well after each addition. Stir in the vanilla extract. This gradual incorporation adds air into the mixture, leading to a lighter texture.
4. COMBINE DRY INGREDIENTS – In another bowl, combine the all-purpose flour, unsweetened cocoa powder, baking powder, and salt. Gradually add this dry mix to the wet ingredients, mixing until just combined. ❓ Why does this matter? Overmixing can lead to tough brownies — we want them soft and fudgy!
5. POUR – Pour the brownie batter into the prepared baking pan and spread it evenly using a spatula.
6. BAKE – Bake for 25-30 minutes or until a toothpick inserted in the center comes out with a few moist crumbs attached. You want them baked just enough so they’re not gooey but still soft!
7. COOL – Allow the brownies to cool completely in the pan before adding the peppermint bark topping. This ensures that your chocolate topping won’t melt into a gooey mess.
HANDY TIPS
- If you prefer an even richer flavor, try using dark cocoa powder instead of unsweetened cocoa!
- You can also experiment with adding nuts or chocolate chips to your brownie batter for an extra crunch.
2. PREPARE THE PEPPERMINT BARK TOPPING
Now for the festive part! Let’s make that delicious peppermint bark topping that takes these brownies over the top.
8. MELT WHITE CHOCOLATE – In a double boiler, melt the chopped white chocolate over low heat until smooth. Stir frequently to prevent burning; nobody wants burnt chocolate!
9. FLAVOR – Remove from heat and stir in peppermint extract. This will infuse your chocolate with that refreshing minty flavor we love so much during the holidays!
10. POUR AND SPREAD – Pour the melted white chocolate over the cooled brownies, spreading it evenly across the surface with a spatula.
11. SPRINKLE – Sprinkle crushed peppermint candies generously on top of the melted chocolate while it’s still warm so they stick perfectly!
12. SET IN FRIDGE – Refrigerate for at least 1 hour until the chocolate is set completely and firm enough to slice neatly.
13. CUT AND SERVE – Once set, cut into squares and serve these delightful treats at your next gathering or simply enjoy them yourself!
HANDY TIPS
- For more intense peppermint flavor, increase crushed candies on top or use peppermint extract in both layers!
- If you’re short on time, you can also use store-bought peppermint bark instead of making your own topping!
What an accomplishment! You’ve just made decadent Peppermint Bark Brownies that are sure to impress anyone who tries them! Make these once, and I wager they will invade your dreams every night too! – Nagi x
FAQ – Peppermint Bark Brownies
🍫 How long will these brownies keep?
These Peppermint Bark Brownies will keep well for up to 5 days if stored properly. I recommend placing them in an airtight container at room temperature, where they’ll maintain about 90% of their deliciousness on day 5. If you want to extend their freshness, refrigerating them can increase their shelf life to about a week. Just keep in mind that refrigeration might slightly alter the texture; they could become a bit denser but still scrumptious.
❄️ Do I really have to chill? YES YOU DO.
Yes, chilling is crucial! After you pour the melted white chocolate over your cooled brownie base and sprinkle on those delightful crushed peppermint candies, you need to refrigerate them for at least 1 hour. This step allows the white chocolate to set properly, creating that distinct layer of peppermint bark on top. Skipping this step would result in a gooey mess when you try to slice into the brownies, so don’t even think about it!
🥶 Can I freeze these brownies for later?
Absolutely! You can freeze these Peppermint Bark Brownies for up to 3 months. To do this, make sure they are completely cooled and set first. Cut them into squares and layer them between sheets of parchment paper in an airtight container or freezer bag. When you’re ready to enjoy them, simply thaw them overnight in the refrigerator or at room temperature for a couple of hours. They’ll taste almost as fresh as when you made them!
🌾 Can these be made gluten free?
Yes, you can make these brownies gluten free! Substitute the all-purpose flour with a 1: 1 gluten-free flour blend designed for baking. I’ve tested this with brands like Bob’s Red Mill and King Arthur Flour, both yielding fantastic results without compromising texture or flavor. Just be sure to check that your peppermint candies are also gluten free if you’re very sensitive.
🍬 Can I reduce the sugar or substitute it with sweeteners?
No, you cannot reduce the sugar — I tried multiple times and found that reducing it makes the brownies too dry and less fudgy. The sugar not only sweetens but also contributes to the overall texture and moistness of the brownies. If you’re looking for alternatives, consider using coconut sugar or a granulated sweetener designed for baking; just remember that some substitutes may alter the flavor profile slightly.
🔥 Why do I need to melt the butter before mixing?
Melting the butter is key for achieving that signature fudgy brownie texture! When butter is melted and combined with sugar, it creates a smooth batter that helps maintain moisture throughout baking. This method also allows sugar to dissolve more efficiently compared to using softened butter, leading to a denser brownie structure that we all crave.
🎉 Can I add other toppings or mix-ins?
Certainly! You can customize these brownies by adding your favorite mix-ins such as nuts (like walnuts or pecans), chocolate chips (dark or semi-sweet), or even swirls of caramel before baking. For additional festive flair, consider drizzling melted dark chocolate over the top after chilling. Just remember not to overload them — balance is key for keeping that rich brownie base intact!
Troubleshooting
I will continue to add more to this Troubleshooting section as I start seeing questions coming through from people who have made the recipe.
Troubleshooting tips
“My brownies turned out too dry! 😩”
- You may have overbaked them. Keeping an eye on the baking time is crucial; if they bake for too long, they will dry out. A toothpick should come out with a few moist crumbs, not completely clean.
- If you didn’t measure your ingredients accurately, particularly the flour, it could lead to a drier texture. Too much flour can absorb moisture and create a dry brownie.
- I bet they were still YUM though!
“My brownies are too thin and flat! 😢”
- If you didn’t use the correct size pan (9×9 inches), your brownies might spread out too much. A larger pan will make them thinner and cook faster, leading to a flatter result.
- Not mixing the wet ingredients enough can also prevent the batter from gaining volume. Ensure everything is well combined before pouring into the pan.
- I bet they were still YUM though!
“There are cracks on the surface of my brownies! 😱”
- Overmixing the batter after adding flour can create excess air bubbles that expand during baking, causing cracks on the surface. Mix until just combined!
- If your oven temperature was too high, it could cause the outside to rise quickly while the inside remains gooey, leading to cracks. Use an oven thermometer to ensure accuracy.
- I bet they were still YUM though!
“My peppermint bark didn’t set properly! 🤔”
- You might not have allowed enough time for the chocolate to cool in the fridge. It requires at least an hour to fully set and harden.
- If you melted the white chocolate at too high of a temperature or didn’t stir continuously, it may not have thickened properly for pouring over the brownies.
- I bet they were still YUM though!