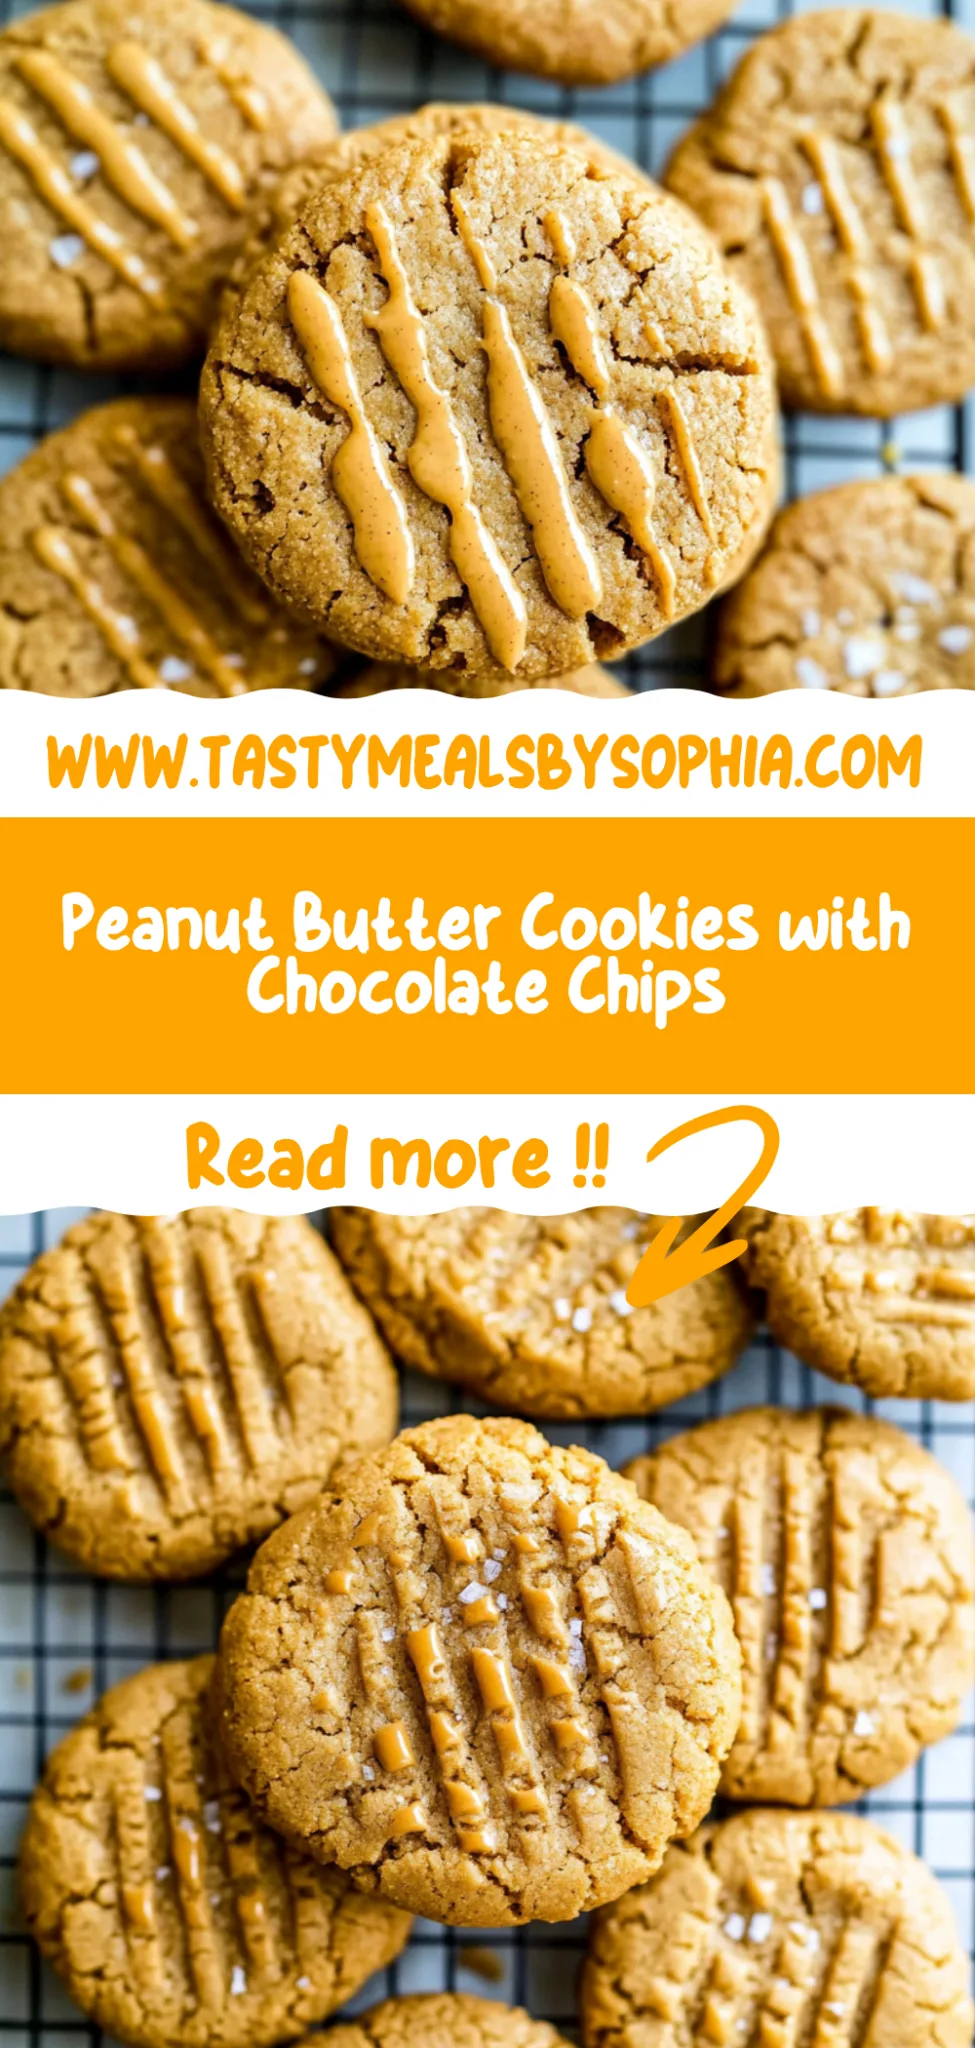
Peanut Butter Cookies: Soft and Chewy Perfection at Home
You know, my love for Peanut Butter Cookies started at this little café I stumbled upon during my college days. They had the most incredible cookies—soft, chewy, and packed with that rich peanut butter flavor that made every bite feel like a warm hug. I remember thinking that if I could recreate those cookies at home, I’d never have to leave the house for a treat again. Plus, let’s be honest, making them myself would save me a bit of cash and give me the chance to make them exactly how I like—extra nutty and just a tad more decadent!
After countless attempts (I’m talking about an embarrassingly high number) to get my peanut butter cookie recipe just right, I finally nailed it. It took me a few late-night baking sessions where I may or may not have eaten my weight in dough, but each batch was a step closer to perfection. My goal was simple: I wanted cookies that were soft without being too crumbly and chewy without feeling like a workout for my jaw—let’s just say some batches ended up resembling hockey pucks!
But oh boy, was it worth it! The final result? Deliciously soft and chewy Peanut Butter Cookies that are not only quick to whip up but are also perfect for any occasion. Each cookie is bursting with flavor, has that perfect slightly crisp edge while remaining gooey in the center, and they hold up beautifully for days (if you can resist eating them all at once!). Trust me; once you dive into these beauties, you’ll be hooked—and I can’t wait for you to give them a try!
These Peanut Butter Cookies are….
….the ultimate indulgence that will have you reaching for seconds!
1. They deliver a decadent, nutty flavor that comes from the rich peanut butter. The combination of creamy or chunky peanut butter with brown sugar creates a deep, sweet taste that is simply irresistible and takes your taste buds on a delightful journey.
2. Incredible texture – soft and chewy with just the right amount of bite. I love how the balance between the flour and baking soda creates a cookie that has a slight crispness on the outside while remaining wonderfully gooey in the center.
3. Effortless technique – mixing in the brown sugar adds moisture and depth, making these cookies unbelievably tender. This simple step means you don’t need to worry about overmixing; just combine until blended for that perfect cookie consistency.
4. Budget-friendly – these Peanut Butter Cookies are easy on the wallet! With just a few pantry staples like flour, peanut butter, and brown sugar, you can whip up a batch at home without sacrificing flavor or quality, saving you money compared to store-bought alternatives.
PS These cookies yield about 24 delightful bites of goodness, perfect for sharing or savoring all week long!
What You’ll Need for Peanut Butter Cookies
Each ingredient in this dish plays an essential role in flavor and texture. Here’s what you’ll need:
1 cup all-purpose flour: Provides the structure for a soft, chewy cookie.
1 tsp baking soda: Helps the cookies rise to a perfect texture.
1 tsp salt: Enhances the sweetness and balances the flavors.
1 cup peanut butter (creamy or chunky): Delivers rich, nutty flavor and moisture.
1 cup brown sugar (packed): Adds depth of sweetness and helps keep cookies soft.
1 large egg: Binds the ingredients together for a cohesive dough.
- 1 tsp vanilla extract: Infuses warmth and enhances the overall flavor profile.
You Must Preheat the Oven. No Exceptions!
I confess, I’ve tried to skip this step before, thinking that it wouldn’t make a difference. After all, what’s a few minutes here or there? But time and time again, I found myself regretting it when my cookies turned out unevenly baked. Trust me, I learned the hard way that there are no shortcuts when it comes to preheating the oven for these Peanut Butter Cookies!
The science behind preheating is simple but crucial. When you place your cookie dough into a hot oven, it immediately starts to bake and puff up. This rapid reaction helps create that perfect soft and chewy texture we all crave, while also ensuring that the edges get lightly golden without overcooking the inside. Think of it like warming up before a workout; your body needs to be ready to perform at its best—and so does your oven!
What Does Preheating the Oven Do?
- Consistent Texture — Starting in a hot oven ensures even cooking throughout, preventing any raw centers while achieving that desirable chewiness.
- Better Rise — The heat causes the baking soda to activate quickly, giving your cookies the lift they need right from the start.
- Enhanced Flavor — A preheated oven allows sugars to caramelize properly on the outside, enriching the overall flavor profile of each cookie.
- Crispy Edges — Baking them straight into a hot environment helps form those lovely crispy edges that contrast beautifully with the soft center.
- Even Color — Preheating promotes an even browning effect; otherwise, you risk pale cookies with uneven spots.
Different Preheating Times
- No Preheat (poor) — The cookies may spread too much and turn out flat and soggy in spots.
- 5 minutes (okay) — Better than nothing, but you’ll still notice inconsistencies in texture and color.
- 10 minutes (good) — On the right track! The cookies will bake more evenly but still won’t reach peak performance.
- 15 minutes or more (best) — Optimal results! Your cookies will be perfectly risen with a beautiful golden color and delightful chewiness.
Make sure you don’t skip preheating your oven! The most common mistake is tossing in cookie dough into a cold oven—this leads to lackluster cookies that are more cake-like than chewy. Take that extra time; your taste buds will thank you!
How to make Peanut Butter Cookies
Are you ready to see how straightforward it is to make the Peanut Butter Cookies of your dreams??
1. PREPARE THE OVEN
First things first, let’s get that oven ready for some cookie magic!
Preheat – Preheat your oven to 350°F (175°C). This temperature is perfect for baking the cookies so they come out soft and chewy.
2. MIX DRY INGREDIENTS
Time to gather our dry ingredients and mix them up!
Whisk – In a mixing bowl, whisk together the all-purpose flour, baking soda, and salt until well combined. This ensures even distribution of the leavening agent and seasoning throughout your dough.
3. MIX WET INGREDIENTS
Now let’s create that delicious peanut butter base!
Combine – In another bowl, combine the peanut butter, packed brown sugar, egg, and vanilla extract. Mix until smooth and creamy. The brown sugar adds that lovely caramel flavor while keeping the cookies moist.
4. COMBINE MIXTURES
It’s time to bring everything together into one harmonious dough!
Stir – Gradually add the dry ingredients to the wet mixture, stirring until just combined. Be careful not to overmix; this helps keep your cookies soft and tender!
5. SHAPE COOKIES
Let’s get those cookies formed and ready for baking!
Scoop – Scoop tablespoon-sized amounts of dough and roll them into balls using your hands. Place these on a baking sheet lined with parchment paper, leaving space between each ball for spreading.
6. FLATTEN COOKIES
A little fork action coming up!
Flatten – Use a fork to gently flatten each cookie ball and create a crisscross pattern on top. This not only looks cute but helps them bake evenly too!
7. BAKE
The moment we’ve all been waiting for: it’s baking time!
Bake – Place the cookies in the preheated oven and bake for 8-10 minutes or until the edges are lightly golden. You’ll know they’re done when your kitchen fills with that irresistible peanut butter aroma!
8. COOL
Patience is key as we wait for these cookies to cool down!
Cool – Remove from the oven and let cool on the baking sheet for 5 minutes before transferring them to a wire rack to cool completely. This step helps them set perfectly without falling apart.
HANDY TIPS
- For Chewier Cookies: Don’t overmix after adding dry ingredients; this keeps them light!
- Chunky Peanut Butter: If you prefer a bit of crunch in your cookies, go for chunky peanut butter — it adds texture!
- Smaller Cookies? Roll into smaller balls if you want bite-sized treats — just adjust baking time slightly.
Make these once, and I wager they will invade your dreams every night too! – Nagi x
FAQ – Peanut Butter Cookies
How long will these cookies keep?
Peanut butter cookies can last up to 1 week when stored in an airtight container at room temperature. After day 3, I found they maintain about 97% of their deliciousness, but the texture may start to soften a bit more. For optimal freshness, you can also refrigerate them, which can extend their shelf life by a few days—just remember to let them come back to room temperature before enjoying!
❄️ Do I really have to chill? YES YOU DO.
Nope, you don’t need to chill the dough for these peanut butter cookies! I’ve tested both chilled and unchilled versions, and honestly, saving that time means you get to enjoy these chewy delights even quicker. So skip the chilling step and dive right into baking; your taste buds will thank you!
❄️ Can I freeze the cookie dough for later use?
Absolutely! You can freeze the cookie dough for up to 3 months. Simply scoop tablespoon-sized portions of dough onto a baking sheet lined with parchment paper and freeze until solid. Then transfer them to a zip-top bag or airtight container. When you’re ready to bake, just preheat your oven and place the frozen dough balls directly on the baking sheet—no need to thaw! Just add an extra minute or two of baking time.
🌾 Can these be made gluten free?
Yes, you can easily make these peanut butter cookies gluten free by substituting the all-purpose flour with a gluten-free flour blend. I recommend using one that includes xanthan gum for better texture. Just remember, different blends can yield slightly different results in terms of texture—so feel free to experiment! They’ll still be soft and chewy, just like the original version.
Can I reduce the sugar or substitute with sweeteners?
No, you cannot reduce the sugar without compromising the texture and flavor of these cookies—trust me, I tried it multiple times! The brown sugar not only sweetens but also contributes moisture and chewiness. If you’re looking for alternatives, you could try using coconut sugar or a sugar substitute like erythritol in equal amounts, but expect slight changes in flavor and texture.
Why do we flatten the cookies with a fork?
Flattening the cookies helps them bake evenly while creating that signature crisscross pattern we all know and love. This technique not only makes for a visually appealing cookie but also increases surface area, which promotes better browning and crisping around the edges while keeping the center soft—and who doesn’t want that perfect balance?
What add-ins can I include in my peanut butter cookies?
Feel free to customize your peanut butter cookies by adding mix-ins like chocolate chips, chopped peanuts, or even dried fruits like cranberries or raisins for a twist! Typically, I stick with about ½ cup of add-ins per batch; just remember that adding too many extras might alter how well they hold together during baking. But hey, more flavor is always a good thing in my book!
Troubleshooting
I will continue to add more to this Troubleshooting section as I start seeing questions coming through from people who have made the recipe.
Troubleshooting tips
“My cookies came out too flat! 😱”
- Your dough may have been too warm when you shaped the cookies. Warm dough spreads more during baking, leading to flat cookies. Try chilling the dough for about 30 minutes before baking next time.
- You might not have used enough flour. If you packed your flour into the measuring cup instead of spooning it in, you could end up with less flour than needed, which makes the cookies spread. Always fluff up your flour before measuring!
- The baking soda might not have been fresh. If your baking soda is old, it can lose its leavening power, resulting in flatter cookies. Check the expiration date on your baking soda to ensure it’s still active.
I bet they were still YUM though!
“My cookies turned out too dry and crumbly! 😩”
- Overmixing the dough after adding the dry ingredients can develop gluten, making your cookies tougher and drier. Mix just until combined for that soft texture!
- You may have added too much flour by accident, especially if you didn’t level it off properly when measuring. A little extra flour can cause dryness—make sure you’re accurate next time!
- If your peanut butter was too thick or dry (especially if using a natural variety), it might not provide enough moisture. Opt for creamy peanut butter or stir natural ones well before measuring.
I bet they were still YUM though!
“The surface of my cookies split and had massive crevices 😭”
- Your oven temperature could be too high, causing the outer edges to cook faster than the inside, leading to cracking. Make sure your oven is properly calibrated to 350°F (175°C).
- If you didn’t flatten them enough before baking, they may rise unevenly, resulting in cracks. Be sure to give each cookie a good press with your fork for that lovely crisscross pattern!
- Using a very cold egg can also lead to uneven baking since it causes the dough temperature to drop suddenly. Let your eggs reach room temperature before mixing them in.
I bet they were still YUM though!
“My cookies are way too sweet! 🍬”
- You might have packed your brown sugar too tightly when measuring it, which would result in using more sugar than intended. Lightly spooning and leveling off is key!
- Consider how much peanut butter you used; some brands are sweeter than others. If you typically use a sweeter brand, you might want to adjust the sugar next time.
- Adding toppings like chocolate chips or candies can also make them overly sweet; be mindful of what extras you’re including next time.
I bet they were still YUM though!