Double Chocolate Brownie Truffles: Indulgent Treats (3 Wa…
I remember the first time I had a double chocolate brownie truffle at this little café downtown. It was one of those moments where my taste buds did a happy dance, and I thought, “I need to recreate this magic at home!” The richness of the chocolate, the fudginess of the brownie, and that delightful truffle texture were simply irresistible. Plus, let’s be honest—who doesn’t want to indulge in decadent treats without breaking the bank or waiting in line? So, I set out on a mission to make these heavenly bites even better right in my own kitchen.
The journey wasn’t as smooth as those luscious truffles would suggest. I must’ve attempted this recipe at least five times, and let me tell you, there were some epic fails along the way! From brownies that turned into a sticky mess to truffles that could’ve doubled as doorstops, I learned a lot about what works and what definitely doesn’t. Each iteration focused on achieving that perfect balance of gooeyness and richness while playing with flavors—like adding mint or peanut butter for some fun twists. You’d think after all that trial and error I’d be a professional chocolatier by now!
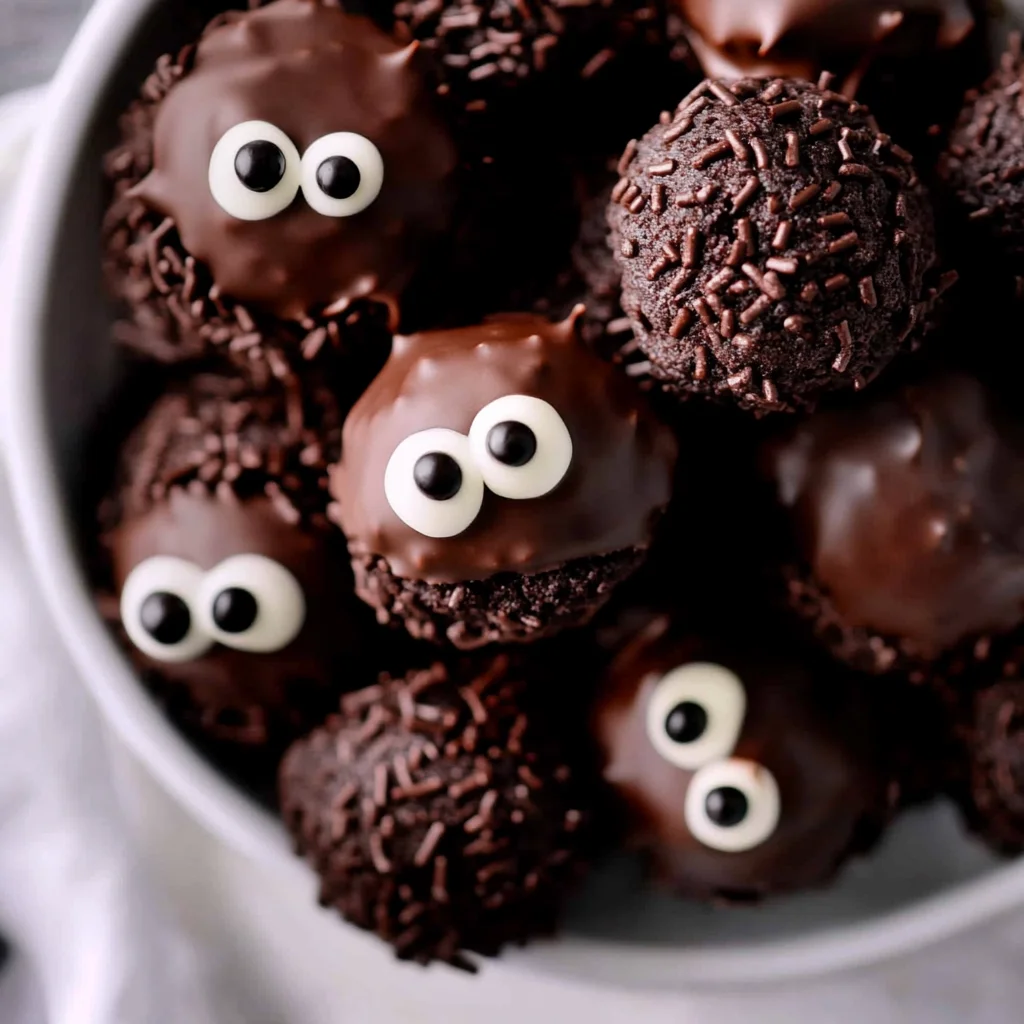
But oh boy, was it all worth it! The final result is an explosion of chocolate goodness that melts in your mouth—rich, fudgy, and oh-so-decadent. These Double Chocolate Brownie Truffles (3 ways!) come in three delightful variations: classic for the traditionalists, mint for a refreshing kick, and peanut butter for those who just can’t resist that creamy goodness. With their irresistible texture and intense flavor, they’re bound to impress anyone lucky enough to snag one. So grab your apron and let’s dive into making these heavenly bites together; trust me, you won’t regret it!
These Double Chocolate Brownie Truffles (3 ways!) are…
…a decadent chocolate lover’s dream come true!
1. They deliver an intense chocolate flavor that will satisfy even the most discerning sweet tooth. By using both semi-sweet chocolate chips and unsweetened cocoa powder in the brownie base, I achieved a rich depth of chocolate that’s truly unparalleled. Each bite is a luscious explosion of flavor that’s hard to resist.
2. Irresistible texture – a perfect balance of fudgy and chewy. The combination of melted butter and eggs creates a moist, dense brownie base, while the generous dose of chocolate chips adds delightful little pockets of gooeyness that elevate every truffle into a bite-sized piece of heaven.
3. A standout baking technique is the careful mixing method I adopted to maintain the brownies’ moisture. By folding the dry ingredients gently into the wet, I ensured that no air was whipped in, which can lead to dryness. This technique results in brownies that are soft and decadent, making them ideal for truffle-making.
4. Exceptional value – these truffles are easy to make at home without breaking the bank. With basic pantry staples like flour, sugar, and cocoa powder, you can whip up a batch of these indulgent treats for a fraction of what you’d pay at a gourmet shop or bakery, giving you more reasons to indulge!
PS These truffles are quite generous in size—perfect for sharing (or not!).
Ingredients for the Double Chocolate Brownie Truffles (3 ways!)
Each ingredient in this dish plays an essential role in flavor and texture. Here’s what you’ll need:
1 cup unsalted butter (melted): Provides richness and a fudgy texture to the brownies.
2 cups granulated sugar: Contributes sweetness and helps create a chewy consistency.
1 cup brown sugar (packed): Adds moisture and a subtle caramel flavor.
4 large eggs: Binds the ingredients together while adding structure and moisture.
1 teaspoon vanilla extract: Enhances the overall flavor with warm, aromatic notes.
1 cup all-purpose flour: Gives structure to the brownies without making them too dense.
1 cup unsweetened cocoa powder: Delivers deep chocolate flavors for that indulgent taste.
1 teaspoon baking powder: Helps the brownies rise slightly, creating a lighter texture.
1/2 teaspoon salt: Balances sweetness and intensifies the chocolate flavor.
1 cup semi-sweet chocolate chips: Adds pockets of melted chocolate for extra decadence.
Mint Variation
1/2 teaspoon peppermint extract: Infuses a refreshing minty flavor that brightens the truffles.
1 cup white chocolate (for coating): Creates a sweet, creamy exterior that complements the chocolate inside.
1/4 cup green sprinkles (for decoration): Adds a fun pop of color and festive flair.
Peanut Butter Variation
1/2 cup creamy peanut butter: Introduces a rich, nutty flavor that pairs beautifully with chocolate.
1 cup milk chocolate (for coating): Provides a smooth, sweet layer that enhances the overall treat.
1/4 cup chopped peanuts (for decoration): Offers a crunchy texture and additional nutty flavor.
You must let the brownies cool completely. Seriously!
I get it, waiting is hard! I tried to shortcut this step because, let’s be honest, who wants to wait when you can dive into those chocolatey goodness right away? Spoiler alert: I was wrong. Those warm brownies crumble like a sad sandcastle instead of forming the rich truffles we all dream of. Trust me, I learned this the hard way (more than once!).
So why does letting the brownies cool completely matter? Think of it as letting your dough rest before rolling out pizza—when it’s too warm, it can’t hold its shape properly. The cooling process allows the structure to set and firm up, which is crucial for those perfect truffle bites. If you skip this step, you’ll end up with a gooey mess rather than luscious truffles that are easy to handle.
What does cooling the brownies do?
- Texture — Allows the brownies to firm up, making them easier to crumble without turning into mush.
- Shape — Prevents the truffle mixture from being too soft, ensuring you can form neat balls.
- Flavor Concentration — Cooling enhances the chocolate flavor as it settles and melds together into a more cohesive bite.
- Moisture Control — Reduces excess moisture which can lead to overly wet truffles that won’t hold their shape when coated.
- Ease of Handling — Chilled brownies are less sticky, making it simpler to work with when forming truffles.
Different cooling times
- 30 minutes (good) — Enough time for surface cooling but still warm inside; truffles may be softer and harder to shape.
- 1 hour (better) — Reasonably firm; you’ll get better results for shaping but may still have some gooeyness in the center.
- 2 hours (great) — The ideal time where brownies are fully set and perfect for crumbling; your truffles will maintain their shape beautifully.
- Overnight (best) — Ultimate firmness achieved; flavors deepen and enhance—perfect for heavenly truffles.
Don’t underestimate this step! The most common mistake is trying to rush through cooling time. If you think a quick 15-minute chill will cut it, think again. It won’t work—trust me on this one!
How to make Double Chocolate Brownie Truffles (3 ways!)

Are you ready to see how straightforward it is to make the Double Chocolate Brownie Truffles (3 ways!) of your dreams??
1. PREPARE BROWNIE BASE
Let’s kick things off by baking a rich brownie base that will serve as the delicious foundation for your truffles!
1. Preheat – Preheat the oven to 350°F (175°C). Grease and line a baking pan with parchment paper, ensuring the edges are covered for easy removal later.
2. Mix – In a mixing bowl, combine melted butter, granulated sugar, and brown sugar. Mix until smooth and creamy; this step is crucial for achieving the perfect fudgy texture in your brownies.
3. Add – Add eggs and vanilla extract, mixing until well combined. This adds moisture and flavor that will elevate your brownie base!
4. Whisk – In another bowl, whisk together flour, cocoa powder, baking powder, and salt. Gradually add this dry mixture to the wet ingredients, mixing until just combined — overmixing can lead to dense brownies!
5. Fold – Gently fold in the chocolate chips for that extra burst of chocolate goodness throughout your brownies!
6. Bake – Pour the batter into the prepared baking pan and bake for 25 minutes or until a toothpick comes out with a few moist crumbs — this ensures they are perfectly baked without being dry.
7. Cool – Let the brownies cool completely in the pan before moving on to forming truffles; this step is vital for achieving the right consistency when crumbling.
HANDY TIPS
- For softer brownies, bake for 23 minutes instead of 25 — keep an eye on them!
- If you’re after an ultra-rich flavor, consider adding a pinch of espresso powder when mixing in the dry ingredients!
2. FORM TRUFFLES
Now that you have your cooled brownie base, it’s time to transform it into delightful truffles!
8. Crumble – Once cooled, crumble the brownies into a large bowl using your hands or a fork; aim for small pieces so they mix well with other ingredients later.
9. Add Flavor – For the mint variation, add peppermint extract and mix well; if you’re making peanut butter truffles, add creamy peanut butter and mix until fully combined — this will give each variation its signature taste!
10. Scoop – Using a cookie scoop or your hands, form small balls from the brownie mixture and place them on a parchment-lined tray; aim for about 1-inch size balls for bite-sized treats!
11. Chill – Refrigerate the truffles for at least 30 minutes to firm up; this is essential to ensure they hold their shape when being coated.
HANDY TIPS
- If you find the mixture too sticky to handle easily, chill it briefly in the fridge before scooping.
- Don’t skip chilling—this makes coating them much easier!
3. COAT TRUFFLES
The final phase is where all your hard work pays off with beautiful coatings that look as good as they taste!
12. Melt – Melt the white chocolate in a double boiler for the mint variation and milk chocolate for the peanut butter variation; be sure not to overheat it as burnt chocolate can spoil your coating! ❓ Why does this matter? Because gently melting ensures a smooth dip without clumps!
13. Dip – Dip each truffle into the melted chocolate using two forks or a dipping tool, ensuring they are fully coated; let excess chocolate drip off before placing them back on parchment paper.
14. Decorate – Place the coated truffles back on parchment paper and sprinkle with green sprinkles or chopped peanuts as desired — get creative here! 💡 TIP: While still wet, you can also drizzle contrasting chocolate over them for an elegant touch!
15. Set – Allow the chocolate to set at room temperature or refrigerate until firm; once set, these little delights are ready to enjoy!
HANDY TIPS
- If you want thicker coatings on your truffles, dip them twice—let them set between dips!
- Use quality chocolate for coating as it greatly enhances both flavor and appearance.
You’ve just created delightful Double Chocolate Brownie Truffles in three scrumptious variations! Whether you choose classic chocolatey goodness or opt for minty fresh or nutty peanut butter flavors, these treats are bound to impress everyone who tries them (including yourself!). Make these once, and I wager they will invade your dreams every night too! – Nagi x
FAQ – Double Chocolate Brownie Truffles (3 ways!)
How long will these truffles keep?
These Double Chocolate Brownie Truffles can last in the fridge for about 5-7 days. I found that they maintain their deliciousness quite well during this time; they are still 97% as good on day 3! After a week, you might notice a slight decline in texture, but they are still safe to eat. Just keep them in an airtight container to keep them fresh and avoid absorbing any odors from your fridge.
❄️ Do I really have to chill? YES YOU DO.
Yes, chilling is essential for these truffles! After forming the balls from the brownie mixture, refrigerate them for at least 30 minutes. This step helps them firm up, making it easier to coat them in chocolate without losing shape. If you skip this step, you risk having melty blobs instead of perfectly shaped truffles—trust me, I learned this the hard way!
Can I freeze these truffles?
Absolutely! You can freeze the truffles after they’ve been formed but before coating them. Just place them on a baking sheet lined with parchment paper and freeze until solid (about 1-2 hours). Once frozen, transfer them to an airtight container or zip-top bag. They can be stored in the freezer for up to 3 months. When you’re ready to enjoy, just let them thaw in the fridge overnight before coating.
🌾 Can these be made gluten free?
Yes! To make these truffles gluten-free, simply substitute the all-purpose flour with a gluten-free flour blend. I’ve tested this with both almond flour and a standard gluten-free baking mix, and both worked beautifully. The key is ensuring that your chocolate chips and coatings are also gluten-free, as some brands may contain gluten.
Can I reduce the sugar or substitute with sweeteners?
No, you cannot reduce the sugar in this recipe without affecting the texture and flavor significantly. I’ve tried various reductions and substitutions—like coconut sugar or erythritol—but found that it just doesn’t yield the same decadent result. The sugars play a crucial role not only in sweetness but also in achieving that rich fudgy brownie base we all love!
Why do I need to fold in chocolate chips?
Folding in chocolate chips rather than mixing them aggressively is crucial for maintaining the integrity of your brownie batter. By gently folding, you help preserve air bubbles created during mixing, which contributes to a lighter texture while still ensuring those delicious pockets of melted chocolate throughout your brownies. Trust me—this extra care makes a difference!
What other variations can I try?
You can get creative with these truffles! Here are some ideas:
- Nutella Swirl: Mix in some Nutella instead of peanut butter for a hazelnut twist.
- Espresso: Add espresso powder to the brownie base for a coffee-flavored kick.
- Coconut: Sprinkle some shredded coconut into the mixture or use coconut-coated chocolate for coating.
Experimenting is half the fun—you never know what delicious combinations you’ll discover!
Troubleshooting
I will continue to add more to this Troubleshooting section as I start seeing questions coming through from people who have made the recipe.
Troubleshooting tips
“My brownies came out too dry! 😭”
- You may have overbaked them. If you bake the brownies longer than the recommended 25 minutes, they can become dry. It’s best to check for doneness a minute or two early.
- You might have measured your flour incorrectly. Too much flour can lead to a dry texture, so be sure to spoon and level it instead of scooping directly from the bag.
- I bet they were still YUM though!
“My truffles are melting and falling apart! 😱”
- If you didn’t refrigerate the brownie mixture long enough, the truffles won’t hold their shape when dipped in chocolate. Make sure to chill them for at least 30 minutes before coating.
- The brownie base might have been too moist. If you added too many chocolate chips or didn’t let the brownies cool completely, the mixture can be too soft. Next time, double-check your measurements and cooling time!
- I bet they were still YUM though!
“My truffles are unevenly shaped! 😂”
- This could be due to not using a cookie scoop or your hands being too warm when shaping them. A cookie scoop helps ensure uniformity, so give that a try next time!
- If you crumbled the brownies too finely, it could make it harder to form cohesive balls. Use larger pieces for better structure.
- I bet they were still YUM though!
“My chocolate coating is not smooth! 😩”
- If you melted the chocolate at too high of a temperature, it can seize up and become grainy. Always melt chocolate slowly in a double boiler over low heat.
- You may not have used enough oil or shortening when melting your chocolate. Adding a teaspoon of oil can help achieve that glossy finish.
- I bet they were still YUM though!
Double Chocolate Brownie Truffles (3 ways!)
Ingredients
Method
- Preheat the oven to 350°F (175°C). Grease and line a baking pan with parchment paper.
- In a mixing bowl, combine melted butter, granulated sugar, and brown sugar. Mix until smooth.
- Add eggs and vanilla extract, mixing until well combined.
- In another bowl, whisk together flour, cocoa powder, baking powder, and salt. Gradually add to the wet ingredients, mixing until just combined.
- Fold in the chocolate chips.
- Pour the batter into the prepared baking pan and bake for 25 minutes or until a toothpick comes out with a few moist crumbs.
- Let the brownies cool completely in the pan.
- Once cooled, crumble the brownies into a large bowl.
- For the mint variation, add peppermint extract and mix well. For the peanut butter variation, add creamy peanut butter and mix until combined.
- Using a cookie scoop, form small balls from the brownie mixture and place them on a parchment-lined tray.
- Refrigerate the truffles for at least 30 minutes to firm up.
- Melt the white chocolate in a double boiler for the mint variation and milk chocolate for the peanut butter variation.
- Dip each truffle into the melted chocolate, ensuring they are fully coated.
- Place the coated truffles back on the parchment paper and sprinkle with green sprinkles or chopped peanuts as desired.
- Allow the chocolate to set at room temperature or refrigerate until firm.