Nanaimo Bars
If you’re looking for a delightful treat that feels like a hug from your kitchen, then Nanaimo Bars are just the thing! This iconic Canadian dessert has a rich history and an even richer flavor. With their layers of chocolate, coconut, and creamy filling, these bars are perfect for any occasion—from cozy family gatherings to quick snacks after a busy week. Trust me, once you try this recipe, it will quickly become a favorite in your household!
These no-bake treats are not only delicious but also incredibly easy to make. You can whip them up in no time and enjoy their sweet, satisfying taste. Plus, they are versatile enough to fit any celebration or everyday craving!
Why You’ll Love This Recipe
- Easy to make: With simple steps and no baking required, you can have these bars ready in no time!
- Family-friendly: Kids and adults alike will adore the combination of flavors and textures in Nanaimo Bars.
- Make ahead: These bars store well in the fridge, making them a great option for meal prep or last-minute desserts.
- Decadent flavor: The layers of chocolate, coconut, and custard filling create an irresistible treat that’s hard to resist!
Ingredients You’ll Need
Let’s gather our ingredients! This recipe calls for simple and wholesome items that you might already have in your pantry. Here’s what you’ll need to make those delicious Nanaimo Bars:
For the Base
- 1/2 cup unsalted butter
- 1/3 cup cocoa powder
- 1/4 cup sugar
- 1 large egg
- 1 3/4 cups graham crumbs (or digestive cookie crumbs)
- 3/4 cup shredded coconut
- 1/2 cup chopped walnuts (chopped very finely)
For the Filling
- 6 tablespoons unsalted butter (softened)
- 2 tablespoons custard powder (or vanilla pudding mix)
- 3 tablespoons heavy cream
- 1 1/2 -2 cups powdered sugar
For the Topping
- 4 oz semi-sweet chocolate (or 50-60% dark chocolate)
- 2 teaspoons oil
Variations
One of the best things about Nanaimo Bars is how flexible the recipe can be! Here are some fun variations you can try:
- Add a twist of citrus: Incorporate some lemon or orange zest into the filling for a refreshing burst of flavor.
- Nut-free option: Omit the walnuts entirely or substitute with sunflower seeds if you’re catering to nut allergies.
- Try different toppings: Swap out the semi-sweet chocolate for white chocolate or even a drizzle of caramel sauce on top.
- Go gluten-free: Use gluten-free graham crackers or cookie crumbs as a base for those who are sensitive to gluten.
How to Make Nanaimo Bars
Step 1: Prepare Your Pan
Start by lining an 8×8 or 9×9 inch pan with parchment paper. This overhang will help you lift out the bars later—trust me, it makes serving so much easier!
Step 2: Make the Base
In a mixing bowl, combine melted unsalted butter with cocoa powder and sugar. Stir in the egg until everything is smooth. Then fold in graham crumbs, shredded coconut, and finely chopped walnuts until well mixed. Press this mixture firmly into the bottom of your prepared pan to create an even layer.
Step 3: Prepare the Filling
In another bowl, beat together softened unsalted butter, custard powder (or vanilla pudding mix), heavy cream, and powdered sugar until light and fluffy. Spread this luscious filling over your cooled base layer evenly.
Step 4: Melt the Chocolate Topping
In a small saucepan or microwave-safe bowl, melt together semi-sweet chocolate and oil. Stir until completely smooth. Pour this melted chocolate over the custard layer, spreading it gently with a spatula.
Step 5: Chill and Serve
Refrigerate your Nanaimo Bars for at least two hours to allow them to set properly. Once chilled, lift them out using the parchment paper overhang and cut into squares—enjoy this delightful treat with friends or family!
Pro Tips for Making Nanaimo Bars
Making Nanaimo Bars can be a delightful experience, and with these handy tips, you’ll elevate your dessert game to a whole new level!
- Use room temperature ingredients: Starting with butter and cream at room temperature helps them blend seamlessly, ensuring a smooth and creamy filling.
- Chill between layers: After spreading each layer, pop the bars in the fridge for about 15-20 minutes. This helps the layers set nicely and prevents them from mixing together.
- Finely chop your walnuts: By chopping the walnuts very finely, you’ll ensure that they mix evenly throughout the base without overpowering the other flavors.
- Be cautious with chocolate melting: Melt your chocolate slowly over low heat or use a microwave in short bursts. This prevents it from burning and keeps the chocolate silky smooth.
- Cutting technique matters: For clean cuts, use a sharp knife and wipe it clean between slices. This way, you maintain those beautiful layers and get perfect presentation.
How to Serve Nanaimo Bars
Nanaimo Bars are not only delicious but also visually appealing! Here are some creative ideas for presenting this charming Canadian treat that will impress your friends and family.
Garnishes
- Chocolate drizzle: A simple drizzle of melted chocolate on top of the bars adds an elegant touch and enhances the chocolate flavor.
- Coconut flakes: A sprinkle of toasted coconut flakes can add an extra layer of texture and visual appeal.
- Fresh berries: Serving alongside fresh raspberries or strawberries not only adds color but also balances the sweetness with a touch of tartness.
Side Dishes
- Vanilla ice cream: A scoop of vanilla ice cream complements the richness of Nanaimo Bars wonderfully, creating a delightful contrast in textures.
- Coffee or tea: Pairing these bars with a cup of freshly brewed coffee or herbal tea enhances their flavors while providing a comforting warm beverage.
- Fruit salad: A refreshing fruit salad can lighten up the meal by adding freshness and brightness to balance the richness of the bars.
- Whipped cream: A dollop of lightly sweetened whipped cream can add an airy element that perfectly contrasts with the dense layers of your Nanaimo Bars.
With these serving suggestions and pro tips, you’re all set to create an unforgettable dessert experience! Enjoy your Nanaimo Bars as they steal the show at any gathering. Happy baking!
Make Ahead and Storage
Nanaimo Bars are a fantastic treat to prepare ahead of time, making them perfect for gatherings or a sweet snack throughout the week. With their rich flavors and delightful textures, they can be made in advance and stored for later enjoyment with ease.
Storing Leftovers
- Store your Nanaimo Bars in an airtight container at room temperature for up to 3 days.
- If you need them to last longer, refrigerate them; they’ll stay fresh for about a week.
- Be sure to separate layers of bars with parchment paper if stacking, to prevent sticking.
Freezing
- Cut the bars into squares before freezing for easy access.
- Wrap each bar individually in plastic wrap, then place them in a freezer-safe container or bag.
- They can be frozen for up to 3 months. Just thaw at room temperature for about 30 minutes before serving.
Reheating
- Nanaimo Bars are best enjoyed chilled or at room temperature, so no need to reheat.
- If they have been refrigerated, allow them to sit out for about 15-20 minutes before serving to soften slightly.
FAQs
Here are some common questions readers might have about making Nanaimo Bars.
Can I make Nanaimo Bars without custard powder?
Absolutely! You can substitute custard powder with vanilla pudding mix for a similar flavor profile.
How long do Nanaimo Bars last?
When stored properly, Nanaimo Bars can last up to 3 days at room temperature or up to a week in the fridge.
What is the best way to cut Nanaimo Bars?
To achieve clean cuts, chill the bars in the refrigerator until firm, then use a sharp knife. Wipe the knife with a warm cloth between cuts for neat edges.
Can I use different nuts in my Nanaimo Bars?
Yes! While walnuts are traditional, feel free to swap them out for your favorite nuts like pecans or even omit them altogether if preferred.
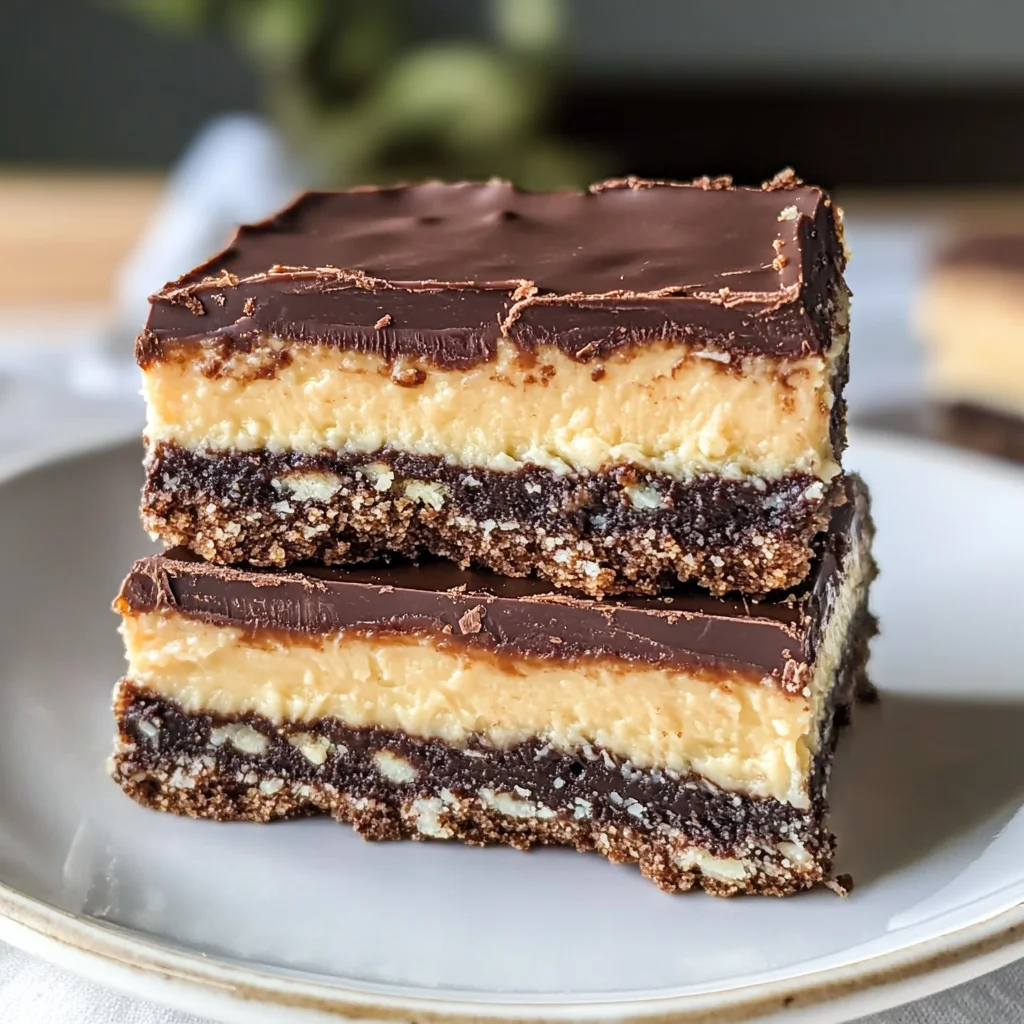
What are the key components of classic Nanaimo Bars?
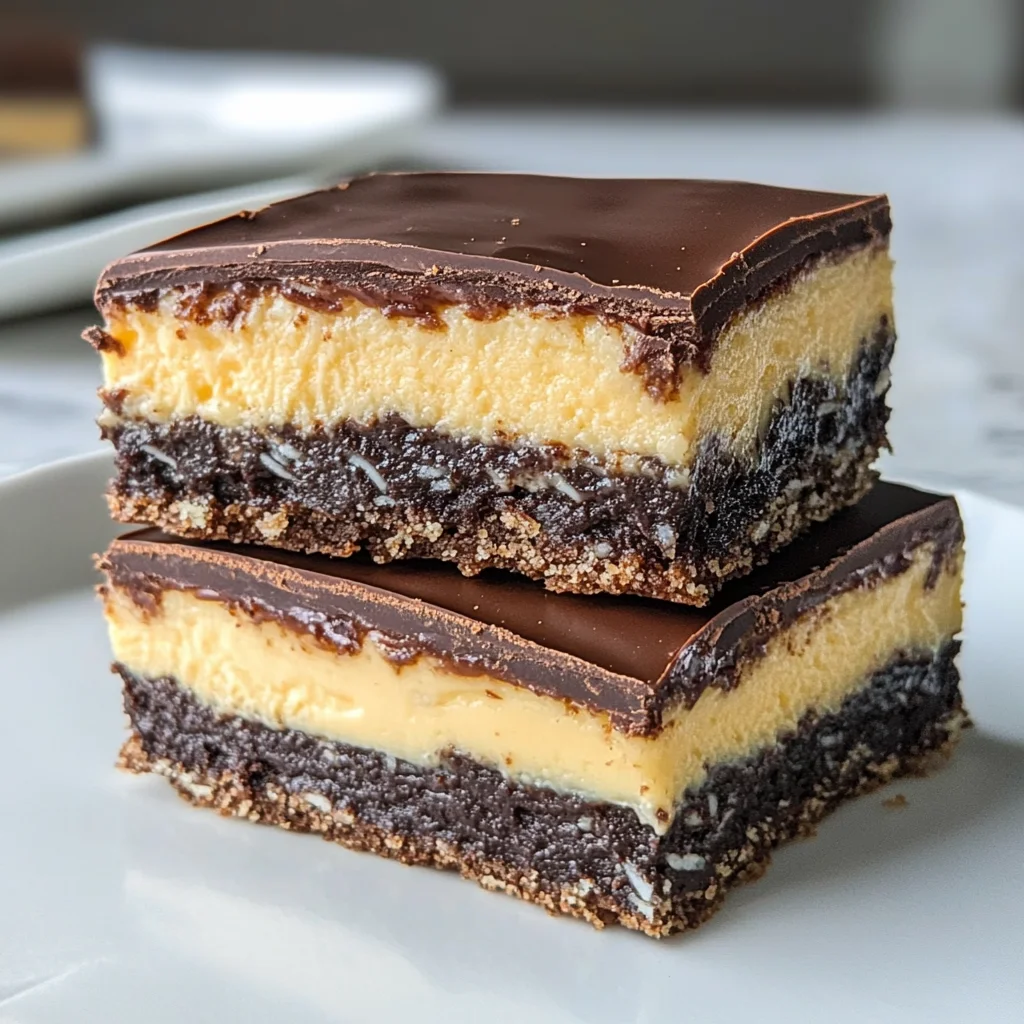
Classic Nanaimo Bars feature three delicious layers: a chocolate coconut base, a creamy custard buttercream filling, and a smooth chocolate topping that ties it all together beautifully.
Final Thoughts
I hope you find joy in making these delightful Nanaimo Bars! They not only embody a beloved Canadian treat but also bring comfort and sweetness into any gathering. Whether you’re sharing them with friends or keeping them all to yourself (no judgment here!), I encourage you to dive into this recipe and savor every bite. Happy baking!
Nanaimo Bars

Indulge in the delightful taste of Nanaimo Bars, a beloved Canadian dessert that combines rich chocolate, creamy custard, and a hint of coconut—all without the need for baking! These no-bake bars are layered to perfection and offer a satisfying treat for any occasion, from family gatherings to a cozy night in. With simple ingredients and easy preparation steps, you can whip up these decadent treats in no time. Whether enjoyed as a sweet snack or a festive dessert, Nanaimo Bars are sure to become a favorite in your household.
- Prep Time: 20 minutes
- Cook Time: 0 minutes
- Total Time: 20 minutes
- Yield: Approximately 16 servings 1x
- Category: Dessert
- Method: No-bake
- Cuisine: Canadian
Ingredients
- 1/2 cup unsalted butter
- 1/3 cup cocoa powder
- 1/4 cup sugar
- 1 large egg
- 1 3/4 cups graham crumbs (or digestive cookie crumbs)
- 3/4 cup shredded coconut
- 1/2 cup chopped walnuts (chopped very finely)
- 6 tablespoons unsalted butter (softened)
- 2 tablespoons custard powder (or vanilla pudding mix)
- 3 tablespoons heavy cream
- 1 1/2 – 2 cups powdered sugar
- 4 oz semi-sweet chocolate (or 50-60% dark chocolate)
- 2 teaspoons oil
Instructions
- Prepare an 8×8 or 9×9 inch pan by lining it with parchment paper.
- For the base: In a bowl, mix melted unsalted butter with cocoa powder and sugar. Stir in the egg until smooth. Fold in graham crumbs, shredded coconut, and finely chopped walnuts. Press this mixture firmly into the bottom of the prepared pan.
- For the filling: Beat together softened unsalted butter, custard powder (or vanilla pudding), heavy cream, and powdered sugar until light and fluffy. Spread evenly over the cooled base layer.
- For the topping: Melt semi-sweet chocolate with oil in a saucepan or microwave until smooth. Pour over the filling and spread gently.
- Chill in the refrigerator for at least two hours before serving. Lift out using parchment paper and cut into squares.
Nutrition
- Serving Size: 1 serving
- Calories: 210
- Sugar: 15g
- Sodium: 35mg
- Fat: 13g
- Saturated Fat: 8g
- Unsaturated Fat: 5g
- Trans Fat: 0g
- Carbohydrates: 23g
- Fiber: 1g
- Protein: 2g
- Cholesterol: 25mg