Mexican Tamales: Unforgettable Homemade Delight
It all started with a craving for authentic Mexican tamales that I just couldn’t shake. I remember visiting a local Mexican restaurant where their tamales were legendary—soft, flavorful, and wrapped in those perfectly pliable corn husks. I thought to myself, “How hard could it be to recreate this at home?” Little did I know that the journey would turn into an adventure of epic proportions—not only for my taste buds but also for my wallet! After realizing how pricey those little bundles of joy could be, I became determined to make my own version that was not only delicious but also budget-friendly.
Let me tell you, perfecting my Mexican tamales was no walk in the park. I lost count of how many attempts I made—let’s just say there were more than a few kitchen disasters involving sticky masa and more corn husks than I care to admit! Each attempt was like a mini science experiment; I was trying to achieve the ideal balance of moisture and flavor while figuring out how to wrap those pesky fillings without making a mess. There were times when I’d pull them out of the steamer only to find they hadn’t cooked through or worse, tasted bland. But every failure taught me something new, and eventually, it all came together.
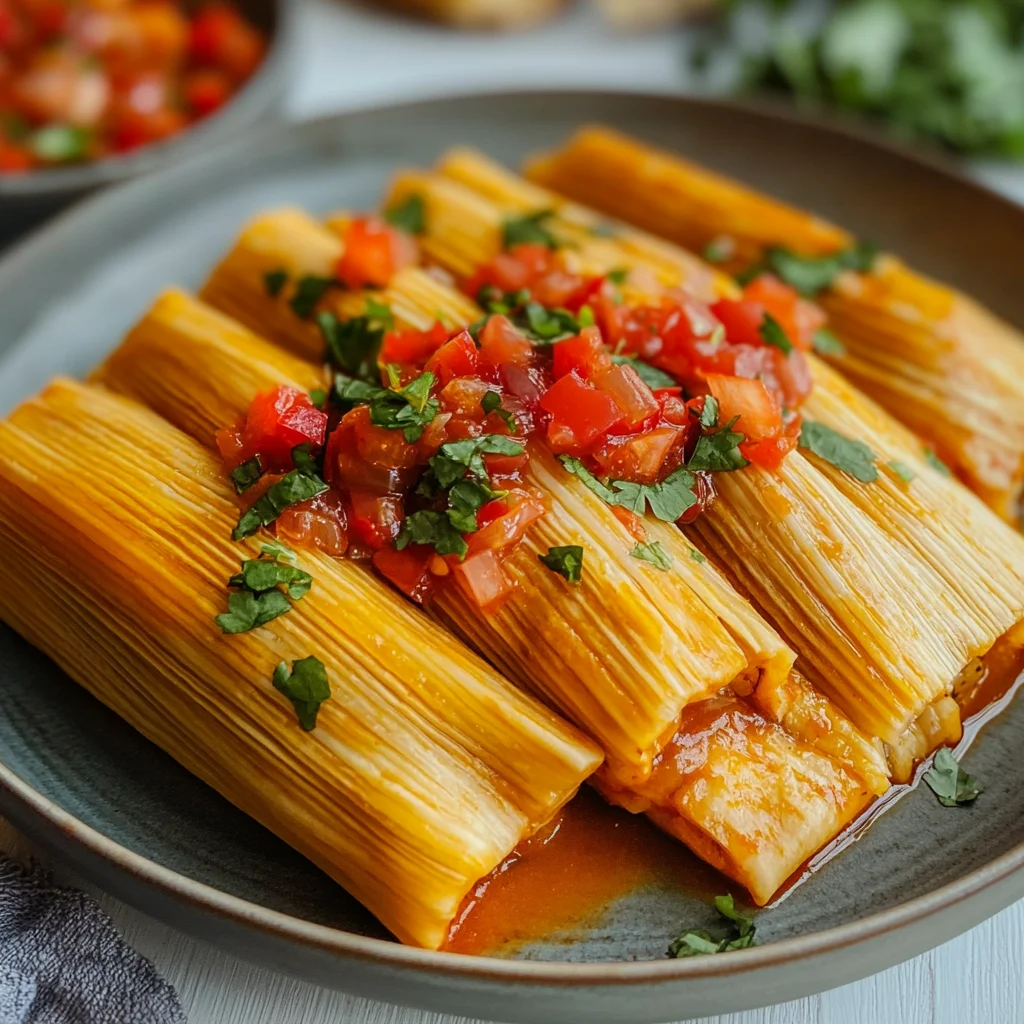
The payoff? Oh, it was so worth it! My Mexican tamales turned out beautifully tender with that delightful chewiness you crave, filled with vibrant flavors from the savory fillings I chose. The aroma wafting through my kitchen was enough to make anyone weak at the knees! With each bite, you’re greeted by layers of texture and taste that are simply irresistible. Trust me when I say these are perfect for sharing—with family, friends, or just indulging on your own (I won’t judge!). So roll up your sleeves and get ready to create something truly special; you won’t regret diving into this deliciously rewarding process!
These Mexican Tamales are….
….a fiesta of flavor and tradition wrapped in a delightful package!
1. They deliver a bold flavor explosion that’s truly unforgettable, thanks to the combination of masa harina and savory fillings. The addition of spices like cumin and garlic powder enhances every bite, creating a delicious depth that transports you straight to Mexico.
2. Incredible texture – the tamale dough is perfectly moist yet firm, allowing for a delightful chew without falling apart. This balance is achieved through the careful mixing of masa harina with vegetable shortening, resulting in a soft and tender exterior that holds the flavorful filling inside beautifully.
3. A key technique that sets these tamales apart is soaking the corn husks before wrapping. This step not only makes the husks pliable but also infuses them with moisture during steaming, which helps keep the tamales succulent and ensures they cook evenly throughout.
4. They offer exceptional value, as making these Mexican Tamales at home is far more economical than buying from restaurants or shops. With simple ingredients like masa harina and vegetable broth, you can whip up a batch that feeds a crowd without breaking the bank, all while enjoying the satisfaction of homemade goodness.
PS These tamales are perfect for gatherings! They can be made ahead of time and steamed just before serving, making them an ideal dish for parties or family get-togethers.
What You’ll Need for Mexican Tamales
Each ingredient in this dish plays an essential role in flavor and texture. Here’s what you’ll need:
- 2 cups masa harina: This fine corn flour creates the perfect base for the tamale dough.
- 1 tsp baking powder: Provides lightness and a fluffy texture to the masa.
- 1 tsp salt: Enhances the overall flavor of the tamale dough.
- 1/2 cup vegetable shortening: Contributes richness and moisture, ensuring a tender outcome.
- 1.5 cups vegetable broth: Adds depth and savory flavor, keeping the dough from being dry.
- 2 cups shredded cooked chicken: Offers a hearty filling that brings protein and robust taste.
- 1 cup red salsa: Infuses the filling with a zesty kick and vibrant color.
- 1 tsp cumin: Delivers warm, earthy notes that elevate the dish’s flavor profile.
- 1 tsp garlic powder: Adds aromatic depth that complements all the other ingredients.
- 20 pieces dried corn husks: Essential for wrapping, these impart a subtle corn flavor while steaming.
Soaking Corn Husks is Non-Negotiable. Trust Me!
I’ll be honest; I thought I could skip soaking the corn husks or at least cut down the time. After several failed attempts where my tamales were a disaster wrapped in dry husks, I had to admit defeat. Soaking them for a solid 30 minutes isn’t just a suggestion—it’s a must!
Think of it this way: if you’ve ever tried to roll dough with dried-out pastry, you’ll know how frustrating it can be. The same principle applies here. When you soak the corn husks, they become pliable and easier to work with, ensuring your tamales are wrapped securely and steam perfectly without cracking open during the cooking process.
What does soaking corn husks do?
- Improves pliability — Soaking allows the husks to soften, making them easier to shape and wrap around the tamale dough.
- Prevents tearing — Properly soaked husks are less likely to tear, which means no filling spills out and your tamales hold together beautifully.
- Enhances moisture retention — Moist husks help retain steam during cooking, leading to tender and fluffy tamale dough that has just the right texture.
- Affects flavor absorption — Softened husks can impart a subtle earthy flavor into the tamales as they steam, enhancing the overall taste of each bite.
- Facilitates even cooking — When wrapped in pliable husks, tamales cook evenly, ensuring that every part of the dough is perfectly steamed without being undercooked or dry.
Different soaking times
- 10 minutes (fair) — A quick dip; the husks might still be somewhat stiff, leading to potential tearing when wrapping.
- 30 minutes (good) — Ideal for pliability; they’re soft enough for easy wrapping without risk of breakage.
- 1 hour (better) — Husks are super soft and flexible; however, over-soaking can lead to mushiness if not used right away.
- Beyond 1 hour (diminishing returns) — Risk of losing structural integrity increases; make sure to check for excessive softness.
Don’t underestimate the importance of soaking those corn husks! The most common mistake is thinking you can rush this step. If your husks aren’t adequately soaked, you’ll end up with torn wrappers and a messy filling—definitely not what we want for our beautiful tamales!
How to make Mexican Tamales

Are you ready to see how straightforward it is to make the Mexican Tamales of your dreams??
1. PREPARE THE CORN HUSKS
Start by getting your corn husks ready; they need a little soak to become pliable!
1. Soak – Soak the corn husks in warm water for at least 30 minutes until pliable. This step is crucial as it softens the husks, making them easier to work with when wrapping your tamales.
2. Drain – Drain and pat dry before using. Ensuring they’re not dripping wet will help the tamale dough stick better.
HANDY TIPS
- If you can’t find dried corn husks, banana leaves can be a great alternative!
- The soaking time can be shortened if you use very hot water.
2. MAKE THE TAMALE DOUGH
Now it’s time to create that delicious masa base that holds everything together!
3. Combine – In a mixing bowl, combine masa harina, baking powder, and salt. This dry mixture forms the backbone of your tamales, giving them texture and flavor.
4. Beat – In another bowl, beat the vegetable shortening until fluffy. The fluffiness adds air into the dough, which helps achieve a light texture in your tamales.
5. Mix – Gradually add the masa mixture to the shortening, alternating with vegetable broth, mixing until smooth. This method ensures a well-combined dough without lumps—aim for a consistency where it holds together but is still spreadable.
HANDY TIPS
- If you prefer a richer flavor, consider using lard instead of vegetable shortening.
- For a gluten-free option, ensure your masa harina is labeled gluten-free!
3. PREPARE THE FILLING
Let’s get those flavors mingling for an irresistible filling!
6. Mix – In a bowl, mix the shredded chicken with salsa, cumin, and garlic powder. This combination brings vibrant flavors into each bite of your tamales—adjust seasoning to suit your taste!
HANDY TIPS
- You can substitute chicken with pork or even create a vegetarian filling using beans and cheese!
- For extra spice, add diced jalapeños or chili powder to your filling mix.
4. ASSEMBLE THE TAMALES
Time to put everything together and wrap up those tasty delights!
7. Spread – Take a soaked corn husk and spread about 1/4 cup of tamale dough on the wide end. Make sure you leave some space at the edges for folding!
8. Fill – Add 2 tablespoons of filling in the center of the dough; this amount ensures you get just enough flavor without overstuffing!
9. Fold – Fold the sides of the husk over the dough and then fold the bottom up to secure; this prevents any filling from escaping during steaming!
10. Repeat – Repeat with remaining husks, dough, and filling until all ingredients are used up.
HANDY TIPS
- Make sure not to overfill your tamales; they need room to expand while cooking!
- You can prepare these ahead of time and store them in the fridge for up to a day before steaming.
5. STEAM THE TAMALES
Finally, it’s time to bring those tamales to life with some steaming magic!
11. Place – Place the tamales upright in a steamer, with the open end facing up; this allows steam to circulate properly around each one for even cooking!
12. Cover – Cover with a damp cloth and steam for about 1.5 hours, adding water as needed; keep an eye on it so there’s always enough water in the steamer!
13. Check – Tamales are done when the dough pulls away from the husk easily—this is your visual cue that they’re perfectly cooked!
HANDY TIPS
- Ensure your water is simmering before placing tamales in for optimal steaming.
- If you’re short on time, consider cutting down on size; smaller tamales will cook faster!
Make these once, and I wager they will invade your dreams every night too! – Nagi x
FAQ – Mexican Tamales
🌽 How long do tamales last in the fridge?
Tamales can be stored in the refrigerator for up to 5 days. However, I recommend consuming them within the first 3 days for optimal flavor and texture—after that, they may start to lose their freshness, around 90% as good on day 4 and only about 80% on day 5. Make sure to store them in an airtight container to prevent them from drying out or absorbing other odors from your fridge!
⏳ Can I skip soaking the corn husks?
No, you cannot skip soaking the corn husks! Soaking is crucial because it makes the husks pliable, allowing you to easily wrap your tamales without tearing. I typically soak mine for at least 30 minutes, but if they’re still stiff, don’t hesitate to let them soak a bit longer. Trust me, this step will save you from a lot of frustration during assembly!
❄️ Can I freeze tamales after making them?
Absolutely! You can freeze tamales before or after cooking. If freezing uncooked tamales, simply wrap them tightly in plastic wrap and then place them in a freezer-safe bag. They can be frozen for up to 3 months. To cook from frozen, steam directly without thawing; just add an extra 20-30 minutes to your steaming time. If you’ve cooked them already, allow them to cool completely before freezing and they should maintain quality for about 2 months.
🌱 Are these tamales gluten-free?
Yes, these tamales are naturally gluten-free as they are made with masa harina (corn flour). Just ensure that any additional ingredients like broth or salsa you use are also gluten-free. I’ve had friends with gluten sensitivities enjoy these tamales without any issues—just make sure to double-check those labels!
🥩 Can I substitute chicken with something else in the filling?
Definitely! While shredded chicken is traditional, you can get creative with your fillings. Pulled pork works wonderfully if you’re looking for a richer flavor. For a vegetarian option, try using sautéed vegetables or beans mixed with cheese and spices instead of meat. Just remember that whatever filling you choose should complement the masa dough!
🤔 Why do I need to beat the vegetable shortening until fluffy?
Beating the vegetable shortening (or lard) until fluffy incorporates air into the mixture, which helps make the final tamale dough light and tender rather than dense. This step might seem trivial, but trust me—it’s essential for achieving that perfect texture! I’ve tested it both ways and there’s no contest; fluffiness wins every time!
🔄 Can I customize my salsa choice for different flavors?
Absolutely! The beauty of tamales is their versatility. You can use red salsa for a smoky flavor or green salsa for a fresh kick—both are delicious! Feel free to experiment with homemade salsas or even store-bought variations like pineapple salsa for sweetness or chipotle salsa for smokiness. Just keep in mind that spicier salsas will give your tamales more heat!
Troubleshooting
I will continue to add more to this Troubleshooting section as I start seeing questions coming through from people who have made the recipe.
Troubleshooting tips
“My tamales came out too dry! 😩”
- You may have used too much masa harina compared to the liquid. If your dough is too thick, it won’t retain moisture during steaming. Aim for a smooth consistency that easily spreads on the husk.
- Not adding enough broth can also lead to dryness. Ensure you’re using 1.5 cups of broth to keep your dough moist and flavorful.
- If you overcooked them while steaming, they might end up dry as well. Keep an eye on your steaming time, about 1.5 hours should do the trick!
I bet they were still YUM though!
“My tamales fell apart when I tried to unwrap them! 😭”
- If your masa dough was too wet, it can make the tamales difficult to hold together. Make sure you’re measuring the broth accurately – 1.5 cups is perfect for that pliable texture!
- On the flip side, if your dough was too dry and crumbly, it may not have stuck together properly in the first place. Strive for that creamy texture when mixing!
- Also, if you didn’t steam them long enough, they may not have set properly and could fall apart easily when removed from the husk. Always test one before serving!
I bet they were still YUM though!
“My tamale dough was super thick and hard to spread!” 🔥
- This could mean you added too much masa harina or not enough broth during mixing. The right balance is crucial; aim for a smooth consistency that’s easy to work with!
- If you didn’t beat the shortening until fluffy enough, it can lead to denser dough that’s harder to spread. Make sure it’s light and airy before combining with masa!
- Remember, if you’re mixing by hand instead of a mixer, it might take longer to achieve that perfect texture – don’t rush it!
I bet they were still YUM though!
“The color of my tamales is uneven and pale!” 😳
- This can happen if you didn’t mix your filling thoroughly with spices like cumin and garlic powder – ensure even distribution for consistent flavor and color throughout each tamale!
- Steaming at too low a temperature can also result in pale tamales since they won’t develop that lovely golden hue we all love. Make sure your steamer is hot before adding them in!
- Lastly, if you’re using a lighter-colored broth or lard in your dough, it might affect how dark your final product looks after cooking. You can always experiment with richer broths next time for deeper color!
I bet they were still YUM though!
Mexican Tamales
Ingredients
Method
- Soak the corn husks in warm water for at least 30 minutes until pliable.
- Drain and pat dry before using.
- In a mixing bowl, combine masa harina, baking powder, and salt.
- In another bowl, beat the vegetable shortening until fluffy.
- Gradually add the masa mixture to the shortening, alternating with vegetable broth, mixing until smooth.
- In a bowl, mix the shredded chicken with salsa, cumin, and garlic powder.
- Take a soaked corn husk and spread about 1/4 cup of tamale dough on the wide end.
- Add 2 tablespoons of filling in the center of the dough.
- Fold the sides of the husk over the dough and then fold the bottom up to secure.
- Repeat with remaining husks, dough, and filling.
- Place the tamales upright in a steamer, with the open end facing up.
- Cover with a damp cloth and steam for about 1.5 hours, adding water as needed.
- Tamales are done when the dough pulls away from the husk easily.