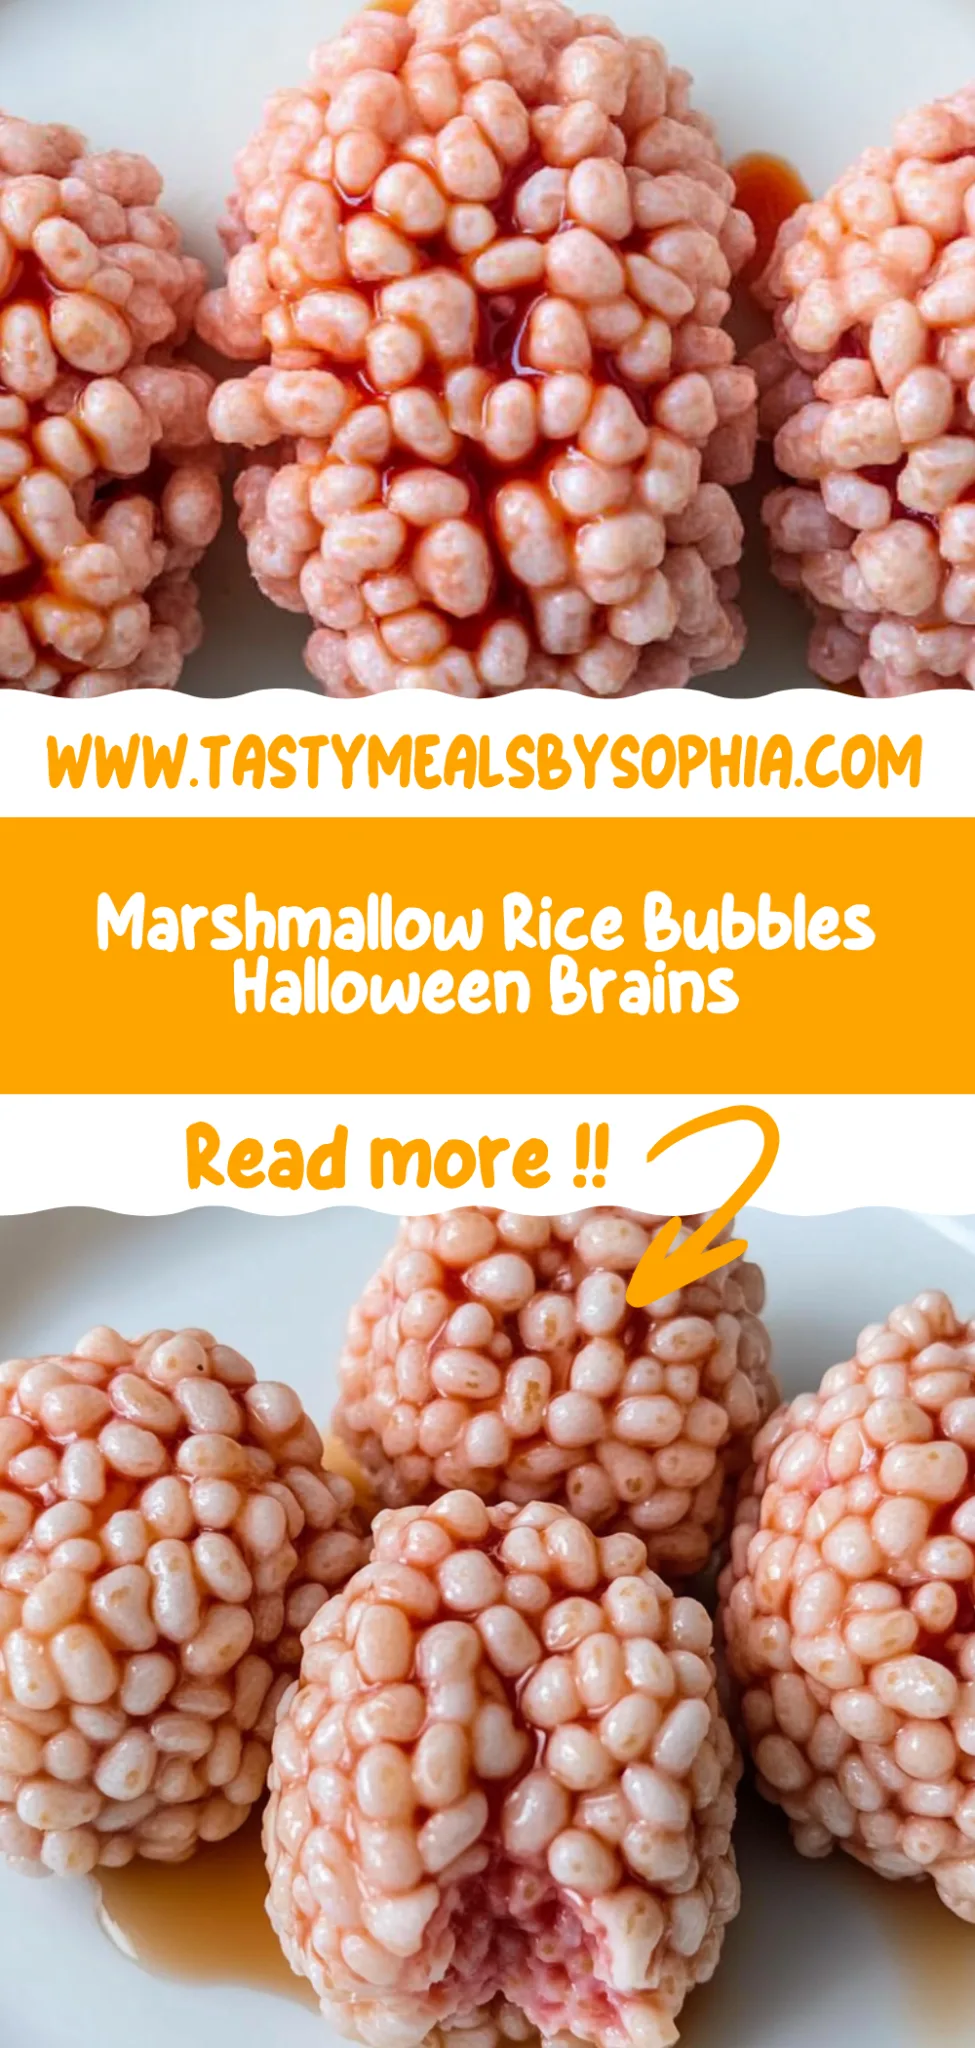
Marshmallow Rice Bubbles Halloween Brains: Spookily Fun T…
I first stumbled upon the idea of creating Marshmallow Rice Bubbles Halloween Brains while browsing a quirky little candy shop during one of my Halloween adventures. They had these adorably creepy treats that looked just like brains, and I couldn’t shake the thought of how fun it would be to make my own version at home. Plus, let’s be honest—store-bought goodies can be pricey and sometimes lack that homemade charm. So, I decided to take on the challenge, envisioning a delightfully spooky treat that I could whip up for my friends and family without breaking the bank.
After several attempts (and a few marshmallow explosions in my kitchen), I finally nailed down the perfect recipe for these little brainy bites. It took me about three tries to get the texture just right—too sticky, and they turned into a gooey mess; too dry, and they crumbled faster than my hopes of being a Halloween baking superstar! Each iteration was an adventure filled with laughter and some very questionable shapes that were more “alien” than “brain,” but every misstep brought me closer to that perfect blend of chewy marshmallow goodness and crispy rice bubbles.
Let me tell you, all those trials were absolutely worth it when I pulled out the final batch—these Marshmallow Rice Bubbles Halloween Brains are not only hilariously fun to make but also incredibly delicious! They’re perfectly chewy with just the right amount of crunch, and the way they look is sure to impress anyone at your Halloween gathering. So grab your spooky cookie cutter and join me in making these delightful treats—I promise they’ll be a hit with kids and adults alike!
These Marshmallow Rice Bubbles Halloween Brains are…
….the ultimate spooky treat that brings a fun twist to your Halloween festivities!
1. They deliver a sweet, marshmallowy bliss that perfectly captures the essence of childhood treats. The combination of 4 cups of mini marshmallows and just the right amount of butter creates an indulgent flavor that transports you back to simpler times, making them irresistibly delightful for kids and adults alike.
2. Enjoy an incredible crunch with a soft, chewy interior that makes each bite satisfying. Thanks to the 3 cups of Rice Bubbles, these treats have a fantastic textural contrast—crispy on the outside while remaining pleasantly chewy inside, ensuring a delightful eating experience.
3. A simple melting technique elevates these treats beyond ordinary rice bubbles. By gently melting the mini marshmallows with butter before mixing in the Rice Bubbles, I found that it binds everything together beautifully and ensures every piece is coated in that sweet marshmallow goodness, creating a cohesive brain shape that’s both fun and visually appealing.
4. They offer remarkable cost-effectiveness compared to store-bought Halloween goodies. With just a handful of ingredients—especially when you can find Rice Bubbles and mini marshmallows at budget-friendly prices—you can create a batch of these spooky delights at home without breaking the bank, all while enjoying the satisfaction of homemade treats.
PS These Marshmallow Rice Bubbles Halloween Brains yield about 12-15 pieces, depending on how large you make them, perfect for sharing at parties or enjoying as festive snacks!
Ingredients for the Marshmallow Rice Bubbles Halloween Brains
Each ingredient in this dish plays an essential role in flavor and texture. Here’s what you’ll need:
Base Ingredients
3 cups Rice Bubbles: Provide a light and crunchy texture that forms the base of our spooky treat.
4 cups mini marshmallows: Create a sweet, gooey consistency that binds everything together.
3 tablespoons butter (unsalted): Adds richness and helps to achieve the perfect melt-in-your-mouth feel.
Decoration Ingredients
1 cup red food coloring: Gives a thrilling blood effect that enhances the Halloween theme.
- 1 cup white chocolate (melted): Offers a creamy contrast and a deliciously sweet finish to the brains.
You MUST Melt the Marshmallows Just Right. No Shortcuts!
I hate to break it to you, but if you’re thinking of speeding through the melting process, think again! I tried to cut corners and just tossed everything in the microwave haphazardly—spoiler alert: it didn’t work out. The result was a clumpy mess that was more “brain splatter” than “brain treat.”
Here’s the deal: melting the mini marshmallows with the butter slowly and carefully is crucial for achieving that smooth, gooey mixture. Think of it like making a perfect risotto; if you rush it, you’ll end up with something grainy and sad instead of creamy and dreamy. The right melting technique ensures that your Rice Bubbles are perfectly coated, allowing them to set into those delightfully spooky brains!
What does melting marshmallows do?
- Texture — It creates a smooth, pliable mixture that binds the Rice Bubbles together perfectly, giving each brain a nice chewiness.
- Flavor — Melting allows the butter and marshmallows to blend thoroughly, enhancing that sweet buttery flavor that makes these treats irresistible.
- Shape retention — A properly melted mixture firms up as it cools, ensuring your brains hold their shape beautifully without crumbling.
- Even coating — Achieving a consistent melt guarantees every Rice Bubble gets fully coated in marshmallow goodness, resulting in uniform treats.
- Aesthetic appeal — The glossy finish from well-melted marshmallows makes the final product look shiny and enticing when decorated.
Different melting times
- 30 seconds (good) — Butter starts to melt but isn’t fully integrated with the marshmallows; expect some lumps.
- 1 minute (better) — Butter is mostly melted but might still leave some marshmallow chunks; a bit more stirring needed for smoothness.
- 1–2 minutes (optimal) — Perfectly smooth and gooey mix achieved! This is where magic happens—your best bet for those glorious brains!
- Beyond 2 minutes (risky) — Overheating can lead to a burnt taste or tough texture; don’t push it!
Be warned: rushing this step can result in lumpy marshmallow clumps that won’t bind your Rice Bubbles properly! Trust me, I learned this the hard way. Skip this critical melting technique at your own risk—you might end up with a Halloween horror show instead of a tasty treat!
How to make Marshmallow Rice Bubbles Halloween Brains
Are you ready to see how straightforward it is to make the Marshmallow Rice Bubbles Halloween Brains of your dreams??
1. PREPARE THE RICE BUBBLE MIXTURE
Let’s start by creating that gooey, marshmallowy base that will form the brains!
1. MELT – In a large microwave-safe bowl, melt the butter in the microwave for about 30 seconds. Keep an eye on it; you want it fully liquid but not bubbling over. This will give our mixture a rich flavor and prevent the marshmallows from sticking.
2. ADD MARSHMALLOWS – Add the mini marshmallows to the melted butter and microwave for an additional 1-2 minutes, stirring every 30 seconds until smooth. You’ll know it’s ready when everything is perfectly melted and you have a beautiful glossy mixture! ❓ Why is stirring important? Because it ensures even melting throughout.
3. COMBINE – Once melted, remove from microwave and quickly stir in the Rice Bubbles until fully coated. Make sure every Rice Bubble gets that luscious marshmallow coating for maximum flavor!
HANDY TIPS
- If you find your marshmallows aren’t melting well, give them another 10 seconds in the microwave; you want them soft but not overcooked.
- For extra flavor, consider using flavored marshmallows if available!
2. SHAPE THE BRAINS
Now it’s time to mold our spooky treats into brain shapes!
4. SPOON – Spoon the mixture into the brain-shaped mold, pressing down firmly to ensure they hold their shape. It’s like sculpting with sticky goodness—don’t be shy about packing them in there!
5. COOL – Let the molds cool for about 10 minutes at room temperature. This allows them to set nicely without getting too hard too quickly.
6. REMOVE – Once set, carefully remove the rice bubble brains from the molds and place them on parchment paper. Gently twist or flex the mold if needed; you want these beauties intact!
HANDY TIPS
- If your molds are sticking, try lightly greasing them with a bit of butter before adding the mixture next time.
- For a fun twist, experiment with different silicone mold shapes if you can’t find brain molds!
3. DECORATE THE BRAINS
Let’s take these creepy treats to the next level with some spooky decorations!
7. MELT CHOCOLATE – Melt the white chocolate and drizzle it over the rice bubble brains to create a brain-like effect. Use a spoon or fork for control—this is where artistry meets spookiness!
8. ADD BLOOD – Using a brush or toothpick, apply red food coloring to mimic blood, adding a spooky touch that brings these brains to life (or death!). Go wild—this is Halloween after all!
9. SET DECORATIONS – Allow the decorations to set for a few minutes before serving. You’ll want those colors to harden just right so they don’t smudge when touched.
HANDY TIPS
- For deeper color saturation, let your decorated brains sit for longer; this helps intensify those bloody effects!
- Consider using edible glitter for an extra eerie shimmer on top of your white chocolate drizzle.
Make these once, and I wager they will invade your dreams every night too! – Nagi x
FAQ – Marshmallow Rice Bubbles Halloween Brains
😱 How long will these treats keep?
These Marshmallow Rice Bubbles Halloween Brains are best enjoyed fresh, but they can last for about 3-4 days when stored properly. After day 1, I find that they start to lose their crispness, dropping to about 90% of their original quality. By the end of day 3, they’re around 80% as good, and after that, you might notice them getting a bit chewy and stale. To store them, simply place them in an airtight container at room temperature — no need for refrigeration!
⏳ Do I really have to let the mixture cool for 10 minutes?
Yes, you definitely need to let the mixture cool for about 10 minutes before removing it from the molds. This cooling time is crucial because it allows the marshmallow and Rice Bubble mixture to set properly, ensuring they hold their brain shape when you take them out. Rushing this step could lead to misshapen brains or even a sticky mess! Trust me; I’ve tried skipping this step and learned my lesson the hard way.
❄️ Can I freeze the shaped brains for later use?
While you can freeze these treats, I recommend only doing so before decorating them. To freeze, simply place the cooled brain shapes in a single layer on a baking sheet until firm, then transfer them to an airtight container or freezer bag. They’ll keep well for about 2-3 weeks in the freezer. When you’re ready to enjoy them, just thaw them at room temperature for a couple of hours before decorating with white chocolate and red food coloring.
🥳 Can these be made gluten-free?
Absolutely! The main ingredients in this recipe — Rice Bubbles (often called Rice Krispies) — are gluten-free by nature. However, always double-check the packaging to ensure there are no cross-contamination risks. If you’re using any additional decorations or toppings, check those as well for gluten content. With just a little attention to detail, you can make these spooky treats suitable for everyone at your Halloween party!
🍯 Can I substitute mini marshmallows with something else?
Unfortunately, you can’t easily swap out mini marshmallows without altering the texture and taste significantly. I’ve tested using alternatives like homemade marshmallow fluff or other types of candy but found that nothing works quite as well as good old-fashioned mini marshmallows. If you’re looking to reduce sugar or calories, you might try using sugar-free marshmallows; just know that they may not melt or hold together as effectively.
🤔 Why do I need to stir every 30 seconds while melting the marshmallows?
Stirring every 30 seconds while melting is essential because it helps distribute heat evenly throughout the marshmallows. If you leave them unattended in the microwave, some parts could overheat while others remain unmelted. This can result in a lumpy mixture instead of that smooth consistency we want! Trust me; it’s worth taking those extra moments to stir — you’ll thank yourself when your brains come out perfectly smooth.
🎨 Can I customize the decorations on these brains?
Definitely! The decorating stage is where you can get really creative. While I’ve gone with white chocolate and red food coloring for a classic creepy effect, feel free to experiment with other colors or toppings like crushed cookies for a “dirt” look or edible glitter for an eerie sparkle. You could even use different molds if you want unique shapes! Just remember that whatever you choose should complement the sweetness of the marshmallow base. Happy decorating!
Troubleshooting
I will continue to add more to this Troubleshooting section as I start seeing questions coming through from people who have made the recipe.
Troubleshooting tips
“My rice bubble brains are too flat! 😩”
- This might happen if you didn’t press the mixture firmly enough into the brain-shaped mold. Pressing down helps them hold their shape while cooling.
- Another reason could be that your mixture was too warm when spooning it into the mold, causing it to spread instead of set. Make sure to let it cool slightly before molding.
- I bet they were still YUM though!
“My marshmallow mixture is too sticky and gooey! 🤦♀️”
- If your mixture is overly sticky, it could be due to using too many mini marshmallows compared to Rice Bubbles. Stick to the 4 cups of marshmallows and 3 cups of Rice Bubbles for the right balance.
- Not stirring often enough while melting can also lead to uneven heating, making parts of the marshmallow mix stickier than others. Stir every 30 seconds as instructed!
- I bet they were still YUM though!
“The surface of my rice bubble brains cracked! 😱”
- Cracking can occur if your mixture was overcooked, causing the marshmallows to lose moisture. Be sure to microwave in short intervals and stir frequently until perfectly smooth.
- If you didn’t allow them to cool completely before removing from the mold, they might crack when handled too soon. Give them a full 10 minutes at room temperature!
- I bet they were still YUM though!
“My brain decorations look uneven and messy! 🎨”
- An uneven appearance can result from not allowing the white chocolate to cool slightly before drizzling; if it’s too hot, it may run off and create a mess.
- If you’re using a brush or toothpick for the red food coloring, make sure it’s clean and dry. A wet brush could cause smudging and uneven application.
- I bet they were still YUM though!