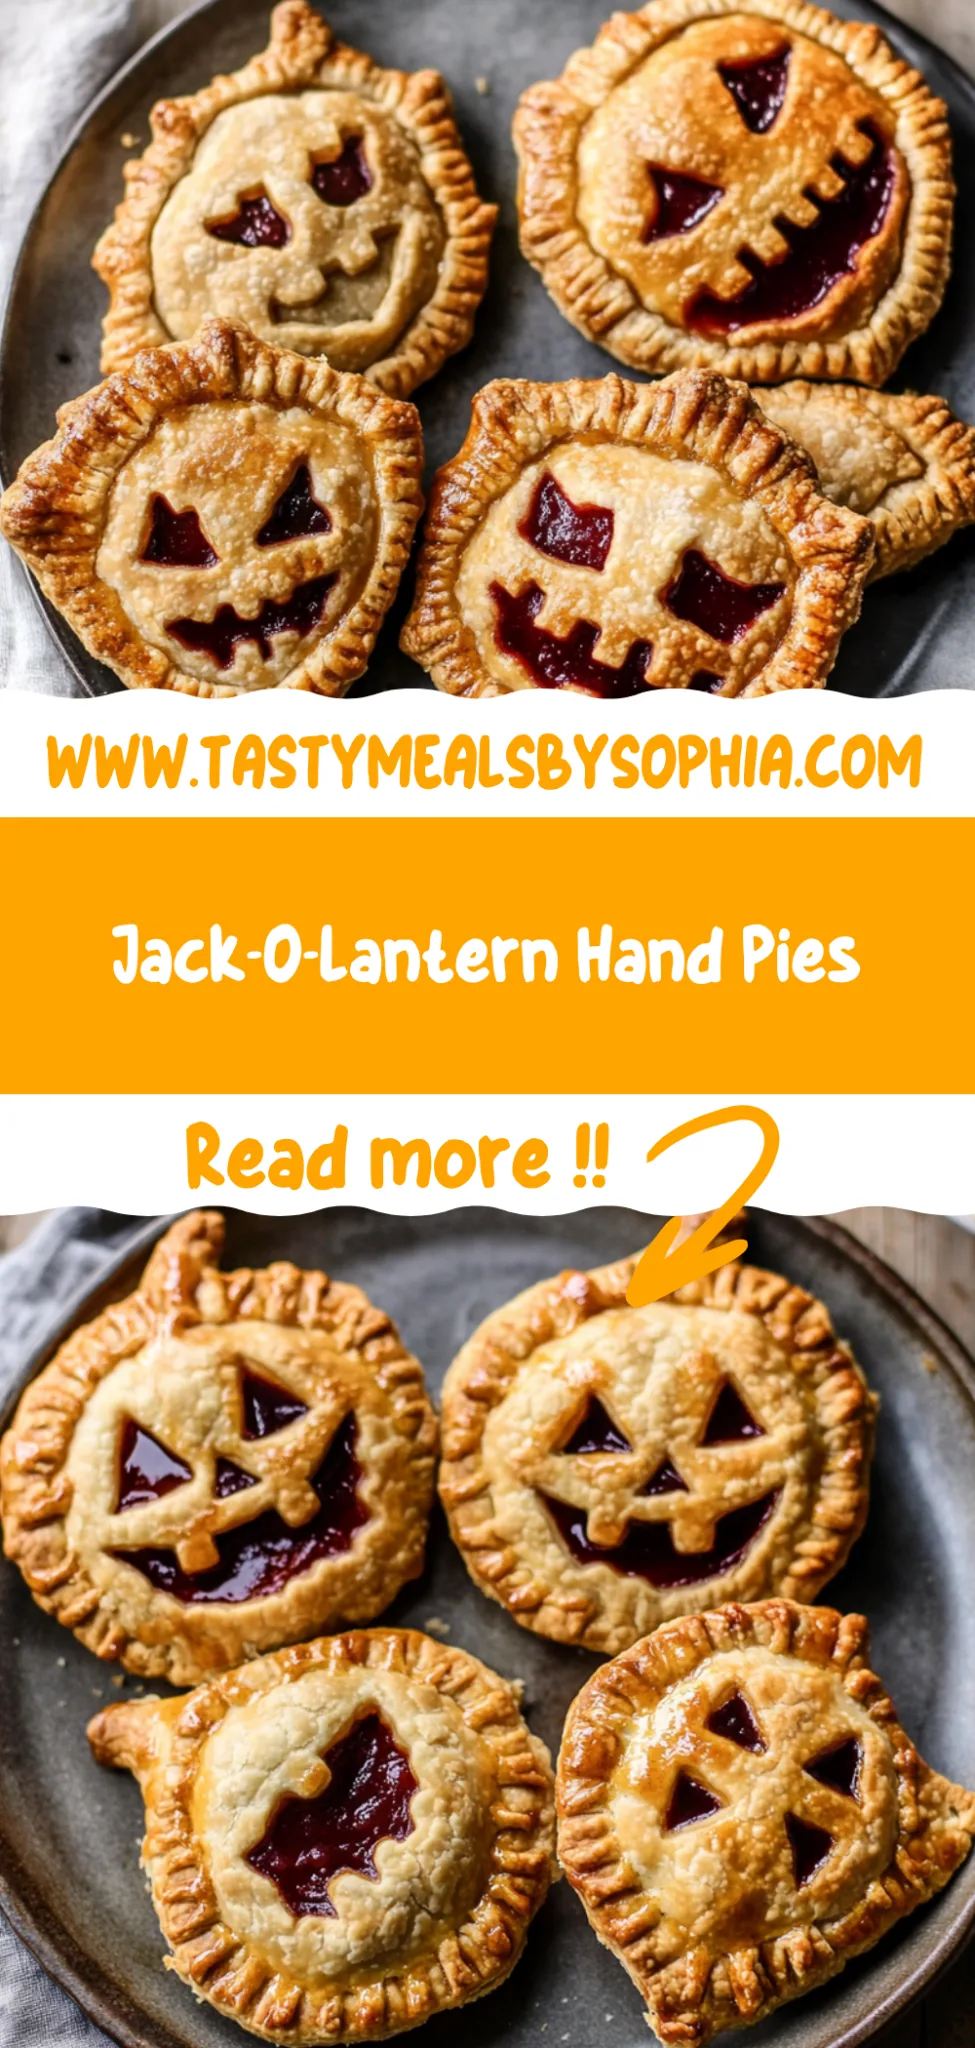
Jack-O-Lantern Hand Pies: Delightfully Spooky Treats
When I first stumbled upon a charming little bakery that sold Halloween-themed treats, I couldn’t resist the allure of their adorable jack-o-lantern hand pies. My craving for something festive yet delicious hit hard, and I knew I had to recreate these delightful pastries at home. What made that bakery’s version so special wasn’t just the cute design; it was the warm, spiced pumpkin filling that wrapped around buttery pastry. However, with three kids in tow and a budget tighter than my jeans after a holiday feast, I figured making my own Jack-O-Lantern Hand Pies would be more cost-effective and way more fun!
Let me tell you, perfecting this recipe took way more tries than I’d like to admit—around six attempts to be exact! Each failed batch was a lesson learned: too dry, too mushy, not enough spice… I felt like a mad scientist in the kitchen, constantly adjusting ratios and flavors. One day I’d be convinced I’d nailed it, only to take a bite and wonder if I’d accidentally made cardboard instead of pie. But every misstep brought me closer, each iteration fueling my determination to craft the ultimate hand pie.
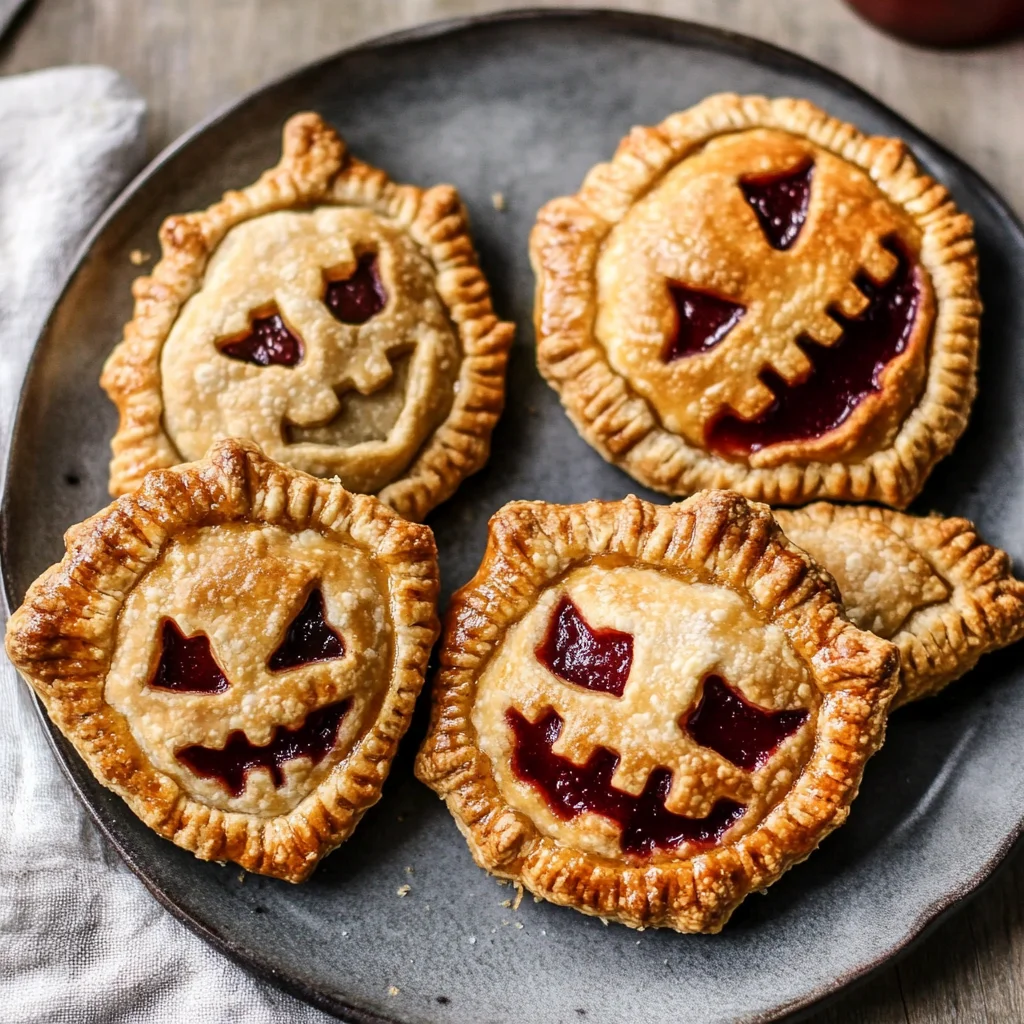
And oh boy, was it worth every minute! The final result is nothing short of magical: flaky pastry that shatters beautifully upon your first bite, encasing a luscious spiced pumpkin filling that dances on your taste buds. These Jack-O-Lantern Hand Pies are not just visually stunning; they’re packed with cozy autumnal flavors that make them perfect for any Halloween gathering. Trust me—once you take a bite, you’ll be as hooked as I am! So grab your rolling pin and join me in bringing some festive joy to your kitchen; you won’t regret it!
These Jack-O-Lantern Hand Pies are….
….the ultimate Halloween treat that combines fun and flavor in every bite!
1. They have a warm, spiced aroma that instantly evokes the essence of fall, thanks to the blend of cinnamon, nutmeg, and ginger in the pumpkin filling. This carefully curated mix enhances the natural sweetness of the pumpkin puree, creating a cozy and inviting scent that fills your kitchen as they bake.
2. Flaky, tender crust – each hand pie features a beautifully flaky crust that’s both satisfying to bite into and light enough not to overpower the filling. By using cold, cubed unsalted butter and ice water, I ensure that the dough remains chilled, which is key in achieving that coveted texture everyone loves.
3. The hand-crimped edges not only add visual appeal but also seal in all the delicious pumpkin filling. This simple technique prevents any leaks during baking, allowing every bite to burst with flavor while ensuring a beautifully golden finish on the outside.
4. Budget-friendly indulgence – making these Jack-O-Lantern Hand Pies at home is far more economical than purchasing specialty treats from bakeries or stores. With common ingredients like flour and canned pumpkin puree, you can whip up a batch for any gathering without breaking the bank while enjoying them fresh from your oven!
PS These hand pies are perfectly sized for snacking or serving at parties — just the right amount of filling and crust to satisfy Halloween cravings!
Ingredients for the Jack-O-Lantern Hand Pies
Each ingredient in this dish plays an essential role in flavor and texture. Here’s what you’ll need:
- 2 cups all-purpose flour: Provides the structure and flakiness of the hand pies.
- 1 tsp salt: Enhances the overall flavor of the crust.
- 1/2 cup unsalted butter (cold and cubed): Creates a rich, buttery flavor and tender texture.
- 6 tbsp ice water (more if needed): Helps bind the dough while keeping it cold for a flaky crust.
- 1 cup canned pumpkin puree: Offers a smooth base with natural sweetness for the filling.
- 1/2 cup brown sugar: Adds depth of sweetness and a hint of molasses flavor.
- 1 tsp cinnamon: Infuses warm, aromatic spice that complements the pumpkin.
- 1/2 tsp nutmeg: Provides a subtle earthiness that enhances the autumnal flavors.
- 1/4 tsp ginger: Adds a zesty kick that brightens the filling.
- 1 tbsp vanilla extract: Introduces a warm sweetness that rounds out the flavors.
- 1 egg beaten (for egg wash): Gives the crust a beautiful golden sheen when baked.
The Dough Must Chill! Seriously, Don’t Skip This Step!
I’ll be honest, I tried to find a shortcut here. I thought maybe, just maybe, I could skip the chilling time and still achieve that flaky, tender crust. Spoiler alert: I was wrong! After several rounds of testing (and a few sad pies later), I learned that this step is absolutely non-negotiable if you want your Jack-O-Lantern Hand Pies to shine.
The reason behind this? Chilling the dough allows the gluten in the flour to relax while also firming up the butter. Think of it like letting a steak rest after cooking—it helps the juices redistribute and enhances flavor. In our case, it ensures that when you bake those hand pies, the butter creates steam pockets that result in a beautifully flaky texture. Trust me; your taste buds will thank you for not rushing this crucial step.
What does chilling the dough do?
- Flakiness — Chilling allows the butter to solidify, creating layers that puff up during baking for a flaky crust.
- Tenderness — Relaxing gluten prevents toughness, resulting in a beautifully tender bite.
- Ease of handling — Cold dough is less sticky and easier to roll out, making assembly a breeze.
- Flavor development — Resting gives the ingredients time to meld together, enhancing overall flavor.
- Better shape retention — Chilled dough holds its shape better in the oven, preventing excessive spreading.
Different chilling times
- 30 minutes (good) — This is the bare minimum; you’ll get decent results but may miss out on optimal flakiness.
- 1 hour (better) — A noticeable improvement in texture and ease of handling; definitely worth the wait!
- 2 hours (great) — The crust becomes even more tender and flaky; something magical happens at this point.
- Overnight (best) — Pure pie perfection! The flavors deepen and the texture reaches next-level flakiness.
Be warned: The most common mistake is rushing this step. If you skip or shorten the chilling time, you’ll end up with a tough crust instead of the tender, flaky delight we’re aiming for. Don’t say I didn’t warn you!
How to make Jack-O-Lantern Hand Pies
Are you ready to see how straightforward it is to make the Jack-O-Lantern Hand Pies of your dreams??
1. MAKE THE PIE CRUST
Let’s start with a flaky and buttery pie crust that’ll hold all that delicious filling!
1. COMBINE – In a mixing bowl, combine 2 cups of all-purpose flour and 1 tsp of salt. This blend sets the foundation for a perfectly seasoned crust. 2. MIX – Add in 1/2 cup of cold, cubed unsalted butter. Using your fingers or a pastry cutter, mix until the mixture resembles coarse crumbs with some pea-sized butter pieces remaining. This step ensures your crust will be light and flaky! ❓ Why does the temperature of the butter matter? Because cold butter creates steam during baking, resulting in flakiness! 3. ADD WATER – Gradually add 6 tbsp of ice water, mixing just until the dough comes together. If it feels too dry, add more water, one tablespoon at a time. 4. DIVIDE – Once combined, divide the dough into two discs, wrap them in plastic wrap, and refrigerate for 30 minutes. Chilling is essential; it relaxes the gluten and makes rolling out easier later!
HANDY TIPS
- Use a pastry cutter or fork for mixing to keep the butter cold!
- If you want extra flaky pastry, consider freezing your butter beforehand.
- Make ahead! You can prepare and refrigerate the crust a day earlier.
2. PREPARE THE FILLING
Now let’s whip up that scrumptious pumpkin filling!
5. MIX INGREDIENTS – In another bowl, combine 1 cup of canned pumpkin puree, 1/2 cup of brown sugar, 1 tsp of cinnamon, 1/2 tsp of nutmeg, 1/4 tsp of ginger, and 1 tbsp of vanilla extract. Stir until well combined and smooth. This aromatic mixture will bring all the cozy fall vibes right into your kitchen!
HANDY TIPS
- For an extra flavor boost, feel free to add a splash of maple syrup or a pinch of cloves!
- Taste as you go! Adjust spices to match your personal preference.
3. ASSEMBLE THE HAND PIES
Time for some fun—let’s shape these pies into adorable jack-o-lanterns!
6. PREHEAT OVEN – Preheat your oven to 375°F (190°C). This ensures even baking when you’re ready to pop those pies in! 7. ROLL OUT DOUGH – On a floured surface, roll out one disc of chilled dough to about 1/8 inch thick. Aim for even thickness so they all bake uniformly! 8. CUT SHAPES – Use a cookie cutter to cut out shapes for your pies; I like using pumpkin-shaped cutters for extra festivity! Place half of these shapes on a baking sheet lined with parchment paper to prevent sticking. 9. FILL WITH PUMPKIN MIXTURE – Spoon about one tablespoon of pumpkin filling onto each shape, leaving space around the edges for sealing later on; otherwise, they might ooze out during baking! ⚠️ Be careful not to overfill! 10. SEAL AND DECORATE – Top each filled shape with another cut-out shape and press the edges firmly to seal them shut; this is where you can also get creative by cutting small slits for steam—think jack-o-lantern faces—and brush them with beaten egg for that beautiful golden finish!
HANDY TIPS
- Try using different cookie cutters if you want various shapes—ghosts or bats could be fun too!
- If you’re worried about sealing properly, use a fork to crimp the edges!
4. BAKE THE PIES
The moment we’ve been waiting for—let’s get these beauties into the oven!
11. BAKE – Place your baking sheet in the preheated oven and bake for about 20-25 minutes or until they are golden brown and fragrant throughout your kitchen—trust me; you’ll know when they’re done by that delightful aroma wafting through the air! Let them cool on a wire rack before serving so you don’t burn your tongue!
HANDY TIPS
- Keep an eye on them towards the end; every oven is different!
- These pies can be made ahead and frozen before baking—just add an extra few minutes in the oven if baking from frozen.
Make these once, and I wager they will invade your dreams every night too! – Nagi x
FAQ – Jack-O-Lantern Hand Pies
🍂 How long will these hand pies keep?
Jack-O-Lantern hand pies can be stored at room temperature for up to 2 days, after which I recommend refrigerating them. In the fridge, they will maintain their quality for about 4-5 days but may lose some crispness. If stored properly in an airtight container, you can expect them to be about 90% as good on day 5. For the best texture, I suggest reheating them in the oven or an air fryer to restore their flakiness.
❄️ Can I freeze these hand pies?
Absolutely! These hand pies freeze beautifully. To freeze, assemble them completely (but don’t bake), then arrange them in a single layer on a baking sheet and freeze until solid. Once frozen, transfer them to a zip-top freezer bag or airtight container for up to 3 months. When you’re ready to bake, there’s no need to thaw—just pop them straight into the oven from the freezer and add an extra few minutes to the baking time. They might take about 30-35 minutes at 375°F (190°C).
🌾 Can I make these gluten-free?
Yes, you can make these Jack-O-Lantern hand pies gluten-free! I recommend using a high-quality gluten-free all-purpose flour blend that includes xanthan gum. This will help mimic the texture of traditional pie crusts. Keep in mind that gluten-free dough may be more crumbly, so handle it gently and add a bit more ice water if necessary to bring it together. Happy Halloween without gluten worries!
🥄 Can I reduce the sugar in the pumpkin filling?
No, you cannot reduce the sugar without affecting the filling’s consistency and flavor balance. I tried this numerous times by decreasing it by 1/4 cup and even substituting with various sweeteners, but it resulted in a filling that was too watery and lacked sweetness—definitely not what we’re going for here! If you’d like a slightly less sweet option, consider using half brown sugar and half maple syrup; just note that it will change the flavor profile slightly.
🤔 Why do I need to chill the dough?
Chilling the dough is essential for achieving that perfect flaky texture in your hand pies. The cold butter creates steam during baking, which results in those lovely layers that we all crave in a pie crust. Skipping this step leads to a tougher crust—trust me; I’ve made that mistake before! Chill your dough for at least 30 minutes, but if you can wait longer (even up to overnight), you’ll get an even better result.
🥧 What if my pumpkin filling is too runny?
If your pumpkin filling turns out runny, don’t worry—there’s a simple fix! You can thicken it by adding a tablespoon of cornstarch or flour while mixing. Just be sure to whisk it well with your other ingredients until smooth. Another option is to let it sit for about 15-20 minutes so excess moisture can evaporate before you spoon it onto your pie crusts. Remember, nobody wants soggy hand pies!
🎃 Can I customize these hand pies with different fillings?
Definitely! While spiced pumpkin is classic for Halloween, feel free to get creative with your fillings. Apple cinnamon or pecan pie fillings would work wonderfully as alternatives—just ensure they are cooked down enough so they aren’t too watery when you fill your hand pies. You could even try savory options like a cheese and spinach mix if you’re feeling adventurous! The world is your oyster—or should I say pumpkin?
Troubleshooting
- I will continue to add more to this Troubleshooting section as I start seeing questions coming through from people who have made the recipe.
Troubleshooting tips
“My hand pies came out too flat! 😩”
- Your dough might have been rolled out too thin. When rolling to about 1/8 inch thick, make sure you’re not going thinner than that, or else they won’t hold their shape while baking.
- If your butter was not cold enough during mixing, it may have melted into the dough before baking. Cold butter creates steam pockets that help the pies puff up!
- I bet they were still YUM though!
“My filling leaked out everywhere! 😱”
- You may not have left enough space around the edges when spooning on the pumpkin filling. Aim for about 1/2 inch of edge space to ensure a good seal.
- If your dough was too wet, it might not have sealed properly. Make sure to gradually add ice water and only use enough for the dough to come together without being sticky!
- I bet they were still YUM though!
“The crust was way too tough! 😬”
- Overworking the dough can lead to a tough texture. When mixing in the butter and adding ice water, be gentle and stop as soon as it comes together.
- If you didn’t chill the dough long enough after forming it into discs, it can lead to gluten development which makes the crust chewy instead of flaky.
- I bet they were still YUM though!
“My pies are unevenly browned! 🔥”
- If your oven temperature is off, it can cause uneven baking. Make sure your oven is accurately preheated to 375°F (190°C) before baking your hand pies.
- If you placed them on an overcrowded baking sheet, they might not bake evenly. Ensure there’s enough space between each pie for hot air circulation.
- I bet they were still YUM though!
Jack-O-Lantern Hand Pies
Ingredients
Method
- In a mixing bowl, combine flour and salt. Add cold butter and mix until crumbly.
- Gradually add ice water until the dough comes together. Divide into two discs, wrap in plastic, and refrigerate for 30 minutes.
- In another bowl, mix pumpkin puree, brown sugar, cinnamon, nutmeg, ginger, and vanilla until well combined.
- Preheat the oven to 375°F (190°C). Roll out one disc of dough on a floured surface to about 1/8 inch thick.
- Use a cookie cutter to cut out shapes for the pies. Place half of the shapes on a baking sheet lined with parchment paper.
- Spoon a tablespoon of pumpkin filling onto each shape, leaving space around the edges.
- Top with remaining shapes, pressing edges to seal. Cut small slits for steam and brush with beaten egg.
- Bake in the preheated oven for 20-25 minutes or until golden brown. Let cool before serving.