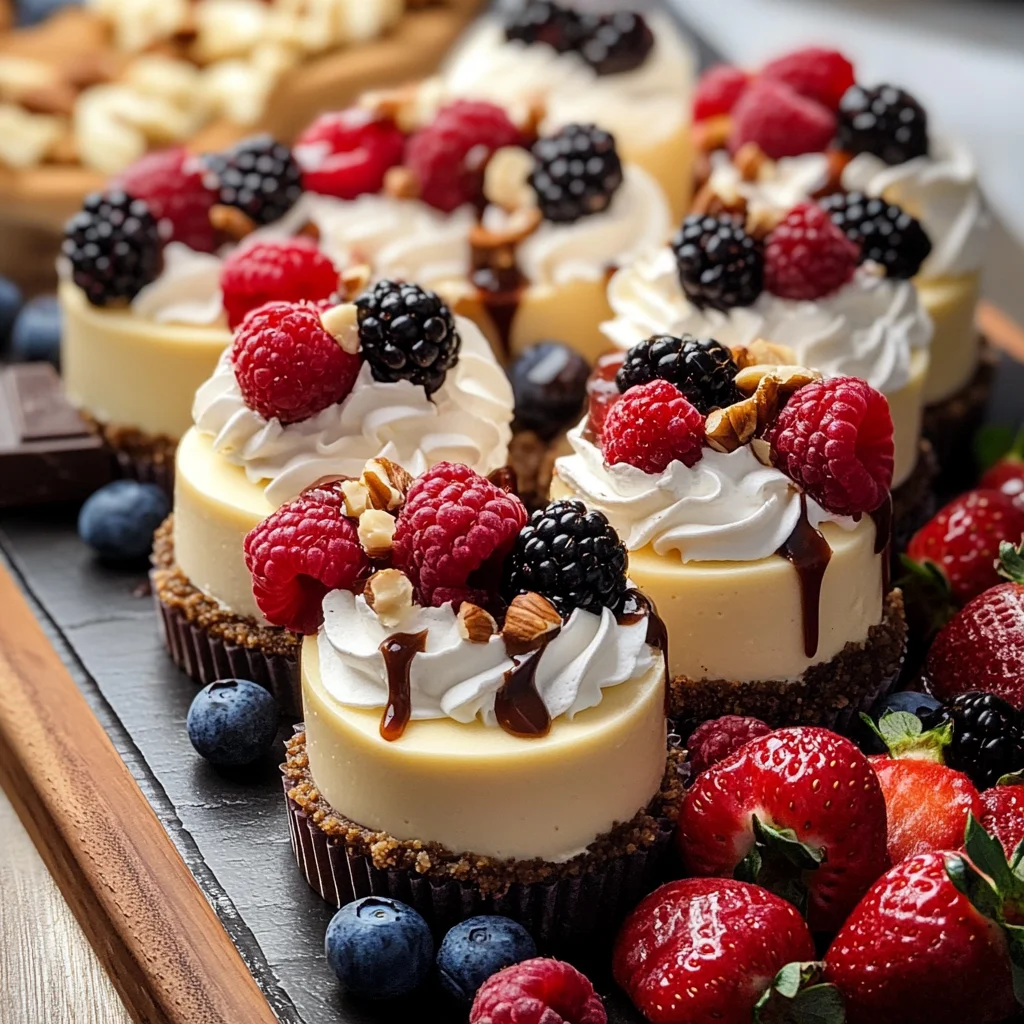
How To Make An Epic Mini Cheesecake Board
Looking to jazz up your dessert game this year? You have to check out this epic mini cheesecake board and how to wow your guests instantly at the dessert table! If you’re anything like me, dessert is the highlight of any gathering. These mini cheesecakes are not only adorable but also incredibly delicious. They come together easily, making them perfect for everything from busy weeknights to family gatherings or holiday celebrations.
What makes this recipe special is its delightful combination of creamy cheesecake and fresh toppings, allowing everyone to customize their own mini masterpiece. Let’s dive into how to make an epic mini cheesecake board that will leave everyone asking for seconds!
Why You’ll Love This Recipe
- Easy to prepare: With simple steps and minimal effort, you can whip up these delightful treats in no time.
- Family-friendly fun: Kids and adults alike will enjoy personalizing their cheesecakes with a variety of toppings.
- Make-ahead convenience: You can bake the cheesecakes in advance, making it a stress-free option for any occasion.
- Delicious flavor: The creamy texture paired with fresh berries and sauces creates a delightful explosion of taste in every bite.
Ingredients You’ll Need
Gathering the ingredients for this mini cheesecake board is half the fun! You’ll find that these are simple, wholesome ingredients that you may already have on hand. Let’s see what you need:
For the Cheesecake Base
- 1 1/2 cup Graham Cracker Crumbs
- 1/4 cup Granulated Sugar
- 1/3 cup Unsalted Butter (melted)
For the Cheesecake Filling
- (2) 8 oz Packaged Cream Cheese (softened)
- 2 large Eggs
- 1 tsp Vanilla Extract
- 1/4 cup Sour Cream
For Toppings
- Fresh Berries (Strawberries, Blueberries, Raspberries)
- Chocolate Chips
- Caramel Sauce
- Chocolate Sauce
- Whipped Cream
- Crushed Nuts
Variations
This mini cheesecake board is wonderfully flexible! You can easily mix things up based on your taste preferences or what you have at home. Here are some fun ideas:
- Change up the crust: Swap graham cracker crumbs for crushed Oreos or shortbread cookies for a different flavor twist.
- Add flavors: Incorporate lemon zest or cocoa powder into the cheesecake mixture for a unique taste.
- Experiment with toppings: Use seasonal fruits like peaches or mangoes, or even add a sprinkle of coconut flakes for a tropical vibe.
- Try different sauces: Instead of caramel and chocolate sauce, drizzle with fruit compote or even peanut butter for a nutty twist.
How to Make How To Make An Epic Mini Cheesecake Board
Step 1: Preheat Your Oven
Preheating your oven to 325°F (160°C) sets the stage for perfectly baked mini cheesecakes. A stable temperature helps ensure even baking, giving you that luscious texture we all love.
Step 2: Prepare the Crust
In a medium mixing bowl, combine the graham cracker crumbs, granulated sugar, and melted butter. Stir until it resembles wet sand. This mixture forms the base of your cheesecakes. Pressing it firmly into each muffin liner creates a sturdy foundation that will hold all that creamy goodness.
Step 3: Prepare the Filling
In a large mixing bowl, beat together softened cream cheese and granulated sugar until smooth and creamy. This step is crucial; beating well ensures there are no lumps in your filling. Adding eggs one at a time helps incorporate air into the mixture, giving your cheesecakes a fluffy texture.
Step 4: Bake Your Cheesecakes
Spoon the cheesecake mixture over your prepared crusts in the muffin tin. Bake them in your preheated oven for about 15-18 minutes. The edges should be set while the centers remain slightly jiggly — this means they’ll firm up perfectly as they cool.
Step 5: Cool Down
After baking, allow your mini cheesecakes to cool in the muffin tin for about 10 minutes before transferring them to a wire rack to cool completely. This step prevents sogginess by letting excess moisture escape.
Step 6: Arrange on Your Board
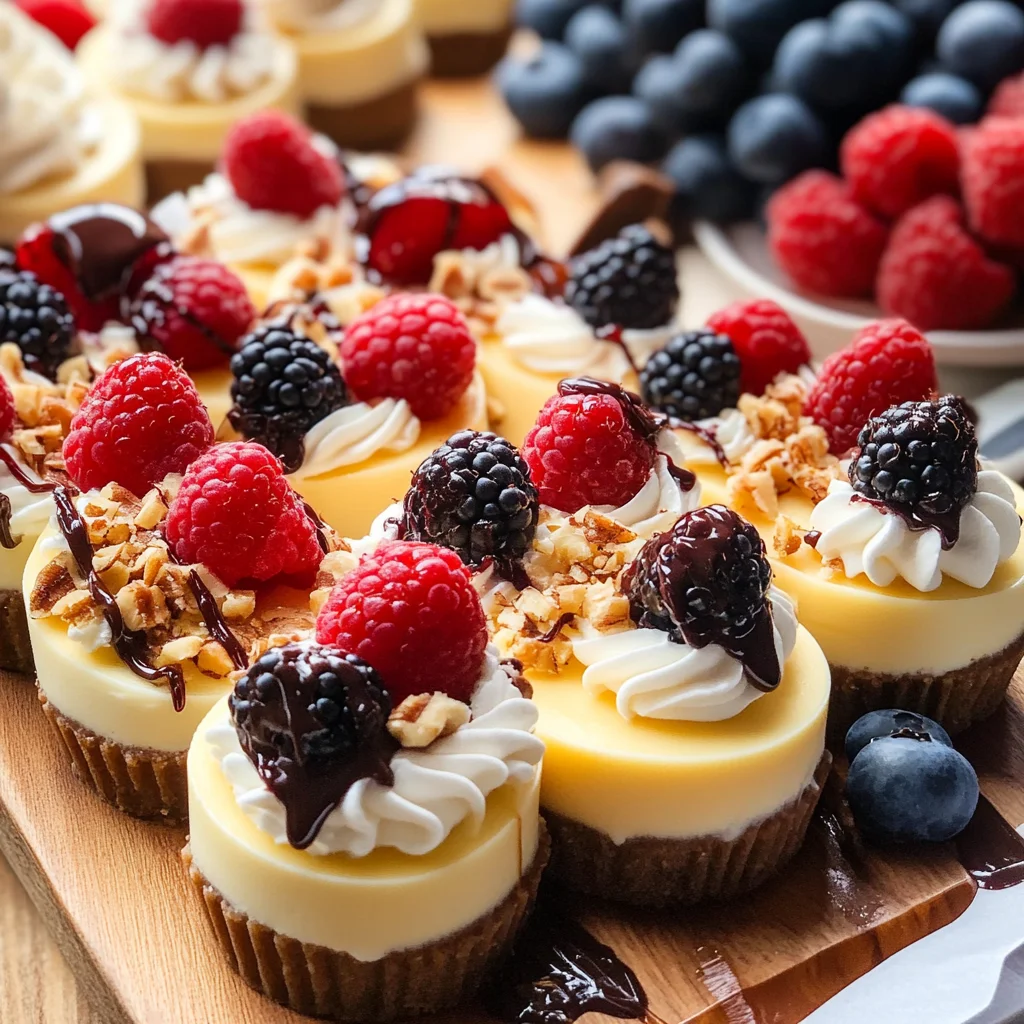
Once cooled, it’s time to create your beautiful dessert display! Arrange your mini cheesecakes on a serving board or platter. This allows you to showcase their charm and makes them inviting for guests.
Step 7: Prepare Your Toppings
Wash and dry your fresh berries, melt those chocolate chips if desired, and warm up caramel sauce so it’s ready for drizzling! Having everything prepped makes it easy and fun for everyone to top their mini cheesecakes just how they like.
Step 8: Serve Up Some Fun!
Set out small serving spoons or forks next to your board so guests can pile on their favorite toppings — berries, chocolate sauce, whipped cream… let their creativity shine! Watching everyone build their own delicious creations is half the joy of this epic mini cheesecake board!
Now you’re ready to impress everyone with this delightful treat! Enjoy every bite!
Pro Tips for Making How To Make An Epic Mini Cheesecake Board
Creating a mini cheesecake board is a delightful way to impress your guests, and with these pro tips, you’ll be a cheesecake hero in no time!
- Use Room Temperature Ingredients: Bringing your cream cheese and eggs to room temperature before mixing ensures a smoother batter, preventing lumps and creating that velvety texture everyone loves.
- Don’t Overbake: Keep an eye on your mini cheesecakes while they bake. They should be set around the edges but slightly jiggly in the center. This will guarantee that creamy consistency we all crave.
- Chill Before Serving: Allowing your cheesecakes to cool completely in the fridge for at least an hour enhances their flavor and makes them easier to remove from the muffin liners.
- Get Creative with Toppings: The beauty of a cheesecake board lies in its versatility. Don’t hesitate to add unique toppings like crushed cookies, different fruits, or even flavored syrups to cater to varying tastes.
- Make it Colorful: A visually appealing board is key! Use a variety of toppings with different colors and textures, such as vibrant berries against the creamy cheesecakes, to create an inviting display.
How to Serve How To Make An Epic Mini Cheesecake Board
Presenting your mini cheesecake board can be just as fun as making it! Consider arranging everything beautifully to make it an eye-catching centerpiece at your dessert table.
Garnishes
- Mint Leaves: Fresh mint adds a pop of color and a refreshing hint of flavor that complements the sweetness of the cheesecakes perfectly.
- Cocoa Powder: A light dusting of cocoa powder over the top of each cheesecake can enhance the chocolatey flavors if you go for chocolate chips on top.
- Edible Flowers: For a touch of elegance, decorate your board with edible flowers—these not only look stunning but also add an unexpected floral note to each bite!
Side Dishes
- Fruit Salad: A vibrant mix of seasonal fruits can provide a refreshing contrast to the rich cheesecakes—think watermelon, kiwi, and pineapple for added sweetness and juiciness.
- Cheese Platter: Pairing savory cheeses like brie or gouda balances out the sweetness of the dessert; serve alongside some crackers or breadsticks for variety.
- Chocolate-Covered Pretzels: The salty crunch of pretzels dipped in chocolate offers a delightful textural element that enhances the overall snacking experience.
- Coffee or Tea: Offering warm beverages like coffee or herbal tea can help cleanse the palate between bites of sweet cheesecake while providing comfort during dessert time.
With these tips and serving suggestions, your mini cheesecake board is sure to be a hit at any gathering! Enjoy creating delicious memories with friends and family around this scrumptious dessert spread.
Make Ahead and Storage
This mini cheesecake board is not only a delightful treat but also perfect for meal prep! You can prepare the cheesecakes in advance and store them, ensuring you have a fabulous dessert ready for any occasion.
Storing Leftovers
- Allow the mini cheesecakes to cool completely before storing.
- Place them in an airtight container in the refrigerator.
- They can be stored for up to 5 days.
Freezing
- To freeze, wrap each mini cheesecake individually in plastic wrap.
- Place wrapped cheesecakes in a freezer bag or airtight container.
- They can be frozen for up to 2 months. Thaw in the refrigerator overnight before serving.
Reheating
- These mini cheesecakes are best served chilled, so there’s no need for reheating.
- If desired, you can let them sit at room temperature for about 15-20 minutes before serving for a softer texture.
FAQs
Here are some common questions that might come to mind as you prepare this delicious dessert!
How To Make An Epic Mini Cheesecake Board with different toppings?
You can customize your mini cheesecake board with a variety of toppings! Consider adding fresh fruits like kiwi or mango, different sauces such as berry compote, or even crushed cookies for added texture. The possibilities are endless!
What is the best way to serve How To Make An Epic Mini Cheesecake Board?
Serve your mini cheesecake board with small spoons or forks and arrange toppings around the cheesecakes. This allows guests to mix and match flavors according to their preferences, making it interactive and fun!
Can I use low-fat cream cheese for How To Make An Epic Mini Cheesecake Board?
Yes! You can substitute low-fat cream cheese without compromising too much on flavor or texture. Just keep in mind that the consistency may vary slightly.
How long does it take to make an Epic Mini Cheesecake Board?
The total time for preparation and baking is about 45 minutes. This makes it a quick and easy option for gatherings or family dinners!
Final Thoughts
I hope you enjoy creating this beautiful and delicious mini cheesecake board as much as I do! It’s such a fun way to bring people together over dessert. Whether it’s a special occasion or just a cozy night in, this recipe guarantees smiles all around. Happy baking!
How To Make An Epic Mini Cheesecake Board

Elevate your dessert experience with this delightful mini cheesecake board! Perfect for any gathering, these adorable mini cheesecakes allow guests to customize their treats with a variety of fresh toppings and sauces. With a creamy texture and rich flavor, this recipe is not only simple to prepare but also a fun interactive experience for family and friends. Whether it’s a holiday celebration or a casual weeknight treat, this mini cheesecake board will be the highlight of your dessert table.
- Prep Time: 15 minutes
- Cook Time: 18 minutes
- Total Time: 33 minutes
- Yield: Approximately 12 servings 1x
- Category: Dessert
- Method: Baking
- Cuisine: American
Ingredients
- 1 1/2 cups Graham Cracker Crumbs
- 1/4 cup Granulated Sugar
- 1/3 cup Unsalted Butter (melted)
- 2 (8 oz) Packaged Cream Cheese (softened)
- 2 large Eggs
- 1 tsp Vanilla Extract
- 1/4 cup Sour Cream
- Fresh Berries (Strawberries, Blueberries, Raspberries)
- Chocolate Chips
- Caramel Sauce
- Whipped Cream
Instructions
- Preheat oven to 325°F (160°C).
- In a bowl, mix graham cracker crumbs, granulated sugar, and melted butter until crumbly. Press firmly into muffin liners.
- In a separate bowl, beat cream cheese and sugar until smooth. Add eggs one at a time, followed by vanilla and sour cream.
- Pour the cheesecake mixture over crusts in muffin tins and bake for 15-18 minutes until edges are set but centers remain slightly jiggly.
- Cool in the muffin tin for 10 minutes before transferring to a wire rack to cool completely.
- Arrange cooled cheesecakes on a serving board and add an array of toppings for guests to enjoy.
Nutrition
- Serving Size: 1 mini cheesecake (60g)
- Calories: 250
- Sugar: 12g
- Sodium: 180mg
- Saturated Fat: 10g
- Unsaturated Fat: 7g
- Trans Fat: 0g
- Carbohydrates: 22g
- Fiber: 1g
- Protein: 4g
- Cholesterol: 55mg