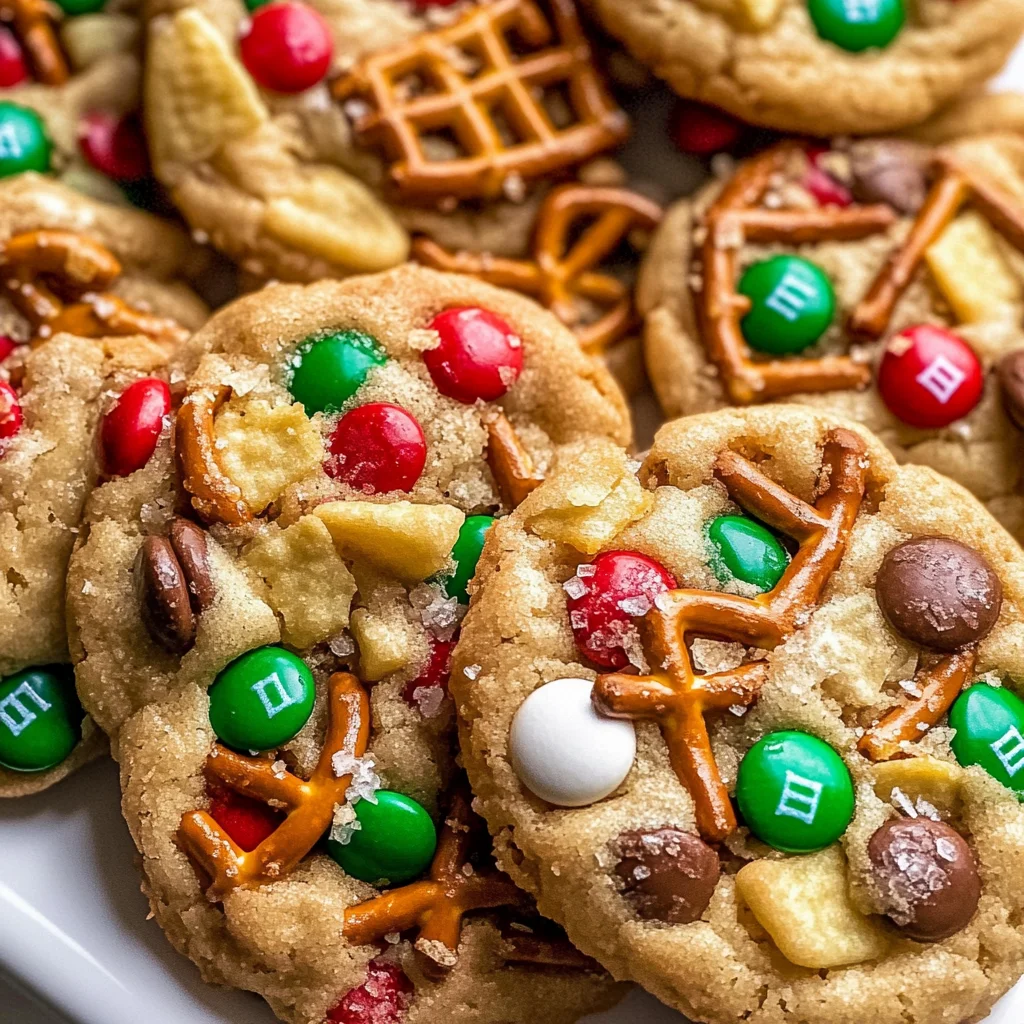
Christmas Kitchen Sink Cookies
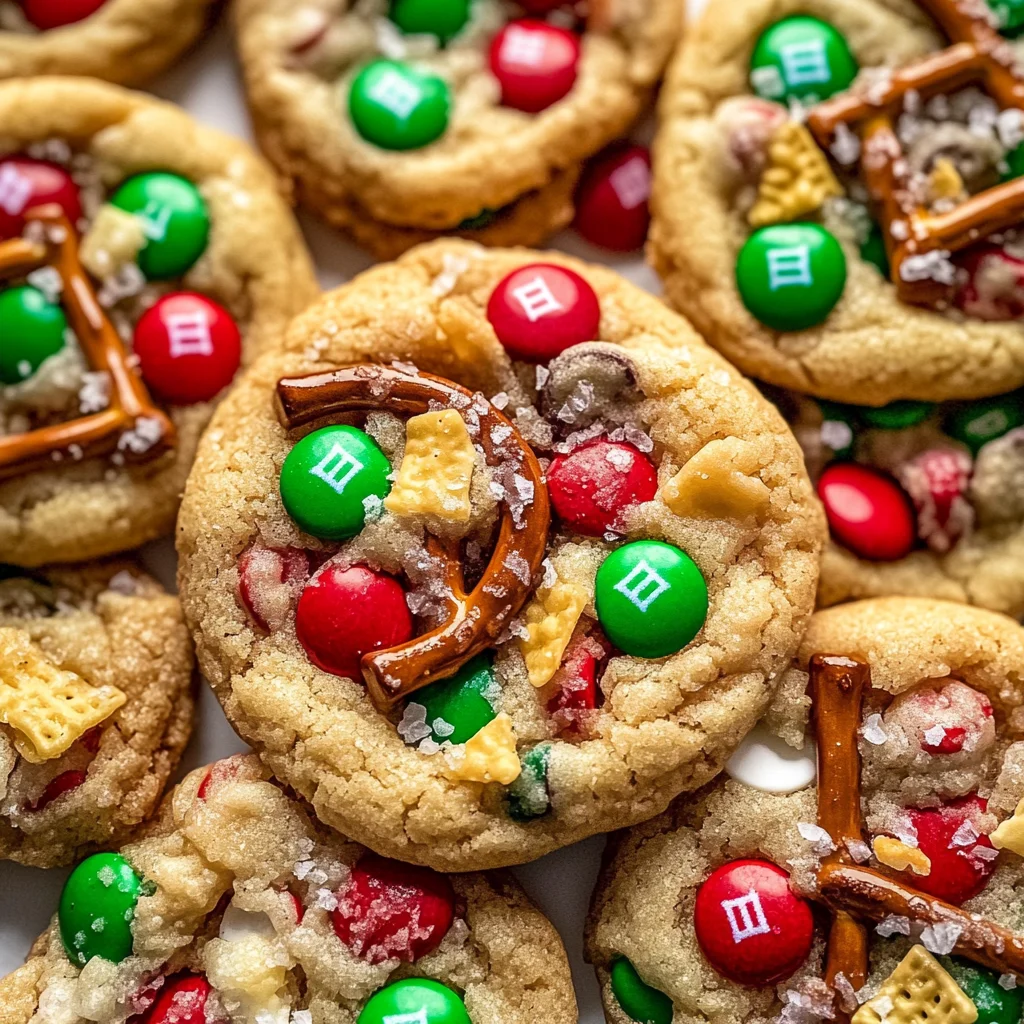
If you’re looking for a cookie that perfectly balances sweet and salty, then you’ve come to the right place! These Christmas Kitchen Sink Cookies are a delightful mix of flavors and textures that will make your holiday season extra special. They’re not just any cookies; they’re filled with pretzel and potato chip pieces, colorful M&M’s, creamy white chocolate chips, and festive sprinkles. Perfect for busy weeknights or cozy family gatherings, these cookies are sure to bring smiles all around.
What I love most about this recipe is how incredibly versatile it is. You can whip up a batch in just about 15 minutes, making them an easy treat to share with friends or enjoy with your loved ones at home. Plus, the combination of flavors will have everyone reaching for another cookie!
Why You’ll Love This Recipe
- Easy to Make: With simple ingredients and straightforward steps, you’ll have these cookies ready in no time!
- Family-Friendly Fun: Kids will love helping out in the kitchen by adding their favorite mix-ins.
- Perfectly Festive: The vibrant colors from the M&M’s and sprinkles make these cookies a hit at any holiday gathering.
- Chewy and Crunchy Delight: Each bite has a satisfying crunch from the pretzels and chips balanced with soft cookie goodness.
- Make-Ahead Convenience: You can bake these cookies ahead of time and store them for those last-minute cravings!
Ingredients You’ll Need
These are simple, wholesome ingredients that come together beautifully to create these festive cookies. Gather them up and let’s get started!
For the Cookie Dough
- 3/4 cup salted butter, softened
- 3/4 cup light brown sugar, packed
- 1/4 cup granulated white sugar
- 2 egg yolks, at room temperature
- 2 tsp vanilla bean paste or extract
- 1 1/2 cups all-purpose flour (spooned and leveled)
- 1/2 tsp baking powder
- 1/2 tsp baking soda
- 1/2 tsp salt
For the Mix-Ins
- 1/2 cup red and green M&M’s
- 1/3 cup white chocolate chips
- 1/3 cup pretzel pieces
- 1/3 cup potato chip pieces
- 2 tbsp red and green jimmies
Variations
This recipe is wonderfully flexible! Feel free to get creative with your mix-ins or flavors.
- Swap the Chips: Use dark chocolate chips or butterscotch chips instead of white chocolate for a different flavor twist.
- Add Nuts: Chopped walnuts or pecans can add an extra crunch to your cookies.
- Change Up the Sprinkles: Use different colored sprinkles for other holidays or occasions.
- Go Gluten-Free: Substitute all-purpose flour with a gluten-free blend for a delicious alternative.
How to Make Christmas Kitchen Sink Cookies
Step 1: Preheat Your Oven
Start by preheating your oven to 350 degrees Fahrenheit. This step is essential as it ensures that your cookies bake evenly. While the oven warms up, line two baking sheets with parchment paper so they’re ready when your dough is prepared.
Step 2: Cream Together Butter and Sugars
In a large mixing bowl, combine softened salted butter, light brown sugar, and granulated sugar. Using an electric mixer, cream these ingredients together on medium speed for about two minutes until they become light and fluffy. This process helps incorporate air into the batter, giving your cookies a lovely texture.
Step 3: Mix in Egg Yolks and Vanilla
Add in two egg yolks along with vanilla bean paste or extract. Mix on medium speed for another two minutes until the mixture turns pale in color. This adds richness to the dough while enhancing its flavor profile.
Step 4: Combine Dry Ingredients
Now it’s time to add in your dry ingredients! Sprinkle in the flour, baking powder, baking soda, and salt. Mix until everything is well combined but don’t overdo it—just enough so there are no dry spots.
Step 5: Fold in Delicious Add-Ins
Gently fold in those wonderful mix-ins: M&M’s, white chocolate chips, pretzel pieces, potato chip pieces, and jimmies. A spatula works best here to ensure everything gets evenly distributed without breaking down the delicate dough.
Step 6: Scoop It Out!
Scoop out dough into about 20 balls using a cookie scoop or spoon. Place them on your prepared baking sheets about two inches apart. If you want those extra cute toppings we talked about earlier, go ahead and add some more mix-ins on top of each ball!
Step 7: Bake Your Cookies
Pop those trays into your preheated oven! Bake for 10-12 minutes; go for 10 if you like chewy centers or 12 if you prefer crisper edges. Keep an eye on them because every oven is different!
Step 8: Optional Shaping Trick
For perfectly round cookies straight from the oven, use a large circular cookie cutter to gently swirl around each cookie while they’re still hot. This little trick helps shape them beautifully!
Step 9: Cool Down
Once baked, let the cookies cool on the sheets for about five minutes before transferring them to a cooling rack for another ten minutes. This cooling time allows them to set properly while keeping that perfect chewy center.
Step 10: Enjoy!
Store any leftovers (if there are any!) in an airtight container for up to three days—though I doubt they’ll last that long! Now grab one (or two) of those delightful Christmas Kitchen Sink Cookies and enjoy every bite!
Pro Tips for Making Christmas Kitchen Sink Cookies
Baking these cookies can be a fun and rewarding experience, especially when you have a few handy tips to ensure they turn out perfect every time!
- Use room temperature ingredients: This helps the butter mix easily with the sugars, creating a light and fluffy texture that is essential for cookies.
- Don’t overmix the dough: Once you add the dry ingredients, mix just until combined. Overmixing can lead to tough cookies, rather than the soft, chewy texture we’re aiming for.
- Chill the dough if needed: If your kitchen is warm or you prefer thicker cookies, chilling the dough for about 30 minutes can help them hold their shape while baking.
- Experiment with mix-ins: Feel free to customize your cookies! Add dried fruits, nuts, or any other favorite candies to make them uniquely yours.
- Keep an eye on baking time: Every oven is different; start checking your cookies at the 10-minute mark. You want them lightly golden around the edges but still soft in the center for that perfect chewiness!
How to Serve Christmas Kitchen Sink Cookies
Presenting your Christmas Kitchen Sink Cookies can add an extra festive touch! Here are some delightful ideas to make your cookie display shine.
Garnishes
- Sprinkles: A light dusting of colorful sprinkles on top adds a festive flair and enhances their holiday spirit.
- Chocolate drizzle: Melt some dairy-free chocolate and drizzle it over the cooled cookies for an elegant finish that adds both flavor and visual appeal.
Side Dishes
- Homemade Hot Chocolate: This rich and creamy beverage pairs beautifully with cookies, making a perfect cozy treat during winter festivities.
- Fruit Salad: A refreshing fruit salad can balance out the sweetness of the cookies and add a healthy touch to your dessert table.
- Coffee or Tea: Offering a warm beverage like coffee or herbal tea alongside your cookies makes for a comforting treat that everyone will enjoy.
- Ice Cream: A scoop of dairy-free ice cream can elevate your cookie experience, creating delicious ice cream sandwiches that are sure to please guests of all ages.
With these serving suggestions and pro tips in hand, you’re all set to impress your friends and family this holiday season with your delightful Christmas Kitchen Sink Cookies! Enjoy every bite!
Make Ahead and Storage
These Christmas Kitchen Sink Cookies are perfect for meal prep, making them an excellent treat to have on hand during the busy holiday season. You can prepare the dough in advance, ensuring you always have fresh cookies available for unexpected guests or a cozy night in!
Storing Leftovers
- Store leftover cookies in an airtight container at room temperature for up to three days.
- If you want to keep them fresh longer, consider placing parchment paper between layers to prevent sticking.
Freezing
- To freeze, allow the cookies to cool completely, then place them in a single layer on a baking sheet and freeze until solid.
- Once frozen, transfer the cookies to a freezer-safe bag or container. They can be stored for up to three months.
Reheating
- To reheat frozen cookies, simply place them on a baking sheet and warm in a preheated oven at 350°F (175°C) for about 5-7 minutes.
- For best results, let them come to room temperature before reheating if they were previously thawed.
FAQs
Here are some common questions about making these delightful Christmas Kitchen Sink Cookies:
Can I use different mix-ins for Christmas Kitchen Sink Cookies?
Absolutely! Feel free to customize your cookies with your favorite candies or snacks. Nuts, dried fruits, and different chocolate varieties would all make great substitutions!
How do I make my Christmas Kitchen Sink Cookies chewier?
To achieve chewier cookies, slightly underbake them by removing them from the oven when they are just set on the edges but still soft in the center. Letting them cool on the baking sheet helps maintain that chewy texture.
How should I store my Christmas Kitchen Sink Cookies?
Store your cookies in an airtight container at room temperature for up to three days for optimal freshness.
Can I make these Christmas Kitchen Sink Cookies gluten-free?
Yes! You can substitute regular flour with a 1:1 gluten-free blend that is designed for baking. The taste and texture will still be delicious!
What can I do with leftover cookie dough?
If you have any leftover cookie dough after scooping out your balls, you can refrigerate it for up to 48 hours or freeze it for later use. Just scoop and bake when you’re ready!
Final Thoughts
I hope this recipe brings extra joy and sweetness to your holiday celebrations! These Christmas Kitchen Sink Cookies are not only fun to make but also delightful to share with family and friends. Enjoy every moment in your kitchen creating these treats; they’re sure to become a new favorite! Happy baking!
Christmas Kitchen Sink Cookies

Indulge in the festive spirit with these Christmas Kitchen Sink Cookies, a delightful blend of sweet and salty flavors that will elevate your holiday gatherings! These cookies are packed with crunchy pretzel and potato chip pieces, colorful M&M’s, creamy white chocolate chips, and vibrant sprinkles. Perfect for sharing with family or friends, they can be whipped up in just 15 minutes for those busy nights when you need a quick treat. Whether you’re baking for a cookie exchange or simply craving something sweet, these cookies are sure to bring joy and smiles all around.
- Prep Time: 15 minutes
- Cook Time: 12 minutes
- Total Time: 27 minutes
- Yield: Approximately 20 servings 1x
- Category: Dessert
- Method: Baking
- Cuisine: American
Ingredients
- 3/4 cup salted butter
- 3/4 cup light brown sugar
- 1/4 cup granulated sugar
- 2 egg yolks
- 2 teaspoons vanilla bean paste or extract
- 1 1/2 cups all-purpose flour
- 1/2 teaspoon baking powder
- 1/2 teaspoon baking soda
- 1/2 teaspoon salt
- 1/2 cup red and green M&M's
- 1/3 cup white chocolate chips
- 1/3 cup pretzel pieces
- 1/3 cup potato chip pieces
- 2 tablespoons red and green jimmies
Instructions
- Preheat your oven to 350°F (175°C) and line two baking sheets with parchment paper.
- In a large bowl, cream together the softened butter, light brown sugar, and granulated sugar until fluffy.
- Mix in the egg yolks and vanilla until pale in color.
- Add flour, baking powder, baking soda, and salt; mix until combined.
- Gently fold in M&M's, white chocolate chips, pretzels, potato chips, and jimmies.
- Scoop out dough into balls and place them on the prepared sheets.
- Bake for 10-12 minutes based on your preferred texture (chewy or crisp).
- Cool on sheets before transferring to a rack.
Nutrition
- Serving Size: 1 cookie (approximately 30g)
- Calories: 150
- Sugar: 9g
- Sodium: 95mg
- Fat: 7g
- Saturated Fat: 4g
- Unsaturated Fat: 3g
- Trans Fat: 0g
- Carbohydrates: 20g
- Fiber: <1g
- Protein: 2g
- Cholesterol: 30mg