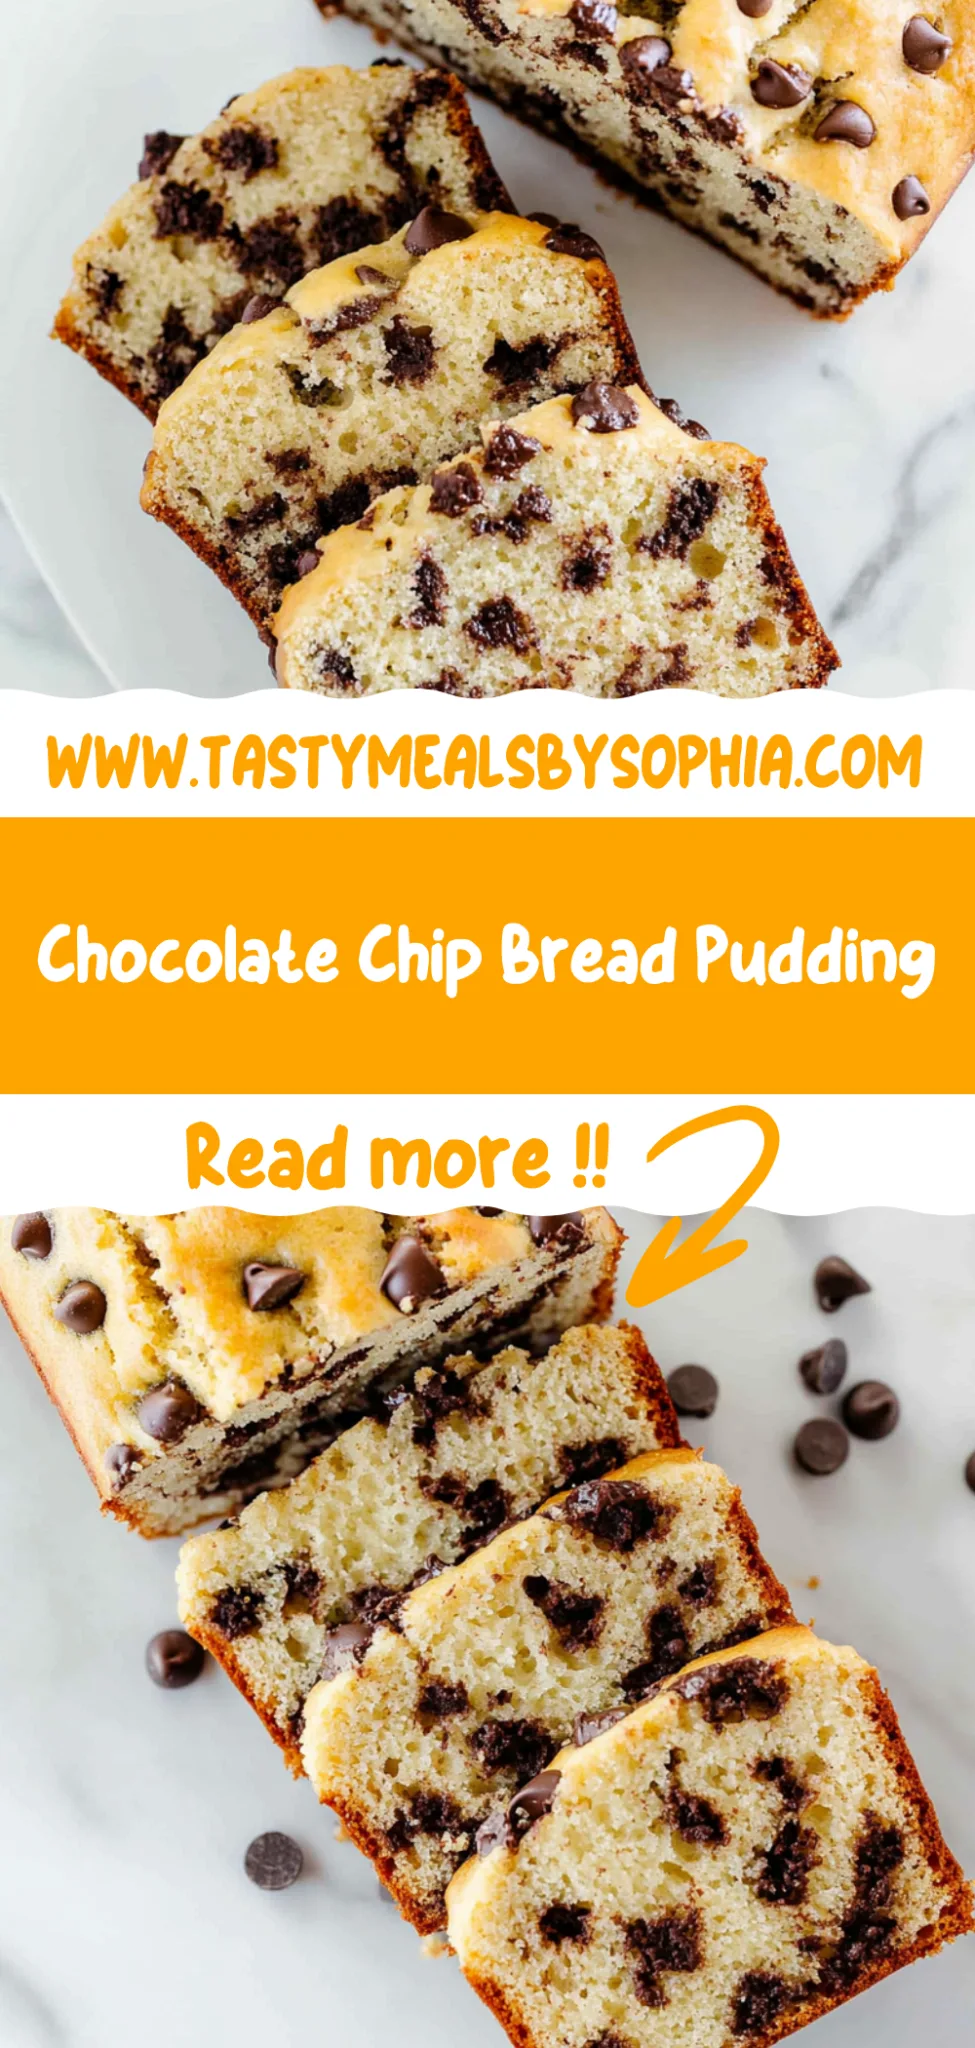
Chocolate Chip Bread: A Decadent Homemade Delight
I still remember the first time I stumbled upon a stunningly decadent Chocolate Chip Bread at a quaint little café during a rainy afternoon. The aroma wafting through the air was nothing short of heavenly, and as soon as I took that first bite, it felt like a warm hug on a gloomy day. I was instantly hooked, but with the price tag on those slices, I knew I had to find a way to recreate that bliss at home—because who wouldn’t want to indulge in this delightful treat without breaking the bank?
After countless attempts—I’m talking about more failures than successes, which is saying something for someone who’s supposed to be a food blogger—I finally cracked the code! Each round of testing brought its own set of mishaps: from bread so dry it could double as a doorstop to loaves that collapsed like my hopes after the first bite. I was determined to achieve that perfect balance of sweetness and moisture while loading it up with chocolate chips, and let me tell you, my kitchen looked like a chocolate factory explosion by the end of it!
But oh boy, was it worth every messy moment! The final result is an utterly irresistible Chocolate Chip Bread that’s both beautifully sweet and moist, making it perfect for breakfast or dessert—or heck, even a midnight snack (no judgment here!). With an irresistible texture that’s soft yet slightly chewy and pockets of gooey chocolate throughout, it’s an experience you won’t forget. I can’t wait for you to try this; trust me, your taste buds are in for a real treat!
These Chocolate Chip Bread are….
…a sweet indulgence that will have you dreaming of chocolate with every bite!
1. They deliver an irresistible sweetness that perfectly balances rich chocolate and buttery notes. Using a full cup of sugar in combination with semi-sweet chocolate chips enhances the overall flavor profile, creating a delightful treat that’s not overly cloying but just right for any occasion.
2. Moist, tender crumb – this bread has a delightful softness that melts in your mouth. The combination of all-purpose flour and milk creates a light yet satisfying texture that pairs beautifully with the gooey pockets of melted chocolate, ensuring every slice is a heavenly experience.
3. Expertly balanced leavening – the use of both baking powder and baking soda ensures the perfect rise without compromising texture. This technique not only helps the bread achieve its fluffy structure but also contributes to a lovely golden crust, making it visually appealing and enticing from the first glance.
4. Incredible value – making this Chocolate Chip Bread at home is not only cost-effective, but it also allows you to use quality ingredients tailored to your taste. With simple pantry staples, you can whip up this delicious bread that rivals any bakery version without breaking the bank!
PS This recipe yields one generous loaf, perfect for sharing or enjoying over several cozy mornings!
Ingredients for the Chocolate Chip Bread
Each ingredient in this dish plays an essential role in flavor and texture. Here’s what you’ll need:
2 cups all-purpose flour: Provides the structure and heartiness to the bread.
1 tsp baking powder: Helps the bread rise and become light and fluffy.
1 tsp baking soda: Enhances the leavening process for a perfect texture.
1/2 tsp salt: Balances sweetness and enhances overall flavor.
1/2 cup unsalted butter (softened): Contributes richness and moisture for a tender crumb.
1 cup sugar: Sweetens the bread while helping to create a lovely crust.
2 large eggs: Bind the ingredients together and add moisture.
1 tsp vanilla extract: Infuses warmth and depth of flavor into the bread.
1/2 cup milk: Adds creaminess and helps achieve the desired moistness.
1 cup chocolate chips (semi-sweet): Delivers delightful bursts of chocolatey goodness throughout.
You Must Preheat Your Oven. No Cutting Corners!
I have a confession: I thought I could skip preheating the oven and still get that perfect Chocolate Chip Bread. Spoiler alert—I was wrong! After several attempts of baking with a cold oven, I can guarantee that there’s no shortcut here if you want bread that’s fluffy and perfectly baked.
So why is preheating so critical? Think of it this way: when you put your batter into an already hot oven, the heat immediately activates the baking powder and baking soda, giving your bread that beautiful rise. If you place it in a cold oven, you’re just asking for dense bread—no one wants that! The combination of those dry ingredients like flour and leavening agents needs instant heat to do their magic, ensuring your loaf is as light and airy as possible.
What does preheating do?
- Texture — A preheated oven leads to a better rise, creating a light and fluffy texture that you simply can’t achieve with a cold start.
- Crust — The immediate heat forms a lovely crust on the outside, locking in moisture inside for that perfect balance of soft and chewy.
- Even Baking — Starting with a hot oven ensures even cooking throughout, preventing the bottom from being soggy while the top remains undercooked.
- Flavor Development — The Maillard reaction kicks in quickly at higher temperatures, enhancing the flavor profile of your bread for a richer taste.
- Chocolate Melting — Preheating allows the chocolate chips to melt beautifully into the batter rather than just sitting there like sad little lumps.
Different preheating times
- 0 minutes (not recommended) — No preheating means uneven baking; expect gummy bread with a flat top.
- 10 minutes (okay) — Better than nothing, but you’ll miss out on that gorgeous rise and texture.
- 15 minutes (good) — The minimum for decent results; bread will be better but lacks that ideal crust.
- 20 minutes (excellent) — Ideal for achieving perfect texture and flavor; this is where your Chocolate Chip Bread shines!
Be warned: skipping or rushing the preheating process is one of the biggest mistakes you can make! Trust me; I’ve learned this lesson too many times. Don’t be tempted to cut corners—your taste buds will thank you later!
How to make Chocolate Chip Bread
Are you ready to see how straightforward it is to make the Chocolate Chip Bread of your dreams??
1. PREPARE THE OVEN AND PAN
Start off by getting your oven and pan ready for this delicious creation!
Preheat – Preheat the oven to 350°F (175°C). This ensures your bread bakes evenly and rises beautifully.
Grease – Grease a loaf pan with butter or line it with parchment paper to prevent sticking. This step is crucial for easy removal after baking!
HANDY TIPS
- If using parchment paper, leave some overhang on the sides for easy lifting out later.
- A glass loaf pan allows you to monitor the browning of the bread as it bakes.
2. MIX DRY INGREDIENTS
Now, let’s get mixing those dry ingredients together.
Whisk – In a mixing bowl, whisk together the flour, baking powder, baking soda, and salt until well combined. This step helps to evenly distribute the leavening agents so your bread rises perfectly.
HANDY TIPS
- Sifting the flour beforehand can help aerate it, resulting in a lighter texture.
- Make sure to measure your flour accurately; too much can lead to a dense bread.
3. MIX WET INGREDIENTS
Next, we’ll whip up the wet ingredients for that creamy base!
Cream – In another bowl, cream together the softened butter and sugar until light and fluffy. This process incorporates air into the mixture, which will help your bread rise nicely.
Add – Add the eggs one at a time, mixing well after each addition. This ensures they are fully incorporated and helps create a smooth batter.
Stir – Stir in the vanilla extract and milk until everything is just combined.
HANDY TIPS
- Make sure your butter is softened but not melted; it should be like spreadable cream cheese.
- Using room temperature eggs helps them mix more easily into the batter.
4. COMBINE MIXTURES
Let’s bring everything together now!
Add – Gradually add the dry ingredients to the wet ingredients, mixing until just combined. Be careful not to overmix; you want to keep that tender crumb!
Fold – Fold in the chocolate chips gently so they are evenly distributed throughout without breaking them up too much.
HANDY TIPS
- If you’d like a gooier chocolate experience, reserve some chocolate chips to sprinkle on top before baking!
- For an extra touch of flavor, consider adding a pinch of cinnamon with your dry ingredients.
5. BAKE THE BREAD
It’s time for our batter to transform into beautiful bread!
Pour – Pour the batter into the prepared loaf pan and smooth the top with a spatula for even baking.
Bake – Bake in the preheated oven for 45-50 minutes, or until a toothpick inserted in the center comes out clean. The top should be golden brown and fragrant!
HANDY TIPS
- Start checking at around 45 minutes; ovens can vary slightly in temperature.
- If you notice excessive browning on top before it’s fully cooked inside, tent with foil.
6. COOL AND SERVE
The final step awaits—let that glorious bread cool down!
Cool – Allow the bread to cool in the pan for 10 minutes before transferring it to a wire rack to cool completely before slicing. This waiting period helps set its shape and flavors.
HANDY TIPS
- Slice only once cooled completely; warm bread can squish down when cut.
- If you want a firmer crust, leave out overnight wrapped in foil after cooling!
Congratulations on creating a moist and delightful Chocolate Chip Bread that could be enjoyed any time of day! It’s perfect for breakfast or as an indulgent dessert treat that will surely impress friends and family alike! Make this once, and I wager they will invade your dreams every night too! – Nagi x
FAQ – Chocolate Chip Bread
🍞 How long will this chocolate chip bread keep?
This chocolate chip bread stays fresh for about 3-4 days when stored properly. I recommend keeping it in an airtight container at room temperature, where it will be 97% as good on day 3. After that, you might notice a slight decline in moisture and flavor, but it’s still delicious! If you’re not planning to finish it within that timeframe, consider freezing it to preserve its quality.
❄️ Can I freeze the chocolate chip bread?
Yes, you can definitely freeze this delicious bread! To do so, allow the bread to cool completely after baking. Then wrap it tightly in plastic wrap and place it in a freezer-safe bag or container. It can be frozen for up to 3 months. When you’re ready to enjoy it, simply thaw it overnight in the fridge or on the counter for a few hours. For a warm slice, pop it in the toaster or microwave for a few seconds!
🌾 Can this recipe be made gluten-free?
Absolutely! To make gluten-free chocolate chip bread, substitute the all-purpose flour with a high-quality gluten-free flour blend that contains xanthan gum (this helps mimic the elasticity of traditional flour). I’ve tested this with brands like Bob’s Red Mill and King Arthur Flour, both with great success. Just be aware that texture may vary slightly but will still be deliciously moist!
🥛 What can I use instead of milk?
If you need a dairy-free option or simply don’t have milk on hand, unsweetened almond milk or oat milk work wonderfully as substitutes in this recipe! You could also opt for coconut milk for a richer flavor. Just remember to keep an eye on the sweetness level; some alternatives are sweeter than regular milk.
🤔 Why do I need to cream the butter and sugar together?
Creaming butter and sugar is crucial because it incorporates air into the mixture, helping your bread rise beautifully during baking. This step creates a lighter texture by trapping tiny bubbles of air that expand when heated. I’ve tested skipping this step—trust me, don’t do it! Your loaf will turn out denser and less delightful.
🍫 Can I add nuts or other mix-ins?
Definitely! You can customize your chocolate chip bread by adding 1/2 cup of chopped nuts, like walnuts or pecans, which add great crunch and flavor. Alternatively, try adding dried fruits like cranberries or even swapping semi-sweet chocolate chips for dark or white chocolate chips for a different twist. Just remember not to overload the batter—too many add-ins can affect how well your bread rises.
😅 Did you really test this recipe multiple times?
Oh yes, err… I’m a little mad like that! 😅 I’ve tested this chocolate chip bread at least 10 times (yes, I lost count after that!) to perfect the balance of flavors and texture. Each time was worth it because now I can confidently say this recipe yields consistently amazing results every single time!
Troubleshooting
I will continue to add more to this Troubleshooting section as I start seeing questions coming through from people who have made the recipe.
Troubleshooting tips
“My bread came out too flat! 😩”
- This could be due to using old baking powder or baking soda that’s lost its potency. These leavening agents need to be fresh to create the lift necessary for your bread.
- Another reason might be overmixing the batter. When you mix too much after adding the dry ingredients, it can develop gluten, making your bread dense instead of fluffy.
- I bet it was still YUM though!
“My chocolate chip bread is way too dry! 😔”
- If you didn’t measure your flour accurately, it’s possible you added too much. Flour can pack down in the measuring cup, leading to a drier result.
- Using unsalted butter that’s too cold can also cause dryness. Make sure it’s softened properly so it blends well with sugar and adds moisture.
- I bet it was still YUM though!
“The top of my bread cracked and split open! 😱”
- This typically happens if your oven temperature is too high. If the heat is intense, the outer layer sets before the inside has fully risen.
- Not smoothing the batter evenly in the pan can create uneven cooking and lead to cracks. Make sure to spread it out evenly before baking!
- I bet it was still YUM though!
“My bread turned out more pale than golden brown! 🤷♀️”
- If your oven wasn’t fully preheated, this could prevent proper browning. Always ensure your oven reaches 350°F (175°C) before popping in your loaf.
- Also, using a light-colored loaf pan may cause less browning compared to darker pans which absorb heat better—something to consider next time!
- I bet it was still YUM though!