Chicken Pot Pie: Cozy and Comforting Homemade Delight
I still remember the first time I had a Chicken Pot Pie that truly blew my mind. It was at this quaint little diner I stumbled upon during a road trip, where the pie was served warm and bubbling, with a crust so flaky it practically melted in my mouth. I couldn’t shake the craving for weeks, and after several failed attempts to find something similar in stores, I decided it was high time to tackle this classic dish myself. Plus, who could resist the idea of making it at home for a fraction of the price—just me, my kitchen, and a whole lot of delicious potential?
Let me tell you, perfecting my Chicken Pot Pie was no walk in the park. After three rounds of trial and error (and maybe a few tears shed over soggy crusts), I finally started to zero in on what I wanted: tender chunks of chicken, vibrant veggies, and a creamy sauce that didn’t just linger but practically danced on your palate. With each attempt, I tweaked the seasoning here and added a splash more cream there, until I felt like Goldilocks finally finding her “just right.” Who knew creating comfort food could be so complicated yet rewarding?
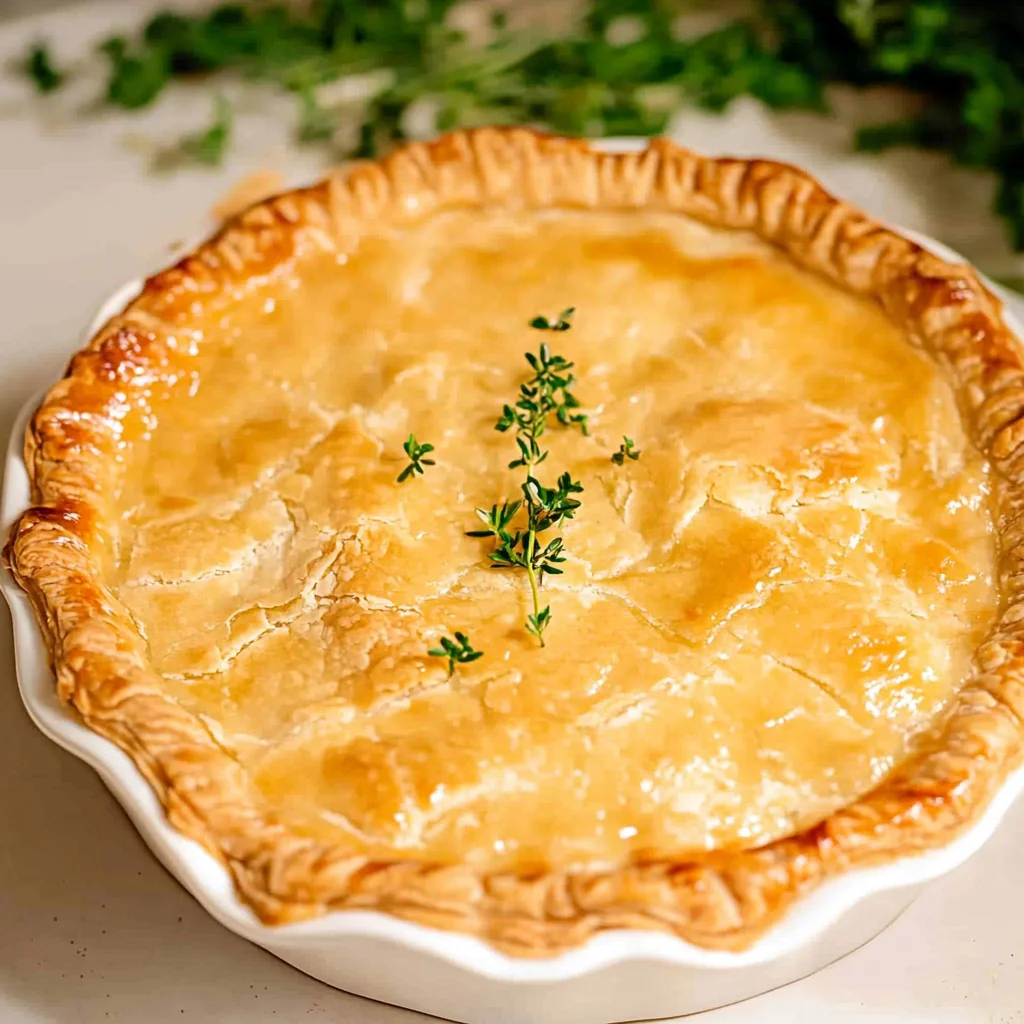
But oh boy, was it worth every moment! The final result is nothing short of heavenly—a comforting and hearty dish packed with tender chicken and colorful vegetables enveloped in a rich creamy sauce, all hugged by that perfectly flaky pie crust. The balance of flavors is spot on, with each bite offering warmth and nostalgia that feels like wrapping yourself in your favorite blanket. I can’t wait for you to experience this; trust me, your taste buds are in for an unforgettable treat!
These Chicken Pot Pie are…
….the ultimate comfort food that warms the soul and satisfies every craving!
1. They deliver an incredible depth of flavor with a rich, savory filling that sings with the essence of tender chicken and fresh vegetables. The combination of herbs like thyme and the subtle sweetness from the carrots creates a harmonious blend that elevates each bite, making it feel like a warm hug on a plate.
2. Flaky and buttery crust – each slice reveals a beautifully golden, flaky crust that crumbles just right. Using cold, cubed unsalted butter ensures that the crust achieves that perfect texture; it’s crisp on the outside while still allowing for a soft, tender interior that complements the creamy filling beautifully.
3. Elevated technique – chilling your pie crust dough with ice water is key to achieving a perfectly flaky texture. This method prevents the butter from melting too soon during baking, ensuring those delightful layers form as it bakes, resulting in a crust that’s both crispy and light.
4. Budget-friendly satisfaction – making Chicken Pot Pie at home is not only delicious but also cost-effective compared to dining out. With ingredients you likely already have on hand, this hearty dish proves you can create something wholesome without breaking the bank while yielding enough to feed the whole family.
PS This Chicken Pot Pie serves 6 generously, making it perfect for family dinners or leftovers to enjoy throughout the week!
Ingredients for the Chicken Pot Pie
Each ingredient in this dish plays an essential role in flavor and texture. Here’s what you’ll need:
Pie Crust
2 cups all-purpose flour: Provides the structure for a flaky crust.
1 cup unsalted butter (cold and cubed): Creates a rich and tender texture.
1/2 teaspoon salt: Enhances the overall flavor of the crust.
6 tablespoons ice water: Helps to bind the dough without melting the butter.
Filling
1 pound chicken breast (cooked and shredded): Offers a hearty protein base for the pie.
1 cup carrots (diced): Adds sweetness and vibrant color.
1 cup peas (frozen or fresh): Brings freshness and a pop of sweetness.
1 cup celery (diced): Contributes crunch and aromatic depth.
1/3 cup onion (diced): Infuses savory flavor into the filling.
1/3 cup butter: Enriches the filling with creamy richness.
1/3 cup all-purpose flour: Thickens the sauce for a hearty consistency.
1 cup chicken broth: Provides moisture and deepens the savory flavor.
1/2 cup milk: Adds creaminess to balance the flavors.
1 teaspoon salt: Seasoning that elevates all other flavors.
1/2 teaspoon black pepper: Introduces warmth and a subtle kick.
1/2 teaspoon thyme: Imparts an earthy aroma that complements the chicken.
You MUST chill the pie crust. No shortcuts!
I’ll confess – I tried to skip chilling the pie crust, thinking, “What’s the worst that could happen?” Well, after one too many dough disasters and a couple of sad, soggy pies, I had to face the music. Chilling is non-negotiable, and trust me, it saves you from a pie crust that resembles a pancake more than anything else.
So why is chilling so vital? Think of it like giving your dough a mini-vacation. When you chill the pie crust, the cold butter firms up and helps create those flaky layers we all crave. It also relaxes the gluten in the flour, which means when you roll it out later, it won’t spring back on you like an angry rubber band. That’s how we get a perfectly tender, flaky crust for our Chicken Pot Pie!
What does chilling the pie crust do?
- Texture — Chilling allows the butter to firm up; this results in a flakier texture when baked as the butter creates steam pockets.
- Ease of handling — A chilled dough is firmer and easier to roll out without sticking or tearing.
- Less shrinkage — Cooling helps prevent the dough from shrinking during baking, ensuring a better fit for your filling.
- Perfect browning — The chilled fat provides a better chance for even browning as it melts into the flour during baking.
- Flavor development — Resting allows time for flavors to meld slightly within the dough ingredients.
Different chilling times
- 10 minutes (fair) — Dough is slightly firmer but still malleable; results in a decent pie but may lack ideal texture.
- 30 minutes (good) — Achieves basic firmness; acceptable flakiness but not quite where you want it.
- 1 hour (better) — Noticeably improved texture and less shrinkage; gets you closer to that bakery-quality crust.
- Overnight (best) — Maximum flavor and texture enhancement; this is where pie dreams come true.
Don’t be tempted to skip or rush this step! The most common mistake is thinking “a little chill will do.” Trust me—if you don’t chill long enough, your beautiful Chicken Pot Pie will end up with a sad crust that doesn’t do justice to that creamy filling!
How to make Chicken Pot Pie

Are you ready to see how straightforward it is to make the Chicken Pot Pie of your dreams??
1. MAKE THE PIE CRUST
Let’s start by creating that flaky, buttery crust that will cradle all the delicious filling!
1. COMBINE – In a mixing bowl, combine the flour and salt, ensuring they are evenly mixed. This is important because it helps distribute the salt throughout the dough for even seasoning.
2. CUT IN BUTTER – Cut in the cold, cubed butter using a pastry cutter or your fingers until the mixture resembles coarse crumbs. The cold butter is key here; it creates those lovely flaky layers when baked!
3. ADD ICE WATER – Gradually stir in the ice water, one tablespoon at a time, until the mixture starts to form a ball. You might not need all 6 tablespoons; add just enough for the dough to hold together without being sticky.
4. CHILL – Wrap the dough in plastic wrap and refrigerate for 30 minutes. This chilling period allows the gluten to relax, making it easier to roll out later.
HANDY TIPS
- Use very cold butter straight from the fridge for maximum flakiness!
- If your kitchen is warm, consider chilling your mixing bowl too before starting.
2. PREPARE THE FILLING
Now, let’s create that comforting filling that makes this dish truly irresistible!
1. MELT BUTTER – In a skillet over medium heat, melt the butter. This forms the base of our flavorful sauce.
2. SAUTE VEGETABLES – Add diced onion, carrots, and celery to the skillet and cook until softened, about 5-7 minutes. The aroma will be heavenly!
3. STIR IN DRY INGREDIENTS – Stir in the flour, salt, pepper, and thyme until well combined. This step helps thicken your filling later on.
4. ADD LIQUIDS – Gradually add chicken broth and milk while stirring constantly until thickened—this should take about 3-5 minutes. You’ll know it’s ready when it coats the back of a spoon.
5. MIX IN CHICKEN AND PEAS – Finally, fold in the shredded chicken and peas, mixing well before removing it from heat.
HANDY TIPS
- For extra flavor, sauté some garlic along with your vegetables!
- You can use leftover rotisserie chicken for an even quicker filling prep!
3. ASSEMBLE THE PIE
Time to bring everything together into one glorious pie!
1. PREHEAT OVEN – Preheat your oven to 425°F (220°C). This high temperature is crucial for achieving a golden brown crust.
2. ROLL OUT DOUGH – Roll out half of your chilled pie crust on a lightly floured surface until it fits into your pie dish nicely.
3. ADD FILLING – Pour your delicious filling into the crust evenly.
4. COVER WITH CRUST – Roll out the second half of your crust and place it over the filling, sealing edges by crimping them together with your fingers or a fork.
5. CUT STEAM SLITS – Cut slits in the top crust to allow steam to escape during baking—you don’t want a soggy pie!
6. BAKE – Bake for 30-35 minutes or until golden brown on top and bubbling inside! Let cool for a few minutes before serving; this will help set everything inside.
HANDY TIPS
- If you want an extra crispy bottom crust, bake it blind (pre-bake) for about 10 minutes before adding the filling!
- Try adding a sprinkle of fresh herbs on top before serving for added freshness.
What an accomplishment! You’ve made a heartwarming Chicken Pot Pie filled with tender chicken and vibrant veggies—all enveloped in a flaky crust! It’s comfort food at its finest! Make this once, and I wager it will invade your dreams every night too! – Nagi x
FAQ – Chicken Pot Pie
🥡 How long can I store leftover chicken pot pie?
Leftover chicken pot pie can be stored in the refrigerator for up to 3 days. However, for the best quality, I recommend consuming it within 2 days as the crust tends to lose its flakiness after that — about 90% as good on day 2. To reheat, place it in the oven at 350°F (175°C) until warmed through, which helps revive some of that crispy texture!
⏰ Do I really need to chill the pie crust before baking?
Yes, chilling the pie crust is essential! The cold butter creates those flaky layers we all love, and resting helps relax the gluten in the dough, preventing shrinkage during baking. I typically chill for at least 30 minutes, but if you have time, an hour is even better. You could even make it a day ahead and keep it in the fridge—just remember to wrap it well!
❄️ Can I freeze chicken pot pie?
Absolutely! I recommend freezing it before baking for optimal results. To do this:
- Assemble the pie without baking.
- Wrap it tightly in plastic wrap and then foil to prevent freezer burn.
- It can be frozen for up to 2 months.
When you’re ready to enjoy it, bake from frozen at 425°F (220°C) for about 50-60 minutes or until heated through and golden on top. Just be patient, it’s worth the wait!
🌾 Can this recipe be made gluten-free?
Yes! You can easily make a gluten-free chicken pot pie by swapping out all-purpose flour with a gluten-free flour blend (like Bob’s Red Mill 1-to-1). Make sure your pie crust is also gluten-free; you can find pre-made options or make your own using gluten-free flour. Just keep in mind that texture might differ slightly—gluten-free dough often needs a little extra care.
🥛 What can I substitute for milk in the filling?
If you’re looking to replace milk due to dietary restrictions or preference, unsweetened almond milk or oat milk work beautifully in this recipe! They maintain creaminess without altering the flavor significantly. If you’re not dairy-sensitive but just looking to cut calories, low-fat milk will suffice as well—just don’t expect quite as rich a filling!
🔍 Why do I need to cut slits in the top crust?
Cutting slits in the top crust allows steam to escape during baking, which prevents your pie from becoming soggy inside. Plus, it adds a rustic charm! I usually go for a few simple slits in a diagonal pattern—it’s quick and ensures that beautiful filling has space to bubble and shine through.
👩🍳 How many times did you test this recipe?
Oh boy, let’s just say there were more than a few pies made in my kitchen! 🥧 I tested this chicken pot pie recipe seven times because getting that perfect balance of flaky crust and creamy filling required some serious dedication (and tasting!). Each iteration taught me something new about achieving comfort food perfection—I promise it’s worth every bite!
Troubleshooting
I will continue to add more to this Troubleshooting section as I start seeing questions coming through from people who have made the recipe.
Troubleshooting tips
“My pie crust turned out too tough! 😩”
- This can happen if you overworked your dough while mixing or rolling it out. The key to a flaky crust is to handle it gently and minimally.
- If the butter gets too warm during mixing, it won’t create those lovely flaky layers. Make sure your butter is cold and cubed before incorporating it into the flour.
- I bet it still tasted amazing, even if the texture wasn’t quite right!
“The filling was way too runny! 😱”
- If you added the chicken broth and milk too quickly without allowing the mixture to thicken properly, it can result in a soupy filling. Be sure to stir gradually and allow time for thickening.
- Using low-fat milk instead of whole milk can also lead to a thinner consistency. Stick with whole milk for creaminess!
- I’m sure it was still delicious, just maybe a bit messy!
“My crust ended up too dark on top! 🔥”
- This usually occurs if your oven temperature is too high or if you didn’t cover the pie with foil when baking. Check that your oven is calibrated correctly before preheating.
- If you baked it on a lower rack, try moving it up for more even browning on top next time.
- I’m guessing it still tasted like heaven inside!
“The bottom of my pie crust was undercooked! 😬”
- If your filling was very hot when poured into the crust, it could prevent the bottom from cooking through properly. Ensure that your filling is not boiling hot when adding to the crust.
- Also, baking on a lower rack can cause uneven cooking; make sure you’re using the middle rack for best results.
- It might not have been Instagram-worthy, but I’m sure it was still YUM!
“My pot pie came out looking misshapen! 🤷♀️”
- This can happen if your dough was rolled unevenly or if you didn’t fit it snugly into the pie dish. Aim for an even thickness when rolling out your dough.
- Make sure to trim any excess dough and seal edges properly so they don’t bulge out during baking.
- Regardless of its shape, I’m convinced it was still delicious comfort food!
Chicken Pot Pie
Ingredients
Method
- In a mixing bowl, combine flour and salt. Cut in butter until mixture resembles coarse crumbs.
- Stir in ice water, a tablespoon at a time, until mixture forms a ball. Wrap in plastic and refrigerate for 30 minutes.
- In a skillet, melt butter over medium heat. Add onion, carrots, and celery; cook until softened.
- Stir in flour, salt, pepper, and thyme until well combined. Gradually add chicken broth and milk, stirring constantly until thickened.
- Add shredded chicken and peas; mix well and remove from heat.
- Preheat the oven to 425°F (220°C). Roll out half of the pie crust and fit it into a pie dish.
- Pour the filling into the crust. Roll out the second half of the crust and place it over the filling. Seal and cut slits for steam to escape.
- Bake for 30-35 minutes or until the crust is golden brown. Let cool for a few minutes before serving.