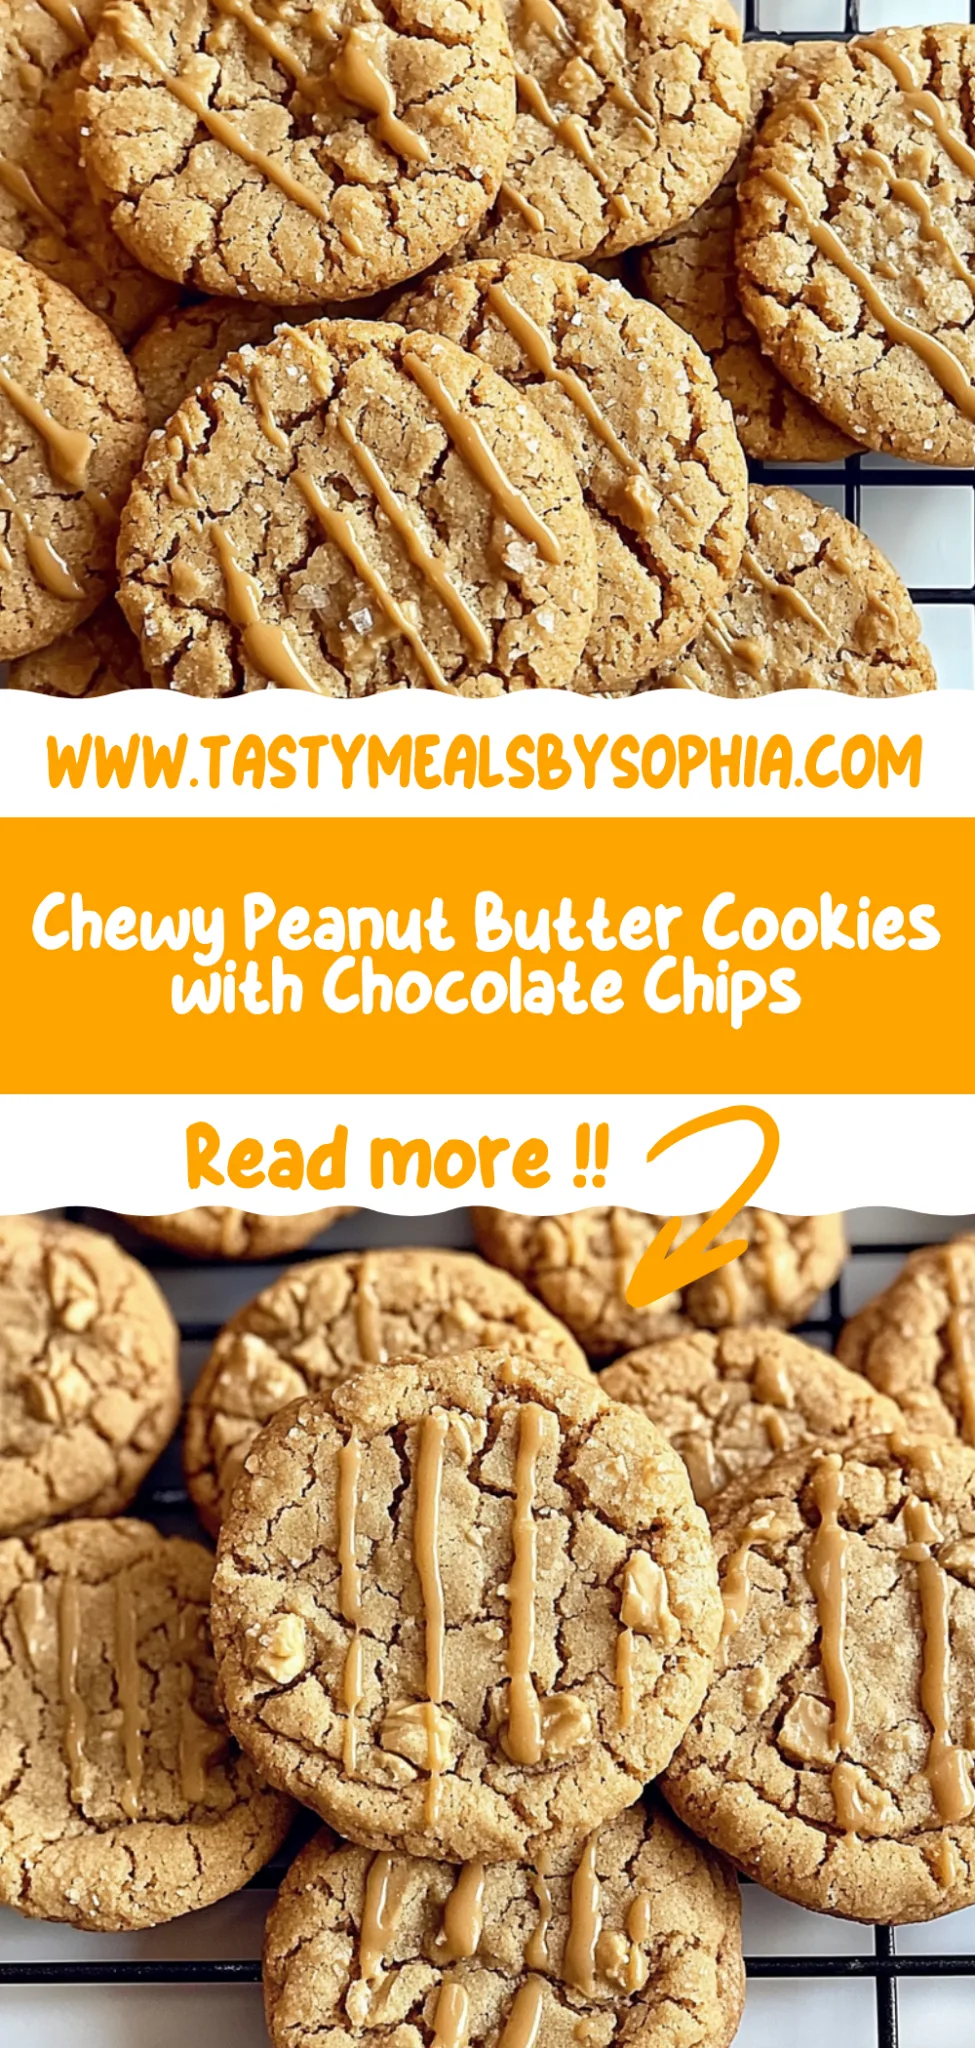
Chewy Peanut Butter Cookies: A Dreamy Delight at Home
I’ve always had a soft spot for peanut butter cookies, and it all started with a tiny little bakery I stumbled upon during my college days. Their cookies were the stuff of dreams—thick, chewy, and bursting with that rich peanut butter flavor I adored. I remember splurging on them every week as a treat for acing my exams (or just surviving another week of classes). But as life got busier and my wallet grew lighter, I realized it was time to channel that craving into my own kitchen. After all, why spend a fortune when I could whip up Chewy Peanut Butter Cookies anytime the craving struck?
Let me tell you, perfecting this recipe was no walk in the park! I went through what felt like a mountain of flour and sugar—five attempts, to be exact—before landing on the ideal mix. Each batch was a lesson learned; one was too crumbly, another too dry, and don’t even get me started on the ones that spread like pancakes! My goal was simple: to create those perfectly chewy bites that would make anyone’s taste buds do a happy dance. I may have looked like a mad scientist in my kitchen, but hey, it was all worth it for the love of cookies!
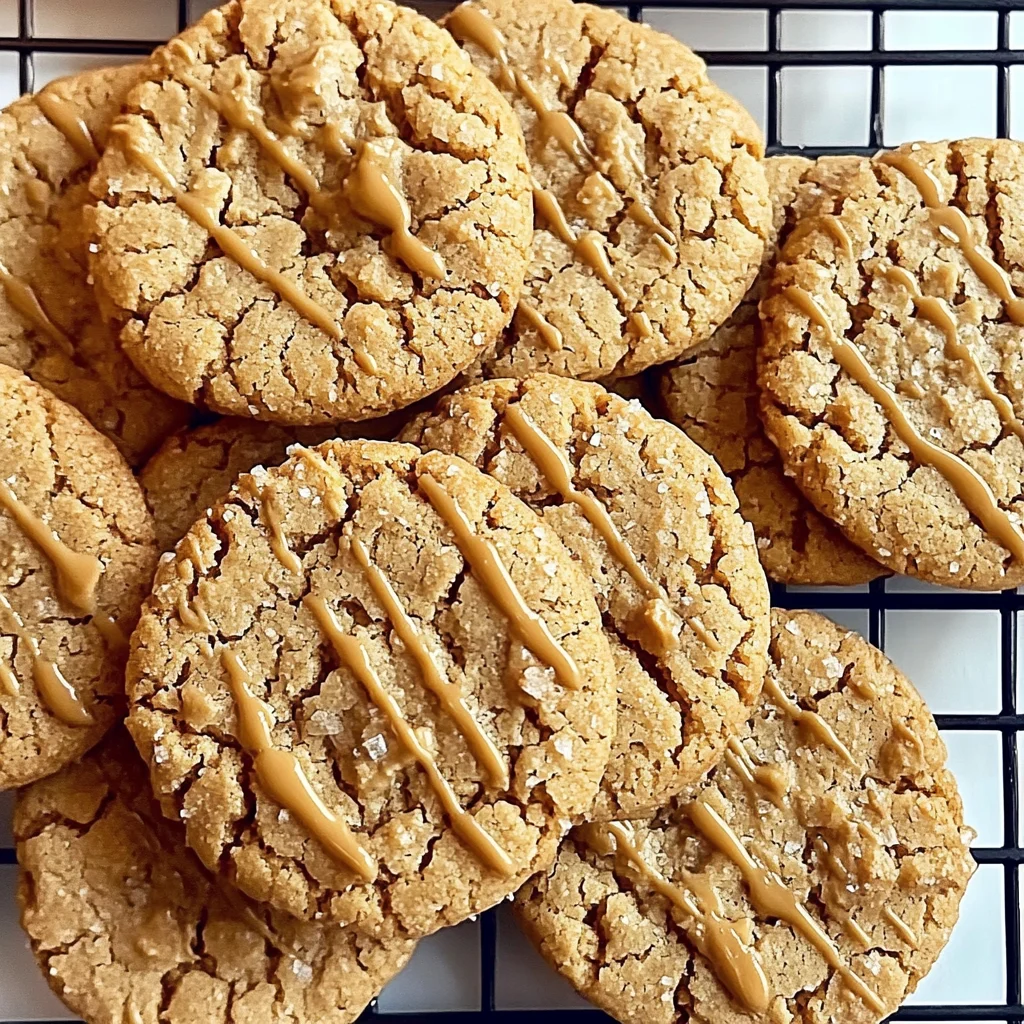
And oh boy, when I finally pulled those golden-brown Chewy Peanut Butter Cookies out of the oven, it felt like winning the baking lottery! They’re irresistibly chewy with crispy edges and that rich nutty flavor that lingers beautifully with each bite. Plus, they stay fresh for days (if they last that long)! I can’t wait for you to try these yourself—trust me, once you take a bite, you’ll feel like you’ve been transported back to that cozy little bakery. Happy baking!
These Chewy Peanut Butter Cookies are….
…an absolute must-have for any cookie lover who craves that perfect balance of flavor and texture!
1. They deliver a rich, nutty flavor that’s simply irresistible, thanks to the generous use of peanut butter. The combination of creamy or chunky peanut butter infuses each bite with a deep, satisfying taste that elevates these cookies beyond the ordinary.
2. Expect an incredible chewy texture – these cookies have a delightful softness that you can’t resist. The perfect ratio of all-purpose flour and sugars creates a wonderfully moist dough that bakes up to have just the right amount of chewiness without being overly dense.
3. A key baking technique is the use of brown sugar alongside granulated sugar, which not only adds moisture but also enhances the depth of flavor. This thoughtful mix allows for an exceptional caramel-like sweetness while ensuring your cookies stay soft and chewy even days after baking.
4. These Chewy Peanut Butter Cookies offer great value as they’re made with common pantry ingredients, meaning you can whip them up anytime without breaking the bank. With their simple preparation and minimal fuss, they’re perfect for spontaneous baking sessions or cozy family gatherings.
PS These cookies are best enjoyed fresh out of the oven, but they can easily be stored in an airtight container for up to a week—if they last that long!
What You’ll Need for Chewy Peanut Butter Cookies
Each ingredient in this dish plays an essential role in flavor and texture. Here’s what you’ll need:
2 cups all-purpose flour: Provides the structure and chewiness of the cookies.
1 teaspoon baking soda: Helps the cookies rise and creates a lighter texture.
1 teaspoon salt: Enhances the sweetness and balances the flavors.
1 cup peanut butter (creamy or chunky): Delivers rich, nutty flavor and chewy texture.
1 cup brown sugar (packed): Adds moisture and a deep caramel-like sweetness.
1/2 cup granulated sugar: Contributes sweetness and helps achieve a slightly crisp edge.
1 large egg: Acts as a binder to hold the ingredients together.
1 teaspoon vanilla extract: Infuses warmth and depth of flavor into the cookies.
You Must Let the Dough Rest. No Exceptions!
I know, I know—waiting feels like torture when you’re craving those chewy peanut butter cookies. I tried to skip this step, thinking I could rush to cookie bliss, but I learned the hard way that impatience leads to disappointment. Trust me, waiting is not just a suggestion; it’s a must.
So why is resting the dough essential? Think of it like letting a good stew simmer; it allows all those flavors to meld and develop. In our cookie recipe, allowing the dough to rest gives time for the flour to fully hydrate and for the baking soda to activate properly with the sugars, resulting in cookies that are beautifully chewy and bursting with flavor, not flat and sad.
What does resting the dough do?
- Improves chewiness — Resting allows gluten in the flour to relax, creating a tender yet chewy texture that’s crucial for these peanut butter cookies.
- Enhances flavor — Just like marinating meat or letting bread rise, time lets the sugars in brown sugar caramelize naturally during baking, leading to a richer flavor profile.
- Boosts color — The longer resting period allows enzymes in the flour to break down starches into sugars that enhance browning during baking, giving you those lovely golden edges.
- Increases moisture retention — The hydration of flour during rest ensures that your cookies stay soft and moist longer instead of drying out too quickly.
- Prevents spreading — Allowing the dough time to chill firms up the fats (peanut butter and sugars), helping maintain their shape while baking instead of turning into flat pancakes.
Different resting times
- 30 minutes (good) — A quick chill helps slightly but won’t achieve optimal chewiness or flavor depth.
- 1 hour (better) — Noticeable improvement with slightly chewier cookies, though still not quite there yet.
- ⭐️ 2 hours⭐️ — This is where things start getting serious! The flavors meld beautifully, and texture improves significantly.
- ⭐️ 4 hours⭐️ — Ideal! You’ll have cookies that are incredibly chewy and bursting with deep peanut butter flavor.
- ⭐️ 12 hours or overnight⭐️ — Cookie perfection! The best balance of chewiness, color, and rich flavor.
Don’t even think about skipping this crucial resting step. The most common mistake is trying to bake immediately after mixing; this leads to flatter cookies that lack that delightful chewiness we all love. Be patient—your future self will thank you!
How to make Chewy Peanut Butter Cookies
Are you ready to see how straightforward it is to make the Chewy Peanut Butter Cookies of your dreams??
1. PREPARE YOUR INGREDIENTS
Let’s get everything in place so we can whip these cookies up in no time!
Bold action label: Preheat – Preheat your oven to 350°F (175°C). This ensures that your cookies bake evenly and become perfectly chewy.
Bold action label: Whisk – In a mixing bowl, whisk together the 2 cups of all-purpose flour, 1 teaspoon of baking soda, and 1 teaspoon of salt. This helps to aerate the flour and evenly distribute the baking soda and salt, which are crucial for texture and flavor.
Bold action label: Mix – In another bowl, combine 1 cup of peanut butter (creamy or chunky), 1 cup of packed brown sugar, 1/2 cup of granulated sugar, 1 large egg, and 1 teaspoon of vanilla extract. Mix until smooth. The sugars will help create that delightful chewiness!
Bold action label: Combine – Gradually add the dry ingredients to the wet ingredients, mixing until just combined. Don’t overmix; you want that perfect balance of texture!
HANDY TIPS
- Use creamy peanut butter for a smoother texture, or chunky if you like those nutty bits!
- Make sure your brown sugar is packed properly for consistent sweetness.
2. SHAPE THE COOKIES
Get ready for some fun as we shape these delicious treats!
Bold action label: Scoop – Scoop tablespoon-sized balls of dough onto a baking sheet lined with parchment paper, spacing them about 2 inches apart. This spacing allows for spreading while they bake!
Bold action label: Flatten – Flatten each ball slightly with a fork, creating a crisscross pattern on top. This not only looks cute but also helps them bake evenly.
HANDY TIPS
- For smaller cookies, simply roll them into balls instead of discs — they’ll work well too!
- If you’re feeling adventurous, try adding chocolate chips or chopped nuts into the dough before shaping!
3. BAKE TO PERFECTION
Now comes the most exciting part—watching them bake!
Bold action label: Bake – Bake in the preheated oven for 10-12 minutes, or until the edges are lightly golden. Keep an eye on them; they can go from perfect to overbaked quickly!
Bold action label: Cool – Remove from the oven and let cool on the baking sheet for 5 minutes before transferring to a wire rack to cool completely. This step is essential; it allows the cookies to firm up while still warm.
HANDY TIPS
- If you prefer them softer, take them out at the lower end of the baking time.
- For even more flavor, consider sprinkling a tiny pinch of sea salt on top right after baking!
Make these once, and I wager they will invade your dreams every night too! – Nagi x
FAQ – Chewy Peanut Butter Cookies
How long will these cookies keep?
These chewy peanut butter cookies can be stored at room temperature in an airtight container for about 5-7 days. They taste best when fresh, but they maintain a good quality for several days. By day 3, they’re still about 97% as good as when you first baked them, thanks to the moisture from the peanut butter. If you want to extend their life, consider freezing them!
❄️ Do I really have to chill? YES YOU DO.
For this recipe, chilling is not necessary! I tested the cookies both ways—chilled and unchilled—and found that chilling doesn’t significantly improve the texture or flavor of these chewy delights. So feel free to skip the fridge time and go straight to baking! Just make sure not to skip on spacing those dough balls apart; they need room to spread.
🥶 Can I freeze these peanut butter cookies?
Absolutely! To freeze your cookies, allow them to cool completely after baking. Then, place them in a single layer on a baking sheet and freeze for about 1-2 hours until solid. Once frozen, you can transfer them to a freezer-safe bag or container. They can last up to 3 months in the freezer. To enjoy, simply thaw at room temperature or pop them in the microwave for a few seconds for that freshly-baked feel!
🌾 Can these be made gluten-free?
Yes, you can make gluten-free chewy peanut butter cookies! Substitute the 2 cups of all-purpose flour with a gluten-free flour blend that contains xanthan gum (if it’s not already included). I’ve tested this substitution and found it works quite well; just be sure to check your peanut butter is also gluten-free! The texture might vary slightly, but they will still be deliciously chewy.
Can I reduce the sugar or substitute with sweeteners?
No, you cannot reduce the sugar without affecting the cookie’s structure. I tried reducing both sugars multiple times, and found that anything less than specified results in dry and crumbly cookies—not what we want! If you’re looking for alternatives, you could use coconut sugar in place of brown sugar for a lower glycemic index option; however, I recommend sticking closely to the original recipe for best results.
Why do we flatten the dough balls with a fork?
Flattening the dough balls creates that iconic crisscross pattern while also ensuring even baking and better texture. When baked without flattening, cookies can turn out thicker and may not bake properly throughout—resulting in gooey centers while leaving edges overbaked. So don’t skip this step; it’s essential for achieving those perfectly chewy cookies!
Can I add chocolate chips or other mix-ins?
Definitely! Adding chocolate chips is one of my favorite variations—just fold in about 1 cup of semi-sweet or dark chocolate chips into your dough after mixing dry and wet ingredients together. You could also throw in chopped nuts or even chunks of your favorite candy bar if you’re feeling adventurous! Experimenting with mix-ins is part of the fun—just remember it may affect baking time slightly depending on additional moisture content from your chosen add-ins!
Troubleshooting
I will continue to add more to this Troubleshooting section as I start seeing questions coming through from people who have made the recipe.
Troubleshooting tips
“My cookies were not as thick as yours! 😟”
- You might not have used enough flour. If your dough is too wet, it can spread out more during baking, resulting in flatter cookies. Make sure to measure your flour accurately by spooning it into the measuring cup and leveling it off.
- If you overmixed the dough after adding the dry ingredients, it can lead to a denser texture. Mix just until combined for that perfect chewiness.
I bet they were still YUM though!
“My cookies came out too dry! 😩”
- If you accidentally added too much flour, this can lead to dry cookies. Ensure you’re using the correct amount by measuring carefully and using the fluff-and-scoop method.
- Another cause could be baking them for too long. Even a minute or two extra in the oven can dry them out, so keep an eye on them and take them out when the edges are lightly golden.
I bet they were still YUM though!
“The surface of my cookies split and had massive crevices 😭”
- This typically happens if your oven temperature is too high. Make sure your oven is preheated to 350°F (175°C) and consider using an oven thermometer for accuracy.
- Additionally, if your dough was too warm when scooping and baking, it can lead to cracking. Chill the dough slightly if it’s warm from mixing!
I bet they were still YUM though!
“My cookies spread too much and are misshapen! 😳”
- If your baking sheet was too warm when you placed the dough on it, this can cause premature spreading. Ensure that your baking sheet is completely cool before placing the cookie dough balls on it.
- Also, be sure you’re spacing them about 2 inches apart; if they’re too close together, they’ll merge into each other while baking.
I bet they were still YUM though!
Chewy Peanut Butter Cookies
Ingredients
Method
- Preheat the oven to 350°F (175°C).
- In a mixing bowl, whisk together the flour, baking soda, and salt.
- In another bowl, combine the peanut butter, brown sugar, granulated sugar, egg, and vanilla extract. Mix until smooth.
- Gradually add the dry ingredients to the wet ingredients, mixing until just combined.
- Scoop tablespoon-sized balls of dough onto a baking sheet lined with parchment paper, spacing them about 2 inches apart.
- Flatten each ball slightly with a fork, creating a crisscross pattern on top.
- Bake in the preheated oven for 10-12 minutes, or until the edges are lightly golden.
- Remove from the oven and let cool on the baking sheet for 5 minutes before transferring to a wire rack to cool completely.