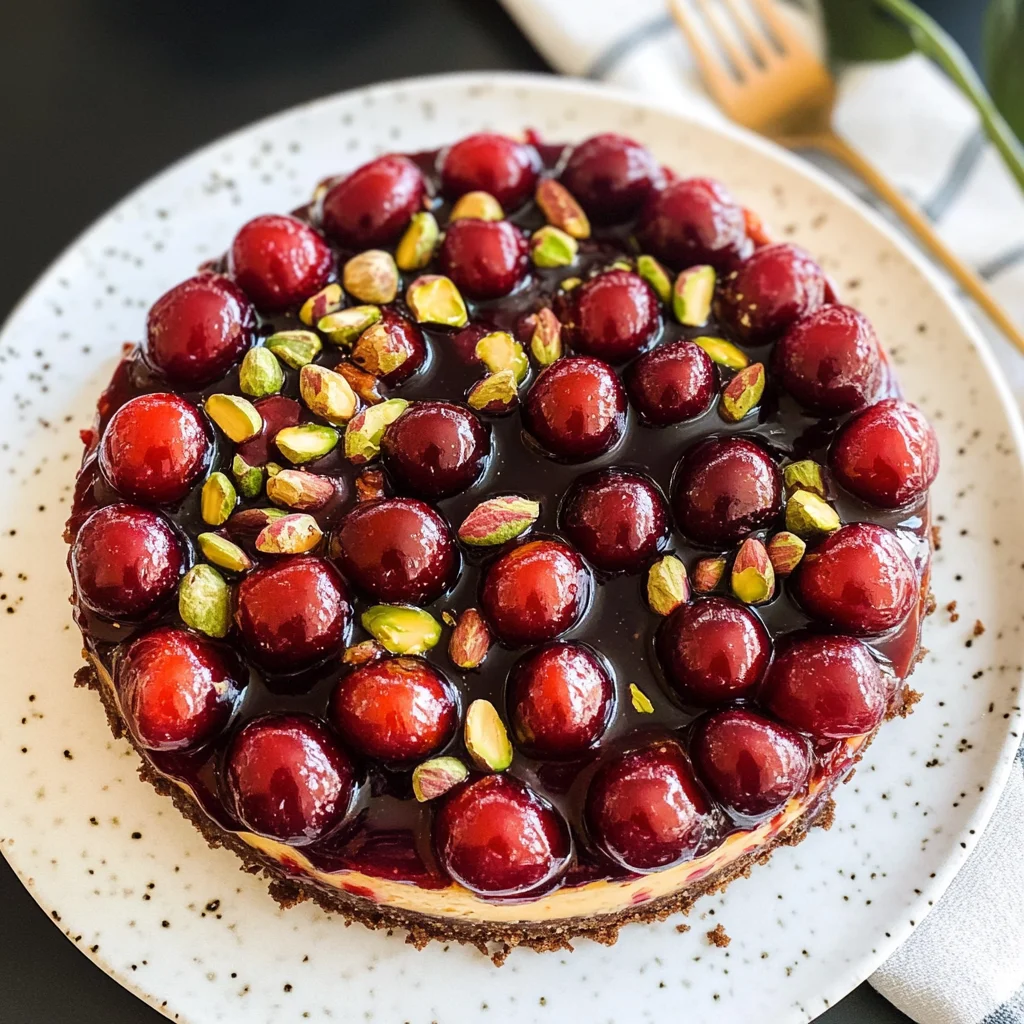
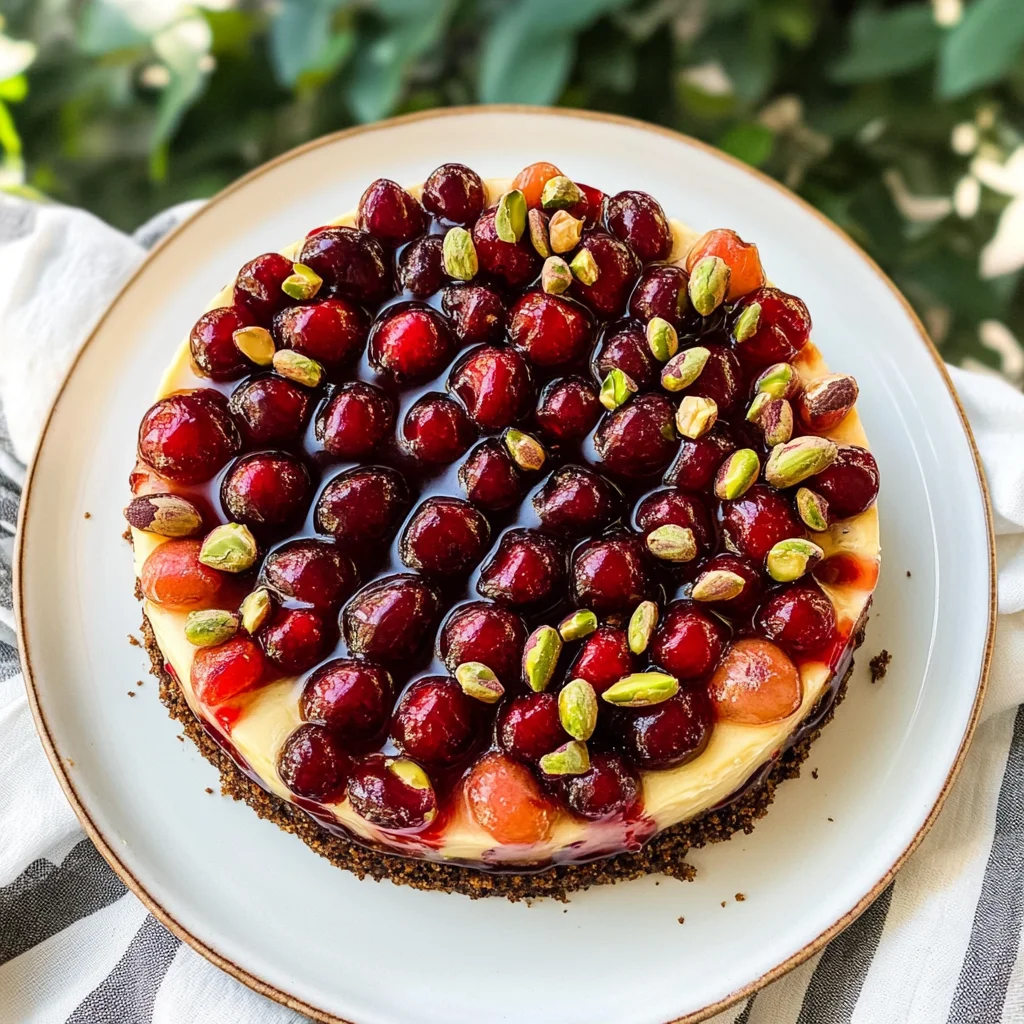
Cherry Pistachio Cheesecake – A Luscious Dessert Recipe
If you’re looking for a dessert that wows both the eyes and the taste buds, you’ve come to the right place! This Cherry Pistachio Cheesecake – A Luscious Dessert Recipe is not only delicious but also a true showstopper. The creamy pistachio-infused filling, combined with a buttery graham crust and topped with sweet-tart cherry pie filling, makes for a delightful treat. Whether it’s a family gathering, a holiday celebration, or just a cozy night in, this cheesecake is perfect for any occasion.
What makes this recipe even more special is how easy it is to prepare. You don’t need to be a fancy chef to whip up this luscious dessert. It’s the kind of recipe that brings people together, making it an ideal choice when you want to impress your friends or indulge in something sweet after dinner.
Why You’ll Love This Recipe
- Simple Ingredients: This cheesecake uses everyday ingredients that are easy to find at your local grocery store.
- Family-Friendly: Everyone loves cheesecake! This recipe appeals to both kids and adults alike.
- Make-Ahead Convenience: You can prepare this dessert ahead of time, making it perfect for busy days or gatherings.
- Delicious Flavor Combo: The mix of creamy pistachio and bright cherry flavors creates a delightful taste experience.
- Showstopping Presentation: With its vibrant colors and rich textures, this cheesecake looks as good as it tastes!
Ingredients You’ll Need
You’ll be delighted to know that making this Cherry Pistachio Cheesecake is quite simple! With just a handful of wholesome ingredients, you’ll be on your way to creating something truly special.
For the Crust:
- 1½ cups graham cracker crumbs
- ¼ cup ground pistachios
- 3 tbsp sugar
- 5 tbsp melted butter
For the Filling:
- 16 oz cream cheese, softened
- ½ cup sugar
- 2 large eggs
- ½ cup sour cream
- ¼ cup pistachio pudding mix (dry powder)
- 1 tsp vanilla extract
For the Topping:
- 1 can (21 oz) cherry pie filling
- Optional: extra chopped pistachios for garnish
Variations
This Cherry Pistachio Cheesecake is wonderfully flexible! Here are some fun ideas if you want to switch things up:
- Try Different Nuts: Substitute ground almonds or walnuts for pistachios for a unique twist.
- Use Fresh Cherries: If cherries are in season, use fresh ones instead of canned filling for a fresh taste.
- Add Chocolate: Drizzle some melted chocolate over the top for an extra indulgent treat.
- Go Gluten-Free: Use gluten-free graham crackers or almond flour in place of regular graham cracker crumbs.
How to Make Cherry Pistachio Cheesecake – A Luscious Dessert Recipe
Step 1: Preheat the Oven
Start by preheating your oven to 325°F (160°C). This step is crucial because it ensures your cheesecake bakes evenly. While the oven warms up, grease your 9-inch springform pan or line the bottom with parchment paper. This will help prevent sticking and make serving much easier!
Step 2: Make the Crust
In a mixing bowl, combine graham cracker crumbs, ground pistachios, sugar, and melted butter. Stir until everything is well mixed and resembles wet sand. Press this mixture firmly into the bottom of your prepared pan. Baking it for just 8 minutes helps set the crust so it holds together nicely once filled.
Step 3: Prepare the Filling
In another bowl, beat together softened cream cheese and sugar until smooth and creamy. Adding eggs one at a time ensures they blend in perfectly without lumps. Then mix in sour cream, pudding mix, and vanilla extract until just combined. This creamy filling will be the star of your cheesecake!
Step 4: Bake
Pour the luscious filling over your cooled crust and smooth out the top with a spatula. Bake in your preheated oven for about 45–50 minutes or until the center is just set—it should still have a slight jiggle. Once done, turn off the oven and let your cheesecake cool inside with the door cracked open; this helps prevent cracking on top.
Step 5: Chill
For best results, refrigerate your cheesecake for at least 4 hours or overnight if you can wait! Chilling allows all those wonderful flavors to meld beautifully.
Step 6: Top and Serve
Once chilled, spread that delicious cherry pie filling over the top of your cheesecake. If you’re feeling fancy, sprinkle some extra chopped pistachios on top for garnish. Slice it up and get ready to share—or keep it all to yourself!
I hope you enjoy making this Cherry Pistachio Cheesecake as much as I do! It’s sure to become one of your favorite recipes too!
Pro Tips for Making Cherry Pistachio Cheesecake – A Luscious Dessert Recipe
Creating this delightful cheesecake is a breeze with a few handy tips to ensure it turns out perfectly every time!
- Use room temperature ingredients: This helps the cream cheese blend smoothly, resulting in a creamy filling without lumps.
- Don’t overmix the batter: Overmixing can incorporate too much air, causing the cheesecake to crack. Mix just until combined for a smooth finish.
- Cool gradually: Allowing the cheesecake to cool in the oven with the door cracked prevents sudden temperature changes that can lead to cracks.
- Chill overnight: While waiting is hard, chilling the cheesecake overnight deepens the flavors and enhances its texture, making every bite heavenly.
How to Serve Cherry Pistachio Cheesecake – A Luscious Dessert Recipe
Presentation can elevate your dish from delicious to divine! Here are some creative ideas on how to serve this gorgeous cheesecake.
Garnishes
- Chopped pistachios: Sprinkling these on top adds a lovely crunch and enhances the pistachio flavor.
- Fresh mint leaves: A few sprigs of mint not only add color but also provide a fresh contrast to the rich cheesecake.
Side Dishes
- Fresh fruit salad: A mixture of seasonal fruits complements the richness of the cheesecake and adds a refreshing element.
- Coffee or tea: Serving your cheesecake with a warm beverage balances the sweetness and creates a cozy dessert experience.
- Vanilla ice cream: The creamy texture of vanilla ice cream pairs beautifully with the cheesecake, creating an indulgent treat.
- Whipped coconut cream: For a dairy-free option, whipped coconut cream is light and fluffy, making it a perfect companion for this dessert.
Enjoy your Cherry Pistachio Cheesecake as you savor its delightful flavors and textures!
Make Ahead and Storage
This Cherry Pistachio Cheesecake is not only a delightful dessert but also perfect for meal prep! You can make it ahead of time, ensuring you have a stunning treat ready for any occasion.
Storing Leftovers
- Cover the cheesecake tightly with plastic wrap or aluminum foil.
- Store in the refrigerator for up to 5 days.
- Keep the cherry topping separate until serving to maintain freshness.
Freezing
- Wrap the cheesecake securely in plastic wrap, then in aluminum foil to prevent freezer burn.
- Freeze for up to 2 months.
- Thaw in the refrigerator overnight before serving.
Reheating
- This cheesecake is best served cold, but if you prefer it slightly warm:
- Place slices on a microwave-safe plate and heat for 10-15 seconds.
- Be careful not to overheat, as it can change the texture.
FAQs
Many readers have questions about this scrumptious dessert. Here are some common inquiries:
What makes this Cherry Pistachio Cheesecake so special?
The combination of creamy pistachio-infused filling and sweet-tart cherry topping creates a unique flavor profile that stands out among traditional cheesecakes. It’s truly a showstopper!
Can I use fresh cherries instead of pie filling for the Cherry Pistachio Cheesecake?
Absolutely! If you prefer fresh cherries, simply pit and slice them, then toss with a bit of sugar to create a syrupy topping. Just let them sit for about 30 minutes before adding them on top of your cheesecake.
How do I ensure my Cherry Pistachio Cheesecake doesn’t crack?
To prevent cracks, avoid overmixing the batter and bake at a low temperature. Allowing the cheesecake to cool gradually in the oven (with the door ajar) will also help keep it smooth and beautiful.
Can I make this Cherry Pistachio Cheesecake gluten-free?
Yes! Use gluten-free graham crackers or an alternative crust made from ground nuts and coconut for a delicious gluten-free version.
Final Thoughts
I hope you’re as excited as I am to create this Cherry Pistachio Cheesecake – A Luscious Dessert Recipe! It’s not just about indulging in something sweet; it’s about celebrating flavors that delight your taste buds. Whether it’s a special occasion or just a well-deserved treat, this cheesecake is sure to impress everyone around your table. Enjoy making it, and I can’t wait for you to share your experience!
Cherry Pistachio Cheesecake – A Luscious Dessert Recipe
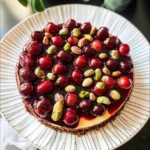
Indulge in the delightful Cherry Pistachio Cheesecake – A Luscious Dessert Recipe, where creamy pistachio-infused filling meets a sweet-tart cherry topping. This visually stunning cheesecake is perfect for any occasion, from family gatherings to cozy nights at home. With its buttery graham cracker crust and vibrant flavors, this dessert not only pleases the palate but also impresses as a showstopper on any table. Best of all, it’s easy to prepare, making it ideal even for novice bakers. Whether you choose to make it ahead or enjoy it fresh, this cheesecake promises to be a favorite among friends and family alike.
- Prep Time: 20 minutes
- Cook Time: 50 minutes
- Total Time: 1 hour 10 minutes
- Yield: Serves 12 1x
- Category: Dessert
- Method: Baking
- Cuisine: American
Ingredients
- 1½ cups graham cracker crumbs
- ¼ cup ground pistachios
- 3 tbsp sugar
- 5 tbsp melted butter
- 16 oz cream cheese, softened
- ½ cup sugar
- 2 large eggs
- ½ cup sour cream
- ¼ cup pistachio pudding mix (dry powder)
- 1 tsp vanilla extract
- 1 can (21 oz) cherry pie filling
- Optional: extra chopped pistachios for garnish
Instructions
- Preheat the oven to 325°F (160°C) and prepare a 9-inch springform pan.
- In a mixing bowl, combine graham cracker crumbs, ground pistachios, sugar, and melted butter. Stir until well mixed and press into the bottom of the pan. Bake for 8 minutes.
- In another bowl, beat together softened cream cheese and sugar until smooth. Add eggs one at a time, then mix in sour cream, pudding mix, and vanilla until just combined.
- Pour the filling over your cooled crust and smooth out the top. Bake for 45–50 minutes or until the center is just set with a slight jiggle.
- Cool in the oven with the door cracked open to prevent cracking and refrigerate for at least 4 hours or overnight.
- Top with cherry pie filling before serving.
Nutrition
- Serving Size: 1 slice (100g)
- Calories: 320
- Sugar: 22g
- Sodium: 250mg
- Fat: 20g
- Saturated Fat: 10g
- Unsaturated Fat: 8g
- Trans Fat: 0g
- Carbohydrates: 30g
- Fiber: 1g
- Protein: 5g
- Cholesterol: 70mg