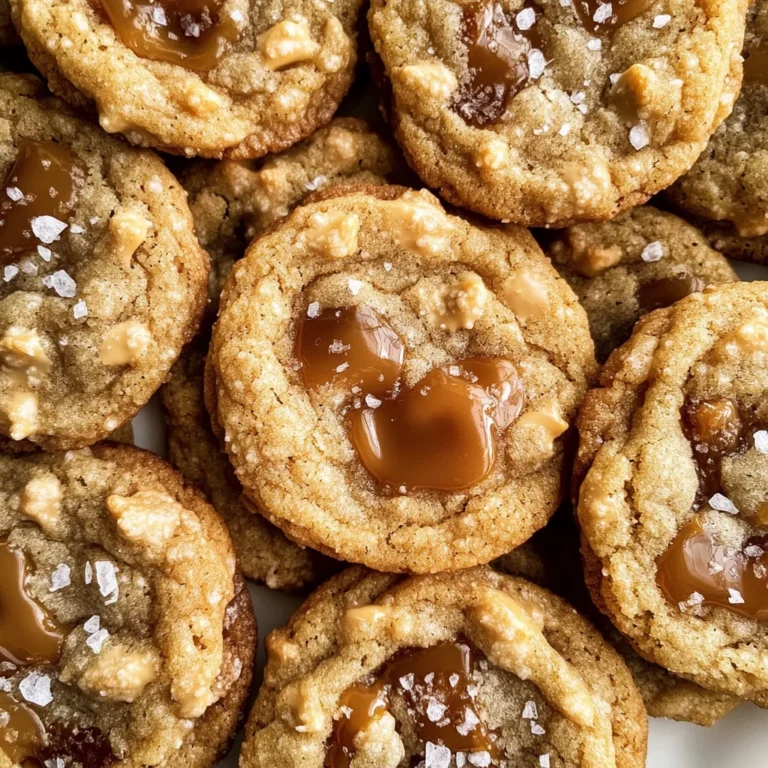
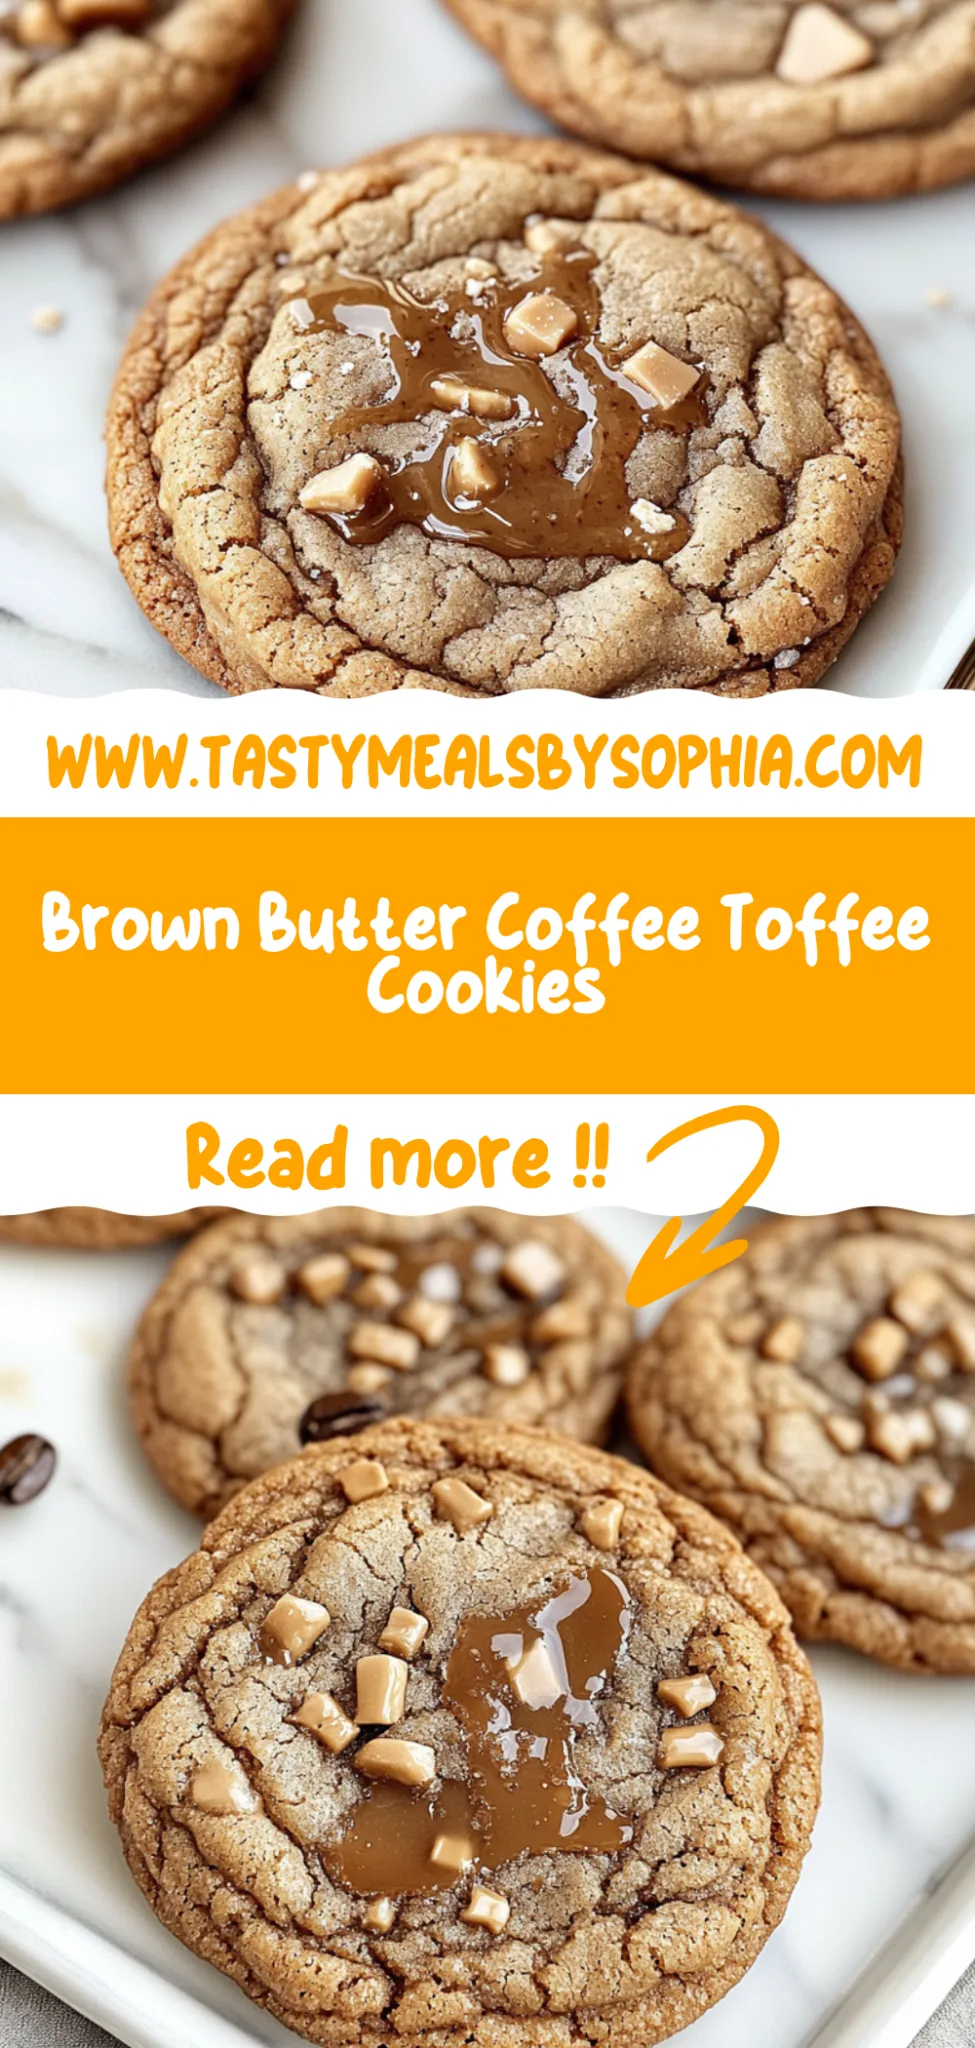
Brown Butter Coffee Toffee Cookies: Irresistibly Decadent
I first stumbled upon the idea of Brown Butter Coffee Toffee Cookies during a late-night binge on social media, where I saw a mouthwatering photo from a little café that boasted about their unique take on classic cookies. Those golden-brown beauties were so enticing that I could practically smell the nutty aroma wafting through my screen. With my wallet feeling a bit too light for frequent café visits, I decided it was high time to challenge myself to recreate these decadent treats at home—because let’s be honest, there’s nothing quite like the satisfaction of pulling fresh cookies out of your own oven.
After what felt like an eternity (okay, maybe just a couple of weeks), and more than a handful of botched batches that had me questioning my baking skills, I finally nailed the recipe. Each attempt was a learning curve—I tried different ratios of butter to flour, played around with the coffee intensity, and even experimented with various types of toffee bits. Let’s just say there were moments where I almost threw in the towel when the cookies turned out too greasy or flat as pancakes. But every misstep taught me something new, and I was determined to get it right—after all, no one wants to share subpar cookies!
But oh boy, when I finally pulled those Brown Butter Coffee Toffee Cookies out of the oven, it was like winning the baking lottery! The rich nutty flavor from the brown butter combined perfectly with the deep notes of coffee and sweet crunch from the toffee bits created an irresistible treat that’s both chewy and crispy at once. They have this magical quality: warm from the oven or stored for days, they stay deliciously fresh while your taste buds dance with joy. Trust me when I say you’ll want to whip up a batch (or two)—because once you try these cookies, you’ll never look at dessert the same way again!
These Brown Butter Coffee Toffee Cookies are…
….the ultimate indulgence in my cookie repertoire!
1. They deliver a decadent flavor profile that’s truly irresistible, thanks to the rich, nutty depth of brown butter. By browning the butter, I unlock a complex butterscotch essence that elevates these cookies beyond the ordinary, making each bite a warm hug for your taste buds.
2. Expect a perfectly balanced texture – these cookies have a delightful contrast between a crisp exterior and a chewy center. The combination of brown sugar and granulated sugar creates just the right amount of moisture and structure, resulting in an enjoyable bite every time.
3. A key technique that sets these cookies apart is the use of instant coffee granules mixed into the wet ingredients. This simple addition not only enhances the overall flavor but also ties together the nuttiness of the brown butter and sweetness of toffee bits for a sophisticated taste experience unlike any other cookie.
4. These cookies provide incredible value by using common pantry staples without sacrificing quality or taste. With just a few straightforward ingredients, you can create bakery-worthy Brown Butter Coffee Toffee Cookies at home that are perfect for sharing or enjoying all to yourself!
PS These cookies yield about 24 generous servings, perfect for gatherings or simply satisfying your sweet cravings!
Ingredients for the Brown Butter Coffee Toffee Cookies
Each ingredient in this dish plays an essential role in flavor and texture. Here’s what you’ll need:
1 cup unsalted butter (brown butter): Provides a rich, nutty flavor that enhances the cookie’s depth.
1 cup brown sugar (packed): Contributes moisture and caramel notes for a chewy texture.
1/2 cup granulated sugar: Balances sweetness and helps create a crisp edge.
2 large eggs: Adds moisture and binds the ingredients together for structure.
1 tablespoon vanilla extract: Infuses warmth and enhances the overall flavor profile.
2 cups all-purpose flour: Forms the base of the cookies, giving them structure.
1 teaspoon baking soda: Acts as a leavening agent to help the cookies rise slightly.
1/2 teaspoon salt: Enhances flavors and balances sweetness in the cookie dough.
1 tablespoon instant coffee granules: Imparts a subtle coffee richness that complements the toffee.
1 cup toffee bits (such as Heath Bar bits): Adds crunchy texture and a buttery sweetness to every bite.
You Must Brown the Butter. No Shortcuts!
I’ll admit it—I tried to cut corners with this brown butter business. I thought, “Surely there’s a way to skip this step and still get great cookies!” Spoiler alert: I was wrong. After several batches that tasted more like sad little hockey pucks than the rich, nutty delights I envisioned, I learned my lesson the hard way.
Browning butter isn’t just an extra step; it’s a game-changer. When you cook the butter until it turns golden brown and develops that irresistible nutty aroma, you’re unlocking flavor compounds that elevate your cookies to a whole new level. Think of it like toasting nuts—without it, your cookies will lack depth and richness. The warm, caramel notes from browned butter meld beautifully with the brown sugar and coffee in our cookie dough, creating a symphony of flavors that simply can’t be replicated by just melting plain butter.
What does browning butter do?
- More Flavor: The browning process creates complex flavors that deepen the overall taste of the cookie, giving it a rich, nutty essence.
- Better Texture: Cookies made with browned butter have a chewier interior due to the emulsification of fats during browning.
- Enhanced Aroma: The nutty scent wafting from browned butter makes these cookies irresistibly inviting—your kitchen will smell heavenly!
- Richer Color: Browned butter gives the cookies a beautiful golden hue, making them visually appealing and adding to their gourmet feel.
- Longer Shelf Life: The browning process helps reduce moisture content in the butter, contributing to cookies that stay fresher for longer.
Different Browning Times
- 1 minute (ok) — Just melted, no nuttiness; cookies are bland and flat.
- 3 minutes (good) — Slightly browned; some flavor development but still lacking depth.
- ⭐️ 5 to 7 minutes⭐️ — Perfect browning; nutty aroma and rich flavor shine through.
- Beyond 8 minutes (caution) — Risk of burnt bits creeping in; while still usable, flavor may turn bitter if overdone.
Be warned—overheating or burning your butter is a common mistake! You want that beautiful golden color without any charred bits. Keep an eye on it as it cooks and stir frequently! Trust me, nobody wants burnt-tasting cookies.
How to make Brown Butter Coffee Toffee Cookies
Are you ready to see how straightforward it is to make the Brown Butter Coffee Toffee Cookies of your dreams??
1. BROWN THE BUTTER
The secret to that nutty, rich flavor starts with perfectly browned butter!
1. Melt – In a saucepan over medium heat, melt the butter. Keep an eye on it and stir frequently, allowing the butter to cook until it turns golden brown and develops a delightful nutty aroma, which should take about 5-7 minutes. This step is crucial because browning the butter enhances its flavor, giving your cookies that irresistible depth.
2. Cool – Remove from heat and let it cool slightly. ⚠️ Cooling is important here! The butter should still be liquid but cool enough so it won’t melt the sugar when combined.
HANDY TIPS
- Use a light-colored saucepan to better monitor the color change of the butter.
- I find that letting the browned butter sit for just a bit longer allows for even deeper flavors!
2. MAKE THE DOUGH
Now we’ll mix our wet ingredients to create a luscious cookie dough.
3. Combine – In a mixing bowl, combine the brown butter, brown sugar, and granulated sugar. Mix until smooth and creamy—this should take just a minute or two. The sugars will dissolve into the warm butter, creating a velvety base for your cookies.
4. Add – Add the eggs and vanilla extract, mixing until well combined. This step adds moisture and flavor, ensuring your cookies turn out soft and chewy.
HANDY TIPS
- Make sure your eggs are at room temperature! It helps them incorporate better into the mixture.
- I like to use pure vanilla extract for richer flavor—trust me, it’s worth it!
3. COMBINE DRY INGREDIENTS
Let’s whisk together our dry ingredients for that perfect texture.
5. Whisk – In another bowl, whisk together the flour, baking soda, salt, and instant coffee granules until evenly mixed. This ensures that every bite is packed with flavor! The coffee granules will enhance the chocolate notes of the toffee bits.
HANDY TIPS
- Sifting your flour can help avoid clumps and give your cookies a lighter texture.
- Store any extra instant coffee in an airtight container; it’s great for future baking projects!
4. COMBINE MIXTURES AND BAKE
It’s time to bring everything together and get those cookies baking!
6. Mix – Gradually add the dry ingredients to the wet ingredients, mixing until just combined—don’t overmix! A few flour streaks are okay; they will disappear as you fold in the next ingredient.
7. Fold – Fold in the toffee bits gently until evenly distributed throughout the dough.
8. Preheat – Preheat your oven to 350°F (175°C) and line a baking sheet with parchment paper.
9. Scoop – Scoop tablespoon-sized amounts of dough onto the prepared baking sheet, spacing them about 2 inches apart to allow room for spreading during baking.
10. Bake – Bake for 10-12 minutes or until the edges are golden brown while keeping the center slightly soft—it’ll continue cooking on cooling! Let cool on the baking sheet for a few minutes before transferring to a wire rack.
HANDY TIPS
- Smaller cookies? They work really well but roll into balls instead of discs; bake them for about 12-14 minutes!
- If you’d like thicker cookies, chill your dough in the refrigerator for about 30 minutes before scooping.
Make these Brown Butter Coffee Toffee Cookies once, and I guarantee they’ll invade your dreams every night too! – Nagi x
FAQ – Brown Butter Coffee Toffee Cookies
How long will these cookies keep?
Brown Butter Coffee Toffee Cookies are best enjoyed fresh, but they can last for up to a week when stored properly. After the first day, I found that they retain about 95% of their deliciousness, dropping to around 90% on day three and 85% by day five. To maintain their texture, keep them in an airtight container at room temperature. If you want to keep them longer, consider freezing them!
❄️ Do I really have to chill? YES YOU DO.
Yes, chilling the dough is essential! While it may seem like an extra step, resting the dough for at least 30 minutes (or even a couple of hours) helps the flavors meld and gives the cookies a better texture. I’ve tested it with and without chilling, and trust me—chilling makes a noticeable difference in chewiness and flavor depth. So don’t skip this step if you want cookie perfection!
🥶 Can I freeze these cookies?
Absolutely! You can freeze the cookie dough or the baked cookies. For freezing dough:
- Scoop tablespoon-sized amounts onto a baking sheet lined with parchment paper and freeze until solid.
- Once frozen, transfer them to a zip-lock bag and store for up to 3 months.
When you’re ready to bake, there’s no need to thaw; just add an extra minute or two to your baking time. For baked cookies, let them cool completely before wrapping them tightly in plastic wrap or placing them in an airtight container before freezing.
🌾 Can these be made gluten free?
Yes! To make Brown Butter Coffee Toffee Cookies gluten-free, simply substitute all-purpose flour with a high-quality gluten-free flour blend that contains xanthan gum or add 1/2 teaspoon of xanthan gum if it doesn’t already include it. I’ve tested this substitution, and while the texture might be slightly different—less chewy—they still come out quite delicious!
Can I reduce the sugar or substitute with sweeteners?
No, you cannot reduce the sugar without impacting the overall structure of these cookies significantly. I tried reducing both sugars multiple times (including using stevia and monk fruit sweetener), and every attempt resulted in cookies that spread too much or didn’t set properly. The balance of brown sugar’s moisture and granulated sugar’s structure is crucial here for that perfect chewy yet crispy edge.
☕ What can I use instead of instant coffee granules?
If you don’t have instant coffee granules on hand, you can substitute it with espresso powder for a more intense coffee flavor or omit it entirely if you prefer a non-coffee version. Just remember that omitting it will change the flavor profile slightly; however, I’ve found that adding finely ground espresso beans also works surprisingly well!
Why do we brown the butter?
Browning butter adds a rich, nutty flavor that elevates these cookies beyond just your average chocolate chip cookie experience. The Maillard reaction that occurs during browning creates complex flavors that enhance sweetness and add depth. I did some side-by-side comparisons between melted butter and browned butter—trust me when I say: once you go brown butter, there’s no going back!
Troubleshooting
I will continue to add more to this Troubleshooting section as I start seeing questions coming through from people who have made the recipe.
Troubleshooting tips
“My cookies were too flat! 😩”
- This could be due to the butter being too warm when you mixed it with the sugars. If the butter is too hot, it can cause the dough to spread excessively while baking.
- Another reason might be that you didn’t chill the dough before baking; chilling helps solidify the fats, preventing them from melting too quickly in the oven.
I bet they were still YUM though!
“My cookies came out too dry! 😢”
- If you accidentally over-measured your flour (it’s easy to do!), that could lead to a drier texture since there’s less moisture to bind everything together. Be sure to spoon and level your flour next time!
- Using old eggs can also contribute to dryness, as they may not provide enough moisture and richness in your dough. Always use fresh eggs for optimal results.
I bet they were still YUM though!
“The edges of my cookies are too dark! 🔥”
- If your oven runs hot or you used a dark baking sheet, it can lead to uneven browning and burnt edges. Consider lowering your oven temperature by 25°F (about 15°C) next time.
- Baking them for a couple of minutes longer than recommended can also cause this issue, so keep an eye on them as they bake!
I bet they were still YUM though!
“My cookies are cracking on top! 😭”
- Cracking can happen if the dough was overmixed once you combined the wet and dry ingredients. Mixing until just combined is key to keeping that lovely texture.
- If your brown butter was too hot when mixed with the eggs, it may have cooked them slightly, causing cracks as they baked. Make sure to let it cool slightly before adding!
I bet they were still YUM though!