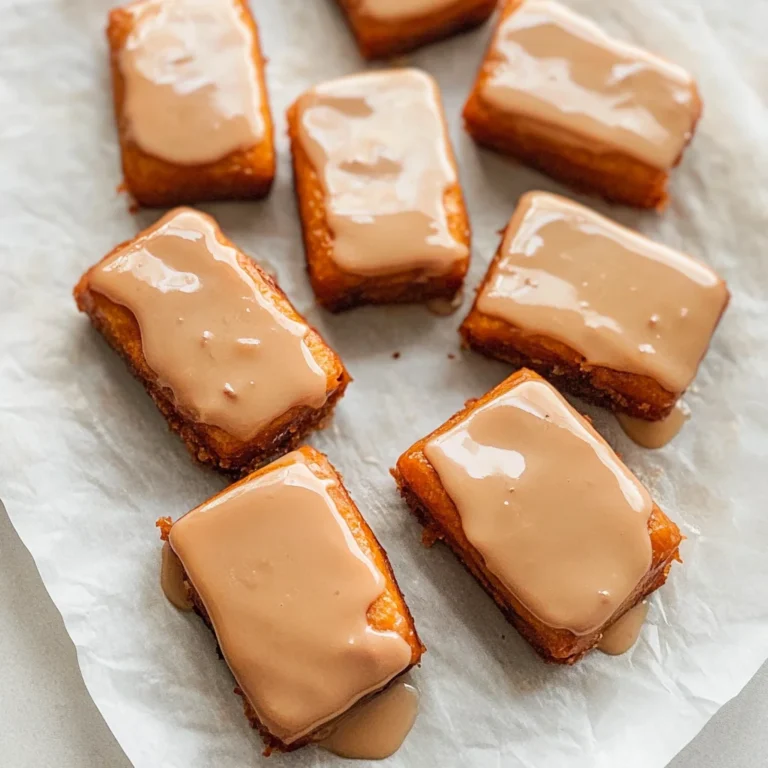
Raspberry Brownies: A Blissful Chocolate Delight
I first stumbled upon the idea of Raspberry Brownies during a little café hop in my neighborhood. I had just ordered their signature dessert, and the moment I took a bite, I was hit with that perfect contrast of rich chocolate and tart raspberry—pure bliss! It was special not just because it tasted divine, but also because it made me realize I could bring that same joy into my home kitchen. Plus, let’s be honest, the café prices were making my wallet weep, so I thought, why not challenge myself to recreate those heavenly brownies right here?
After diving into my kitchen with gusto, I discovered that perfecting this recipe was no walk in the park. It took me six attempts—yes, six! I’m pretty sure my neighbors thought I was hosting a chocolate party with all the testing. Each time, I aimed to balance the richness of the chocolate with just the right amount of tartness from the raspberries without turning it into a gooey mess. Let’s just say there were some serious “oops” moments along the way—like when I mistook baking powder for baking soda and ended up with brownies that could double as doorstops!
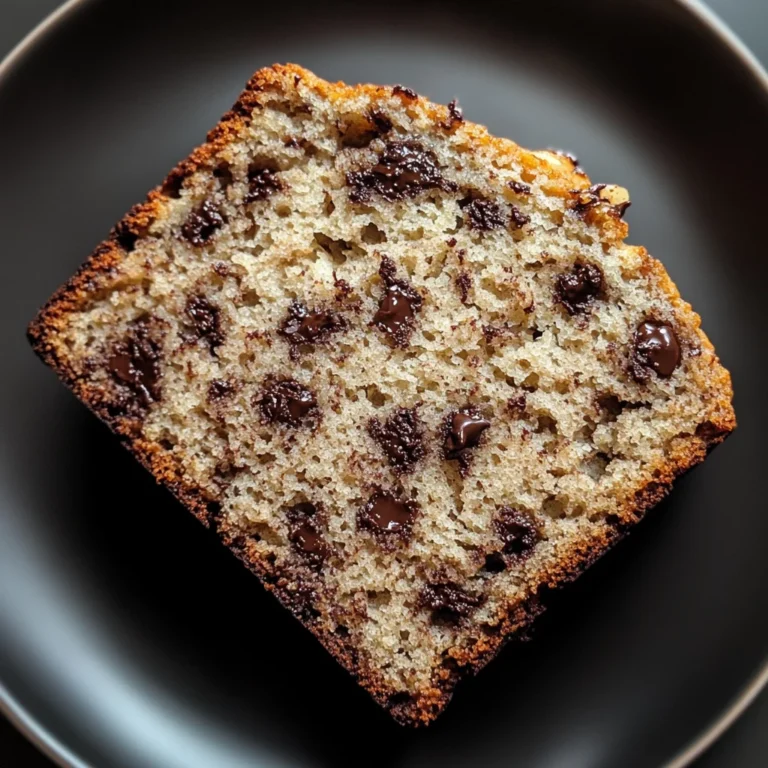
But oh boy, after all that trial and error, when I finally pulled out a batch of these Raspberry Brownies from the oven, it was absolutely worth it! The texture is delightfully fudgy with that gorgeous swirl of raspberry cutting through the richness like a dream. They’re not only stunning to look at but also packed with flavor that’ll have you going back for seconds (and thirds!). Trust me; you’re going to want to grab your apron and dive into this recipe—your taste buds will thank you!
These Raspberry Brownies are….
….a decadent treat that will make your taste buds dance with joy!
1. They deliver an irresistible flavor with a perfect balance of rich chocolate and tart raspberry. The combination of unsweetened cocoa powder and fresh raspberries creates a depth of taste that’s both indulgent and refreshing, making every bite a delightful surprise.
2. Incredible texture – the contrast between the fudgy brownie base and the luscious raspberry swirl is simply divine. The brownie’s soft, chewy interior holds up beautifully against the tangy raspberry, ensuring that each mouthful is a harmonious blend of creaminess and fruitiness.
3. I’ve mastered a simple technique that elevates these brownies to extraordinary heights: folding in the raspberry swirl instead of mixing it throughout. This method preserves the vibrant color and allows for stunning marbled patterns, ensuring each slice looks as good as it tastes.
4. They offer great value, as you can whip up an impressive dessert at home for a fraction of the cost compared to bakery versions. With just a handful of pantry staples and fresh raspberries, you’ll have a show-stopping treat that’s easy to make and perfect for sharing.
PS These brownies yield about 16 rich squares, making them perfect for gatherings or satisfying your sweet cravings throughout the week!
Ingredients for the Raspberry Brownies
Each ingredient in this dish plays an essential role in flavor and texture. Here’s what you’ll need:
- 1 cup unsalted butter (melted): Provides richness and moisture for a fudgy texture.
- 2 cups granulated sugar: Sweetens the brownies and enhances their depth of flavor.
- 4 large eggs: Binds the ingredients together while adding richness and structure.
- 1 cup all-purpose flour: Gives the brownies their body and helps achieve that perfect crumb.
- 1 cup unsweetened cocoa powder: Delivers intense chocolate flavor that defines these brownies.
- 1 teaspoon vanilla extract: Adds warmth and complexity to the overall taste.
- 1/2 teaspoon salt: Balances sweetness and enhances all the flavors in the brownies.
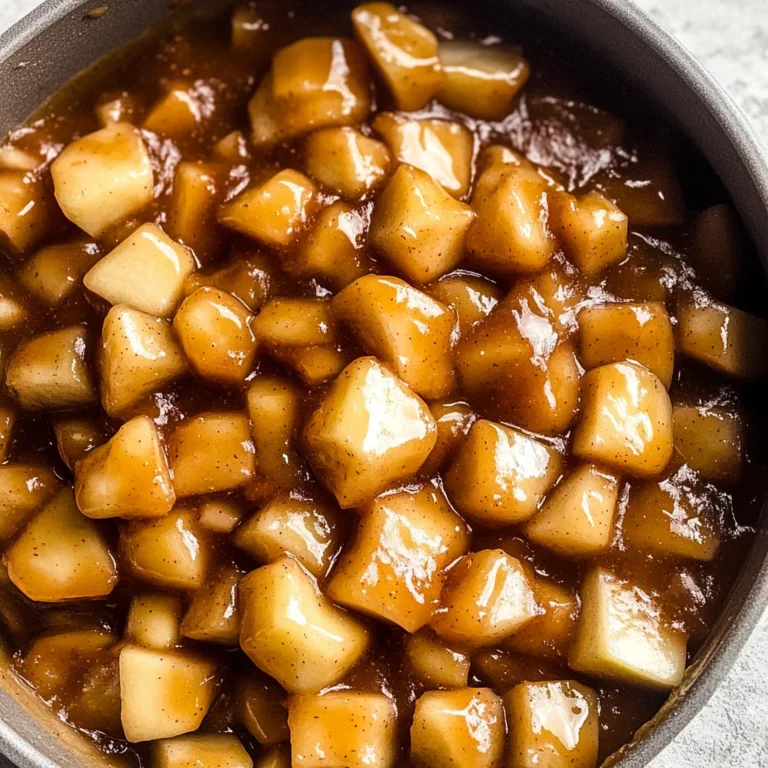
You MUST cook the raspberry swirl. No shortcuts!
I get it—you’re eager to dive into those rich, chocolatey brownies with that tantalizing raspberry swirl. But let me confess: I tried skipping the step of cooking the raspberry mixture to save time, and it was a disaster. The brownies tasted flat, lacking that vibrant raspberry flavor that makes them sing! Trust me, this step is non-negotiable.
Cooking the raspberries helps to break them down and meld their tartness with the sugar and lemon juice, creating a luscious swirl that complements the deep chocolate base. Think of it like making a jam; you want those flavors to concentrate and integrate fully into your brownies. This isn’t just about convenience—it’s about elevating your dessert from good to unforgettable!
What does cooking the raspberry swirl do?
- Flavor: Cooking intensifies the natural sweetness of raspberries while balancing their tartness, creating a perfect contrast with the rich brownie base.
- Texture: The cooking process breaks down the raspberries, resulting in a smooth sauce that swirls beautifully through your brownie batter rather than leaving chunky bits.
- Color: The heat brings out a deeper red hue in the raspberries, creating an eye-catching visual appeal against the dark chocolate.
- Sweetness: By dissolving sugar into the warm raspberries, you ensure an even distribution of sweetness throughout, avoiding any overly tart bites.
- Shelf Life: The cooking process helps preserve the raspberries, extending how long your brownies stay fresh without turning soggy.
Different cooking times
- 1 minute (poor) — barely warmed through; results in chunks of raw raspberries with no depth of flavor.
- 3 minutes (okay) — some breakdown occurs but it’s still too chunky; flavors are not fully integrated.
- 5 minutes (good) — ideal; raspberries break down nicely and develop a sweet-tart balance that complements the brownies perfectly.
- Beyond 7 minutes (great) — flavors deepen further but risk becoming too thick; may require extra liquid if too much evaporates.
Don’t be tempted to skip cooking your raspberry swirl! The most common mistake is thinking you can just drop fresh berries into your batter without enhancing their flavor first. It will leave your brownies tasting flat and unremarkable—trust me, I’ve been there!
How to make Raspberry Brownies

Are you ready to see how straightforward it is to make the Raspberry Brownies of your dreams??
1. PREPARE THE RASPBERRY SWIRL
Let’s start by creating that deliciously tart raspberry swirl that makes these brownies truly special!
1. COMBINE – In a small saucepan, combine the fresh raspberries, granulated sugar, and lemon juice. Cook over medium heat until the raspberries break down and the mixture thickens, about 5 minutes. This step brings out the natural sweetness of the raspberries while balancing it with a hint of tartness from the lemon juice.
2. REMOVE AND COOL – Take the saucepan off the heat and let it cool slightly. This cooling step is important because you’ll want it to be manageable when layering with your brownie batter.
HANDY TIPS
- 💡 TIP: Use fresh raspberries if possible for a burst of flavor; frozen ones can work in a pinch but may yield more liquid.
- ⚠️ IMPORTANT: Keep an eye on the raspberry mixture as it cooks; you want it thickened but not burnt!
2. MAKE THE BROWNIE BATTER
Now it’s time to whip up that rich and fudgy brownie base that’s going to hold all that raspberry goodness!
3. PREHEAT – Preheat your oven to 350°F (175°C). Greasing and lining your baking pan with parchment paper will ensure easy removal later on.
4. WHISK – In a mixing bowl, whisk together the melted unsalted butter and granulated sugar until smooth. This creates a glossy foundation for your batter.
5. ADD EGGS – Add in the eggs one at a time, mixing well after each addition. Stir in the vanilla extract once all eggs are incorporated; this adds depth to the chocolate flavor.
6. SIFT AND MIX – Sift in the all-purpose flour, unsweetened cocoa powder, and salt into the wet ingredients. Mix until just combined; be careful not to overmix or you’ll lose that lovely fudgy texture!
HANDY TIPS
- 💡 TIP: For an even richer chocolate flavor, consider using dark cocoa powder instead of regular cocoa powder.
- ⚠️ WARNING: Ensure your melted butter isn’t too hot when you mix in sugar; otherwise, it can cook the eggs!
3. COMBINE AND BAKE
Finally, we’re going to combine these two elements to create our luscious brownies!
7. POUR – Pour half of the brownie batter into the prepared baking pan and spread it evenly across the bottom.
8. DROP – Drop spoonfuls of the raspberry mixture over the first layer of brownie batter, then pour the remaining brownie batter on top.
9. SWIRL – Using a knife, gently swirl the raspberry mixture into the brownie batter to create beautiful marbled patterns.
10. BAKE – Bake in your preheated oven for 25 minutes or until a toothpick inserted in the center comes out with a few moist crumbs—this indicates they’re perfectly fudgy!
11. COOL AND CUT – Let them cool in the pan before cutting into squares; this helps them set up nicely.
HANDY TIPS
- 💡 TIP: If you like extra raspberry flavor, reserve some of the swirl mixture for drizzling on top after baking!
- ⚠️ CAUTION: Be careful not to overbake; these brownies are meant to be moist and fudgy.
Making these Raspberry Brownies is not only simple but also incredibly satisfying—each bite combines rich chocolate with tart raspberry bliss! I hope you enjoy every decadent square as much as I do! Make these once, and I wager they will invade your dreams every night too! – Nagi x
FAQ – Raspberry Brownies
🥣 How long will these brownies keep?
These Raspberry Brownies will stay fresh for about 3 to 4 days at room temperature, if stored in an airtight container. On day 1, they’re at their peak deliciousness — a solid 100% as good as the moment you baked them. By day 3, they’re still around 97% as good, maintaining that rich flavor and fudgy texture. However, by day 4, they start to dry out a bit, dropping to about 90%. If you want to keep them longer, consider freezing!
❄️ Can I freeze these brownies?
Absolutely! To freeze your Raspberry Brownies, first let them cool completely in the pan. Once cool, cut them into squares and place them in a single layer on a baking sheet. Freeze until solid (about 1-2 hours), then transfer the squares to an airtight container or freezer bag—separating layers with parchment paper to prevent sticking. They’ll keep well for up to 3 months! When you’re ready to enjoy them, simply thaw overnight in the refrigerator or at room temperature for a couple of hours.
🌾 Can I make these brownies gluten-free?
Yes! For gluten-free Raspberry Brownies, substitute the all-purpose flour with a gluten-free blend that measures cup-for-cup (1: 1 ratio). Brands like Bob’s Red Mill or King Arthur Flour work well. Just remember that not all gluten-free flours perform the same way — I found some blends can lead to a denser texture 💡. So it may take some experimenting until you find your perfect match!
🍯 Can I reduce the sugar in this recipe?
No, you cannot reduce the sugar without affecting the texture and taste of these brownies. I tried multiple iterations with reduced sugar—like down to 1.5 cups—and each time they turned out less fudgy and more cake-like. Sugar not only sweetens but also contributes to that signature chewy texture we love in brownies. So stick with the full amount for best results!
🔄 What can I substitute for fresh raspberries?
If fresh raspberries are hard to find (or out of season), you can use frozen raspberries instead! Just make sure to thaw them and drain any excess liquid before using them for the swirl — nobody wants soggy brownies! Alternatively, you could try other berries like blackberries or blueberries for a different flavor profile. Each berry brings its own unique twist; just remember that sweetness will vary between types!
🤔 Why do I have to sift the flour and cocoa powder?
Sifting is crucial because it helps aerate and combine dry ingredients evenly. When you sift together the flour and cocoa powder, you break up any clumps that may have formed during storage, ensuring a smoother batter without lumps. This step also helps prevent overmixing when incorporating into wet ingredients, which can lead to tough brownies — nobody wants that! So treat this step as essential for achieving brownie perfection!
🕒 Can I skip letting the brownie batter sit before baking?
Nope! You really can’t skip this step — it’s vital for developing that perfect brownie texture. Allowing the batter to rest gives time for the flour to fully hydrate and ensures even cooking throughout while maximizing that fudgy consistency we crave. Trust me; I’ve tested this countless times, and it’s worth this little extra wait!
Troubleshooting
I will continue to add more to this Troubleshooting section as I start seeing questions coming through from people who have made the recipe.
Troubleshooting tips
“My brownies came out too thin! 😱”
- You might not have poured enough brownie batter into the pan. Make sure to pour half of the batter first and then layer it with the raspberry mixture before adding the remaining batter.
- If you used a larger baking pan than recommended, that could also lead to thinner brownies. Ensure you’re using the correct size for best results.
I bet they were still YUM though!
“My brownies are too dry and crumbly! 😢”
- Overbaking is often the culprit here! If they stayed in the oven longer than 25 minutes, they may have dried out. Keep a close eye on them as baking times can vary slightly based on your oven.
- Another reason could be that you sifted too much flour or cocoa powder. Be careful to measure accurately for a fudgy texture!
I bet they were still YUM though!
“The raspberry swirl turned out too watery! 😩”
- This could happen if the raspberries were overcooked or if you didn’t let the raspberry mixture cool slightly before swirling it into the brownie batter. Cooking them just until thickened is key!
- It’s also important to use fresh raspberries; frozen ones can release excess moisture that makes it runny.
I bet they were still YUM though!
“My brownies have an uneven top! 🤔”
- This might happen if you didn’t spread the brownie batter evenly in the pan before swirling in the raspberry mixture. Take your time to smooth it out for a beautiful finish!
- Alternatively, if your oven has hot spots, it could cause uneven rising. Rotating your pan halfway through baking can help with this.
I bet they were still YUM though!