Chocolate Cinnamon Roll with Espresso Cream Cheese Icing:…
I first discovered the magic of chocolate cinnamon rolls at a cozy little café during a rainy weekend brunch. The moment I took that first bite, I was hooked—fluffy dough swirled with rich chocolate and laced with warm spices, topped off with a decadent espresso cream cheese icing. It was such a delightful experience that I just couldn’t shake the craving for more. So, armed with my love for baking and a mission to recreate this glorious treat at home, I decided to take matters into my own hands. Plus, let’s be honest, making them myself meant I could bake as many as I wanted without breaking the bank!
Let me tell you, perfecting this Chocolate Cinnamon Roll with Espresso Cream Cheese Icing was no walk in the park! It took me five attempts (yes, five!) to get it just right—each try filled with various degrees of disaster. There were doughs that didn’t rise, chocolate fillings that oozed out like they were auditioning for a messy food show, and icing experiments that ended up more like soup than frosting. With every batch, I was determined to achieve that pillowy softness while getting the balance of chocolate and spice just perfect. Spoiler alert: it wasn’t pretty at times!
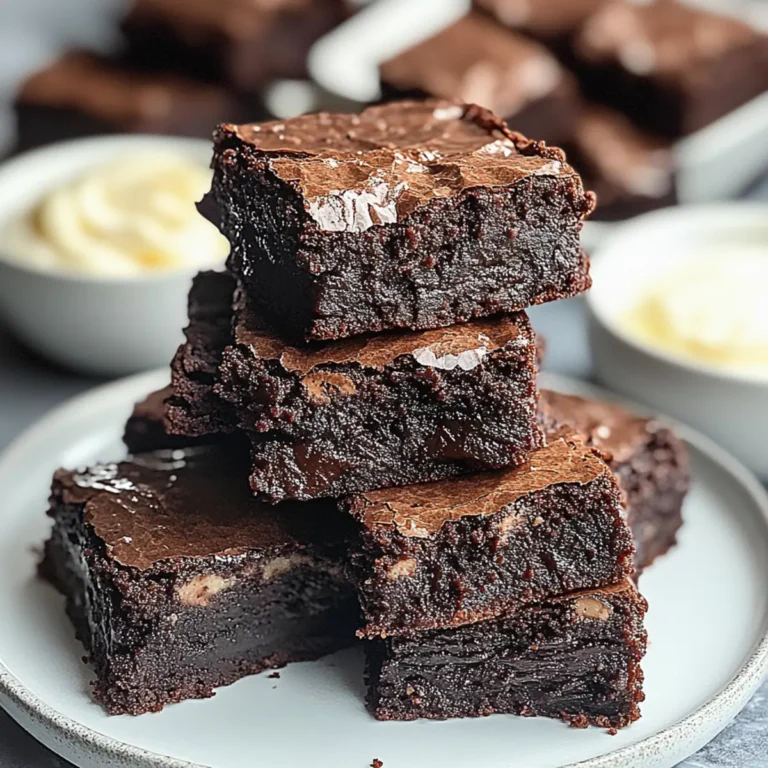
But oh boy, was it worth every sticky finger and flour-covered countertop! The final result is nothing short of heavenly—these chocolate cinnamon rolls are deliciously soft and fluffy, melting in your mouth with each bite. Topped with that rich espresso cream cheese icing, they boast an irresistible flavor combo that’ll make anyone weak at the knees (or at least skip breakfast!). Trust me when I say you absolutely need to make these; they’re the kind of indulgence that turns an ordinary day into something special! Happy baking!
These Chocolate Cinnamon Roll with Espresso Cream Cheese Icing are…
…a heavenly indulgence that will make your mornings feel like a special occasion!
1. They deliver a decadent chocolate flavor that’s both rich and comforting, thanks to the addition of cocoa powder in the filling. This thoughtful touch elevates the classic cinnamon roll, infusing it with layers of luscious chocolate that dance on your palate, making each bite a delightful experience.
2. Incredibly soft and fluffy texture — these rolls are pillowy and tender due to the careful balance of warm milk and melted butter in the dough. By using instant yeast, I ensure they rise beautifully, resulting in a lightness that practically melts in your mouth with every bite.
3. A simple yet effective technique — allowing the dough to rest after mixing helps develop its gluten structure. This step not only enhances elasticity but also contributes to those perfect swirls filled with chocolate goodness, ensuring each roll is as visually appealing as it is delicious.
4. Cost-effective and easy to make — creating these chocolate cinnamon rolls at home means you can enjoy gourmet flavors without breaking the bank or waiting in line at a bakery. With readily available ingredients like all-purpose flour and sugar, this recipe brings café-quality treats right into your kitchen.
PS These rolls yield about 12 soft and fluffy pieces, perfect for sharing or savoring throughout the week!
Ingredients You’ll Need
Each ingredient in this dish plays an essential role in flavor and texture. Here’s what you’ll need:
Dough
2 cups all-purpose flour (plus extra for dusting): Provides the structure and body of the rolls.
1 packet instant yeast: Helps the dough rise, creating soft and fluffy rolls.
1/4 cup granulated sugar: Sweetens the dough and enhances browning during baking.
1/2 teaspoon salt: Balances sweetness and enhances overall flavor.
1/2 cup milk (warm): Activates the yeast and adds moisture for tenderness.
1/4 cup unsalted butter (melted): Adds richness and helps create a tender crumb.
1 large egg: Acts as a binding agent, enriching the dough’s texture.
Filling
1/4 cup brown sugar (packed): Contributes deep sweetness and a hint of molasses flavor.
2 tablespoons cocoa powder: Infuses the filling with chocolatey richness.
1 teaspoon ground cinnamon: Adds warmth and spice to complement the chocolate.
1/4 cup chocolate chips (semi-sweet): Provides delightful bursts of chocolate throughout.
Icing
4 oz cream cheese (softened): Creates a creamy base that adds tanginess to the icing.
1/2 cup powdered sugar: Sweetens the icing while providing a smooth texture.
1 tablespoon espresso (strong brewed): Enhances the flavor profile with a rich coffee undertone.
- 1 teaspoon vanilla extract: Adds depth and aromatic sweetness to round out the icing.
You MUST Let the Dough Rise! Seriously, No Skipping!
I’ll be honest: I initially thought I could skip letting the dough rise for a quicker fix. I even tried cutting corners by rolling it out right away, but let’s just say my first batch was more “chocolate pancake” than fluffy cinnamon roll. 😅 Spoiler alert: there are no shortcuts here!
Allowing the dough to rise is crucial because it develops gluten structure while trapping air bubbles created by the yeast. Think of it like inflating a balloon; without that rise, your rolls will end up flat and dense instead of soft and pillowy. The yeast ferments during this time, creating flavor and ensuring that each bite is light and airy—essential for achieving the ultimate chocolate cinnamon roll experience!
What does letting the dough rise do?
- Fluffiness — The yeast produces carbon dioxide during fermentation, leading to those soft, airy textures we all love. Without this rise, your rolls will be disappointingly dense.
- Flavor Development — As the dough rises, flavors deepen and develop through fermentation. This results in a more complex taste that enhances the rich chocolate and cinnamon filling.
- Better Texture — A proper rise helps create a tender crumb in the rolls. This means you’ll enjoy each bite with a delightful chew rather than a gummy texture.
- Increased Volume — Allowing the dough to double in size ensures your rolls have that signature puffiness. They go from flat discs to glorious spirals!
- Moisture Retention — Well-risen dough retains moisture better during baking, resulting in gooey centers filled with melted chocolate chips instead of dry rolls.
Different rising times
- 30 minutes (fair) — A quick rise can lead to decent rolls, but they will lack fluffiness and have a denser texture.
- 1 hour (good) — This is the minimum recommended time; you’ll get rolls that are noticeably softer but still not at their best.
- 1.5 hours (better) — If you can wait a little longer, this timeframe allows for more flavor development and an even fluffier outcome.
- 2 hours or more (best) — Optimal for flavor and texture; your rolls will rise beautifully and have an irresistible taste that’s hard to beat.
Just remember: don’t rush this step! The most common mistake people make is being impatient with the rising time. Trust me when I say that skipping or shortening this crucial phase leads to sad, sad cinnamon rolls!
How to make Chocolate Cinnamon Roll with Espresso Cream Cheese Icing
Are you ready to see how straightforward it is to make the Chocolate Cinnamon Roll with Espresso Cream Cheese Icing of your dreams??
1. PREPARE THE DOUGH
Let’s start with a soft and fluffy dough that will be the base of our delicious rolls!
1. COMBINE – In a mixing bowl, combine 2 cups of all-purpose flour, 1 packet of instant yeast, 1/4 cup of granulated sugar, and 1/2 teaspoon of salt. This mixture is the foundation for your dough, providing both structure and flavor.
2. ADD LIQUIDS – Next, add 1/2 cup of warm milk (not hot!), 1/4 cup of melted unsalted butter, and 1 large egg. Mix until a dough begins to form; this will help activate the yeast!
3. KNEAD – Transfer the dough onto a floured surface and knead for about 5 minutes until it’s smooth and elastic. Kneading develops the gluten in the flour, which gives your rolls that delightful chewy texture.
4. RISING TIME – Place the dough in a greased bowl, cover it with a damp cloth or plastic wrap, and let it rise for about 1 hour or until it has doubled in size. This is where all the magic happens—watch your dough transform into something fluffy!
HANDY TIPS
- Make sure your milk is warm to touch, around 110°F (43°C). This temperature helps yeast become active without killing it!
- If your kitchen is cool, place the bowl in a slightly warmed oven (turned off) to help speed up rising.
2. MAKE THE FILLING
Now let’s create that luscious filling that brings chocolatey goodness!
5. MIX FILLING – In a small bowl, mix together 1/4 cup packed brown sugar, 2 tablespoons cocoa powder, and 1 teaspoon ground cinnamon. This combination will create a sweet, chocolaty filling with just the right amount of spice.
HANDY TIPS
- Feel free to adjust the cocoa powder according to your chocolate cravings! Want more chocolate? Add an extra tablespoon.
- For added texture, consider mixing in some chopped nuts or additional chocolate chips into your filling.
3. ASSEMBLE THE ROLLS
It’s time to bring everything together into beautiful rolls!
6. PREHEAT OVEN – Preheat your oven to 350°F (175°C). This ensures it’s hot enough to bake those rolls perfectly!
7. ROLL OUT DOUGH – On a floured surface, roll out the risen dough into a rectangle approximately 12×18 inches. The thickness should be about 1/4 inch—this allows for easy rolling and plenty of filling.
8. SPREAD FILLING – Evenly spread the filling mixture over the rolled-out dough and sprinkle with 1/4 cup of semi-sweet chocolate chips on top for an extra chocolatey kick.
9. ROLL AND CUT – Starting from one long edge, roll the dough tightly into a log shape and cut it into 8 equal pieces using a sharp knife or dental floss for clean cuts.
10. SECOND RISE – Place the rolls in a greased baking dish and let them rise again for another 30 minutes until puffy. This second rise ensures they are airy and soft after baking!
11. BAKE – Bake for about 25 minutes or until golden brown. You’ll know they’re done when they smell heavenly and are lightly browned on top!
HANDY TIPS
- If you want perfectly round rolls, use dental floss to cut them instead of a knife—it won’t squish them!
- Keep an eye on them towards the end; ovens can vary slightly in heat.
4. PREPARE THE ICING
A rich icing will take these rolls over-the-top delicious!
12. BEAT ICING – In a mixing bowl, beat together 4 oz softened cream cheese, 1/2 cup powdered sugar, 1 tablespoon strong-brewed espresso, and 1 teaspoon vanilla extract until smooth and creamy! The espresso adds depth to this sweet icing.
HANDY TIPS
- For an extra kick of coffee flavor, try adding another splash of espresso!
- If you prefer a thicker icing consistency, you can add more powdered sugar until you reach your desired thickness.
SERVE
13. DRIZZLE AND ENJOY – Drizzle that luscious icing over warm rolls right before serving! Each bite will be filled with gooey chocolate goodness accompanied by creamy espresso frosting—pure bliss!
Make these once, and I wager they will invade your dreams every night too! – Nagi x
FAQ – Chocolate Cinnamon Roll with Espresso Cream Cheese Icing

How long will these chocolate cinnamon rolls keep?
These delicious chocolate cinnamon rolls can be stored at room temperature for about 2 days, after which they start to lose their fluffiness. By day 3, they’re about 97% as good as when freshly baked, but you might find them a bit drier. To prolong their life, you can refrigerate them for up to a week or freeze them for up to 3 months. Just remember to wrap them tightly in plastic wrap or foil before freezing to prevent freezer burn!
❄️ Can I make these rolls ahead of time?
Absolutely! You can prepare the dough and let it rise, then shape the rolls and place them in your greased baking dish. Cover them with plastic wrap and refrigerate overnight. When you’re ready to bake, let them sit at room temperature for about 30-60 minutes to allow for a final rise before popping them in the oven. This method works like a charm without sacrificing texture!
🌾 Can these cinnamon rolls be made gluten-free?
Yes, you can make gluten-free chocolate cinnamon rolls! I recommend using a good quality gluten-free all-purpose flour blend that contains xanthan gum, which helps replicate the structure of traditional wheat flour. Keep in mind that the texture might not be as soft and fluffy as with regular flour, but they’ll still taste fantastic! I’ve tested it and was pleasantly surprised.
Can I substitute the cream cheese in the icing with something else?
If you want to switch out the cream cheese in the icing, you can use mascarpone or even Greek yogurt for a lighter option. However, note that this will change the flavor profile slightly. For a dairy-free alternative, try using cashew cream or coconut cream whipped until fluffy. Just remember that each substitute may alter the overall sweetness and texture of the icing!
Why do I need to let the dough rise?
Letting the dough rise is crucial because it allows yeast to produce carbon dioxide, which makes the dough airy and light. If you skip this step, your rolls will end up dense and chewy rather than soft and fluffy—definitely not what we want! Trust me; I’ve tested skipping this step multiple times (and regretted every single one). So give it that hour; your future self will thank you!
💡 Can I add more chocolate chips or other ingredients to the filling?
Definitely! Feel free to customize your filling by adding extra chocolate chips or even nuts like pecans or walnuts for added crunch. You could also mix in some dried fruit like raisins or cranberries if you fancy something sweet and tangy. Just don’t go overboard; too many add-ins can affect how well your rolls hold together when baking.
How do I know when my cinnamon rolls are done baking?
Your chocolate cinnamon rolls are perfectly baked when they turn golden brown on top—typically around 25 minutes at 350°F (175°C). You can also gently poke one; if it springs back slightly without leaving an indentation, they’re ready! If you’re unsure, an instant-read thermometer should read about 190°F (88°C) in the center of a roll. Happy baking!
Troubleshooting
I will continue to add more to this Troubleshooting section as I start seeing questions coming through from people who have made the recipe.
Troubleshooting tips
“My rolls came out too flat! 😩”
- Your dough didn’t rise enough during the first proofing. This can happen if the warm milk was not warm enough (ideally around 110°F/43°C) to activate the yeast properly.
- You might have also used expired yeast, which wouldn’t provide the lift you’re looking for. Always check that your yeast is fresh!
- No worries though, even flat rolls can be delicious in their own right!
“The texture of my rolls was way too dense! 😟”
- If your dough was kneaded for less than 5 minutes, it may not have developed enough gluten, leading to a denser texture. Make sure to knead until smooth and elastic!
- Additionally, adding too much flour while rolling out can make them heavy. Dust lightly and only as needed.
- I bet they were still YUM though!
“My rolls are a bit dry and crumbly! 😢”
- Overbaking is often the culprit here; make sure to keep an eye on them in the oven, especially as they near the 25-minute mark.
- If your milk wasn’t warm enough when added, it could lead to dryness due to improper hydration of the dough.
- But hey, dry or not, you still made chocolate cinnamon rolls—so that’s a win!
“The tops of my rolls look burnt while the insides are undercooked! 🔥”
- Your oven temperature might be too high. Ovens can vary quite a bit; consider investing in an oven thermometer to ensure accuracy at 350°F (175°C).
- If you find that they brown too quickly, try covering them loosely with foil halfway through baking.
- Even if they’re a bit charred, I’m sure they still tasted amazing!
“My filling leaked out while baking! 😱”
- Rolling your dough too loosely can cause gaps, allowing filling to escape during baking. Make sure to roll it tightly into a log.
- Also, using too much filling or not sealing the edges well can lead to leakage. Just a light sprinkle of chocolate chips should do!
- I’m sure those gooey bits were still totally delicious—just like a sweet surprise!