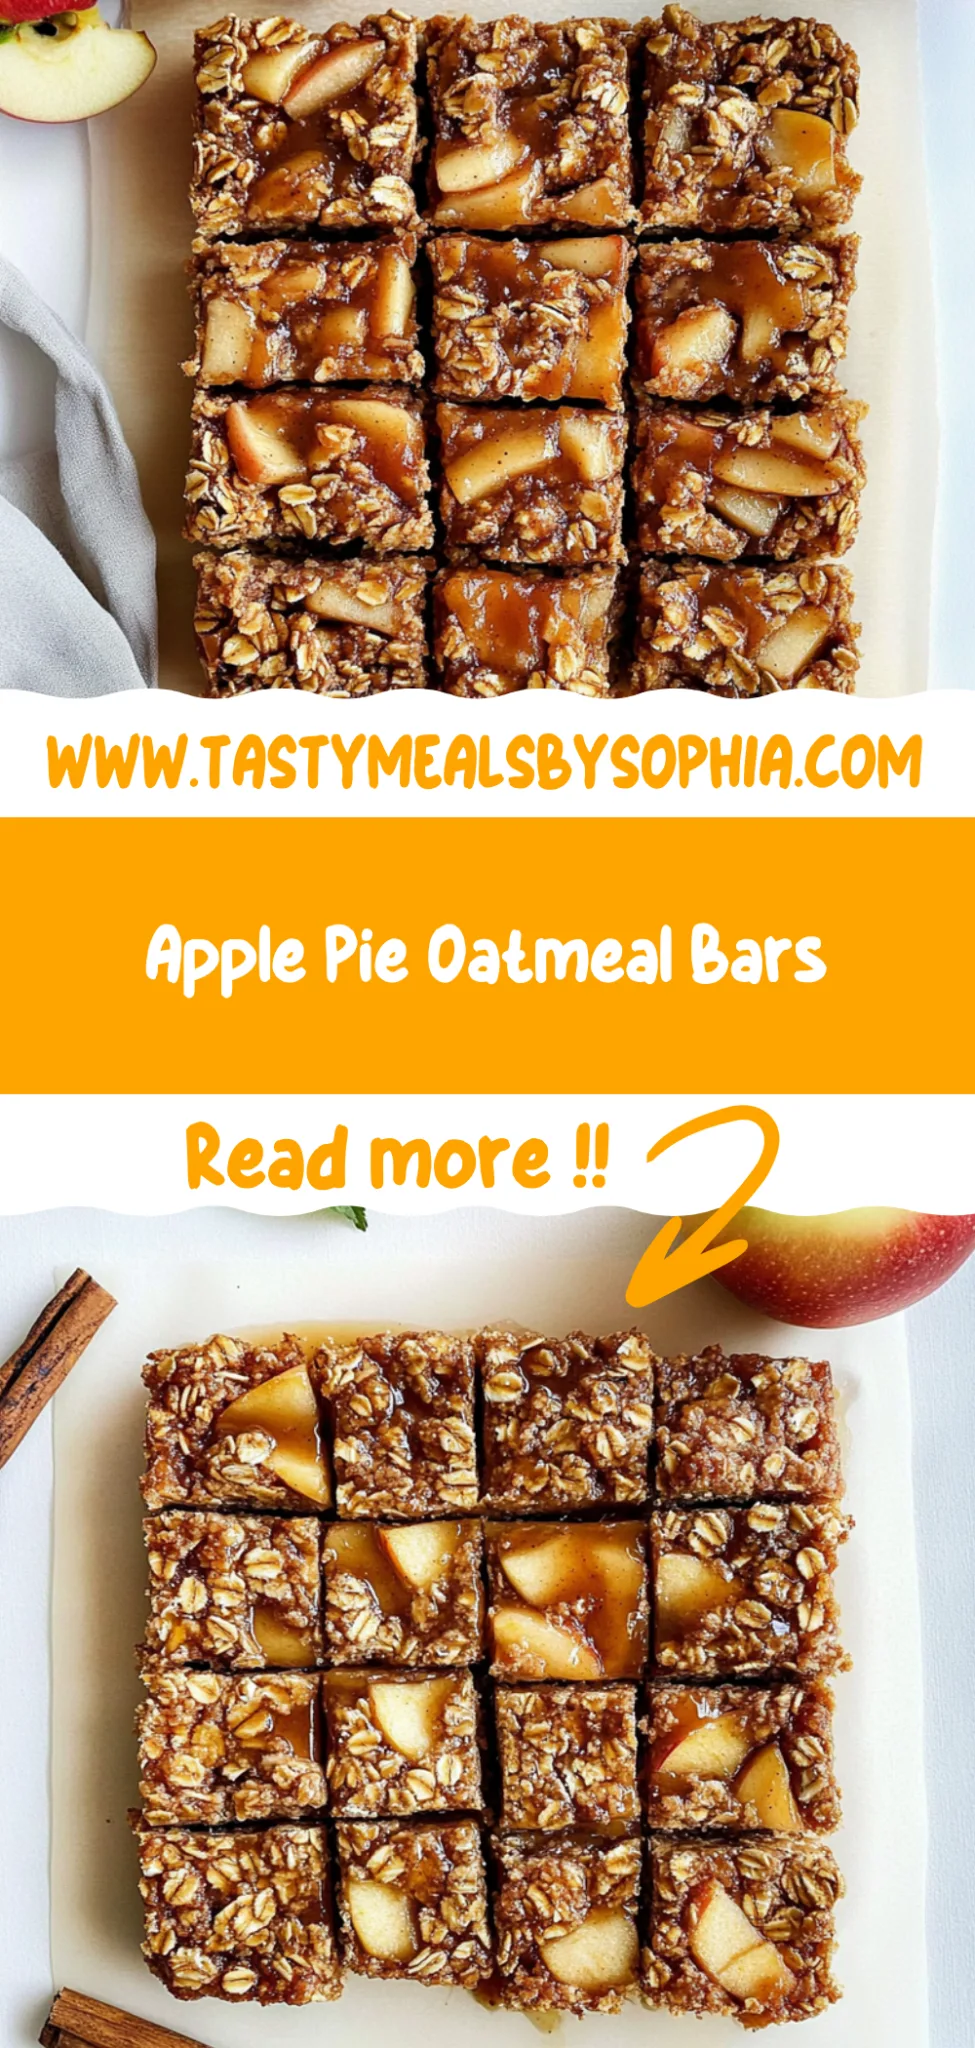
Apple Pie Oatmeal Bars: Gooey and Irresistible Treats
I first stumbled upon the idea for these Apple Pie Oatmeal Bars during a particularly intense craving for something sweet yet wholesome. I was at a cozy little café that had an irresistible array of baked goods, and their apple pie oatmeal bars caught my eye. They were warm, gooey, and bursting with flavors that reminded me of my grandma’s famous apple pie. I couldn’t shake the thought of them after leaving, so I decided to recreate that magic at home—after all, who wouldn’t want a delicious treat that’s also healthy and budget-friendly?
Let me tell you, perfecting this recipe was no walk in the park! I lost count after about six attempts, each batch varying wildly from too dry to resembling an oatmeal soup. My goal was to strike that perfect balance between chewy and crumbly while infusing every bite with the warm spices of cinnamon and the sweet tartness of apples. There were moments I seriously considered giving up (especially when my kitchen looked like a flour bomb exploded), but I was determined to nail that comforting flavor profile without compromising on health.
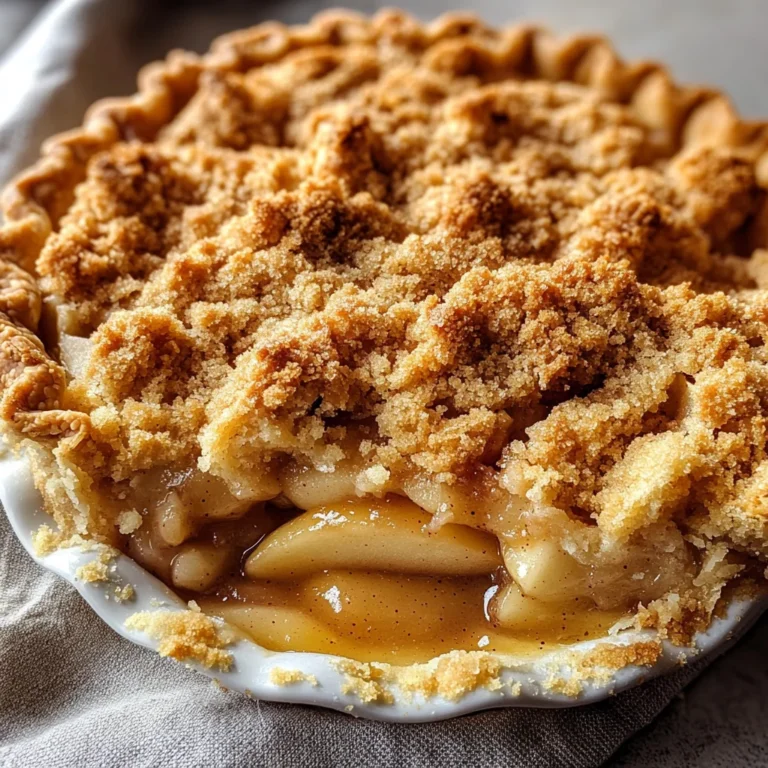
In the end, all those trials were totally worth it! The finished Apple Pie Oatmeal Bars turned out to be everything I dreamed of—golden-brown perfection with a chewy texture that gives way to juicy apple chunks in every bite. They’re not just tasty; they’re a convenient grab-and-go breakfast or snack that’s both nutritious and satisfying. Trust me, you’re going to want to whip up a batch (or two) of these delightful bars—I can practically guarantee they’ll become your new favorite treat!
These Apple Pie Oatmeal Bars are….
…a wholesome treat that combines the warmth of homemade apple pie with the goodness of oatmeal!
1. They offer a delightfully warm and spiced flavor that will transport you to a cozy kitchen filled with the aroma of cinnamon and baked apples. The unsweetened applesauce enhances the natural sweetness of the diced apples, allowing their fruity essence to shine through—perfect for those who appreciate a pure apple flavor without overwhelming sweetness.
2. Incredibly satisfying texture – with a chewy base and tender filling. The rolled oats create a hearty foundation that holds everything together beautifully, while the diced apples add an enjoyable burst of softness that contrasts with the chewy oats, making each bite a delightful experience.
3. Clever technique – using coconut oil in the base not only imparts a subtle coconut flavor but also contributes to that perfect chewy texture we crave in oatmeal bars. I discovered that melting it allows for even distribution throughout the mixture, ensuring every bite is consistently delicious.
4. Affordable and accessible – these bars are made from pantry staples like oats and apples, making them easy to whip up anytime without breaking the bank. With just 10 simple ingredients, you can enjoy homemade Apple Pie Oatmeal Bars that are both nutritious and budget-friendly compared to store-bought options.
PS These bars yield about 12 generous servings, making them perfect for meal prep or sharing at breakfast gatherings!
Ingredients for the Apple Pie Oatmeal Bars
Each ingredient in this dish plays an essential role in flavor and texture. Here’s what you’ll need:
Base
2 cups rolled oats (old-fashioned): Provide a hearty base with great texture and chew.
1 cup applesauce (unsweetened): Adds moisture and natural sweetness, enhancing the apple flavor.
1/4 cup honey (or maple syrup): Sweetens the bars while balancing the tartness of the apples.
1/4 cup coconut oil (melted): Contributes creaminess and helps bind the ingredients together.
1 teaspoon vanilla extract: Infuses a warm, aromatic essence that elevates the overall flavor.
1 teaspoon baking powder: Ensures the bars rise slightly for a light and fluffy texture.
1/2 teaspoon cinnamon: Offers a warm spice that complements the apple filling beautifully.
1/4 teaspoon salt: Enhances all flavors and balances the sweetness of the other ingredients.
Filling
2 cups apples (peeled and diced): Provides fresh bursts of flavor and a delightful, juicy texture.
1 teaspoon cinnamon: Amplifies the comforting warmth that pairs perfectly with apples.
1 tablespoon lemon juice: Brightens the filling, adding zing to counteract sweetness.
1/4 cup brown sugar (packed): Introduces rich caramel notes that deepen the overall flavor profile.
Let the Apples Marinate: It’s a Game Changer!
I know, I know — letting those apples sit with cinnamon and brown sugar might feel like a step you can skip. I tried to rush through this once, thinking, “What’s the worst that could happen?” Spoiler alert: it was a disaster. The flavor was flat, and my apple pie oatmeal bars were less than impressive. So trust me on this one; it’s worth the extra few minutes.
Why is this marinating step so crucial? Think of it like letting a good sauce simmer; it allows the flavors to deepen and meld together beautifully. When you toss your diced apples with cinnamon, lemon juice, and brown sugar, the juices from the apples combine with the sugar and spice, creating a flavor-packed filling that elevates your oatmeal bars from ordinary to extraordinary. This is what brings that delightful, warm apple pie taste right into your breakfast!
What does letting the apples marinate do?
- Flavor — The apple filling develops a richer taste as the sugars draw out juices from the apples, enhancing their sweetness.
- Moisture — The ingredients create a syrupy mixture that keeps each bite juicy rather than dry or grainy.
- Balance — The acidity from lemon juice cuts through the sweetness, giving your bars a more rounded flavor profile.
- Texture — Marinating softens the apples slightly, ensuring they blend seamlessly into the bars instead of being crunchy chunks.
- Color — The combination of spices and sugars gives the apples a beautiful caramelized hue that enhances visual appeal.
Different marinating times
- 5 minutes (good) — Just enough time for some flavors to start mingling; still quite fresh and bright in taste.
- 10 to 15 minutes (better) — A noticeable improvement in flavor depth; apples begin to soften ever so slightly.
- 20 to 30 minutes (great) — Flavors are well integrated, resulting in a deliciously sweet and spiced filling.
- ⭐️ 1 hour ⭐️ — Peak deliciousness! The filling becomes syrupy and deeply flavorful, perfect for those oatmeal bars.
Don’t be tempted to skip or rush this marinating step! The most common mistake is thinking you can just mix and go — trust me, your taste buds will thank you if you let those flavors develop.
How to make Apple Pie Oatmeal Bars
Are you ready to see how straightforward it is to make the Apple Pie Oatmeal Bars of your dreams??
1. PREPARE THE FILLING
Start by infusing those apples with flavor, creating a delightful filling that will shine in your oatmeal bars!
1. COMBINE – In a mixing bowl, combine the diced apples, cinnamon, lemon juice, and brown sugar. Toss until the apples are well coated. This step is crucial as the lemon juice helps prevent browning while adding brightness to the sweetness of the apples!
2. SET ASIDE – Set aside to let the flavors meld while preparing the base. Allowing them to sit enhances their natural sweetness and flavor complexity.
HANDY TIPS
- Use firm apples like Granny Smith or Honeycrisp for a great texture.
- Feel free to adjust the cinnamon based on your taste preference; more means more warmth!
2. MAKE THE BASE
Let’s get rolling on that delicious oat base that holds everything together!
3. PREHEAT – Preheat the oven to 350°F (175°C). This ensures even baking and gives you that lovely golden top!
4. MIX – In another mixing bowl, combine the rolled oats, applesauce, honey (or maple syrup), melted coconut oil, vanilla extract, baking powder, cinnamon, and salt. Mix until well combined. The mixture should be slightly sticky but hold together well when pressed—this is what gives your bars that hearty texture!
HANDY TIPS
- If you’re using maple syrup, it adds a lovely depth of flavor—perfect for these bars!
- You can substitute coconut oil with unsalted butter if you prefer a different flavor profile.
3. ASSEMBLE THE BARS
Time to build those layers of goodness!
5. GREASE – Grease an 8×8 inch baking dish and press half of the oatmeal mixture into the bottom of the dish to form a base layer. Make sure it’s compact; this will help keep your bars from crumbling!
6. SPREAD – Spread the apple filling evenly over the base layer. Ensure every bite gets that delicious apple goodness!
7. TOP – Top with the remaining oatmeal mixture, spreading it evenly over the apples. This creates a nice topping that will crisp up beautifully during baking.
HANDY TIPS
- For an extra crunch on top, sprinkle some rolled oats or chopped nuts before baking!
- If you like a sweeter bar, feel free to add a bit more honey or maple syrup on top before baking.
4. BAKE
The final step—time to bake these beauties into perfection!
8. BAKE – Bake in the preheated oven for 25-30 minutes, or until the top is golden brown and fragrant. Keep an eye on them towards the end; you want that perfect golden hue!
9. COOL – Allow to cool in the baking dish for 10 minutes before slicing into bars. This cooling time is essential as it helps them firm up so they cut nicely.
HANDY TIPS
- Make sure to use a sharp knife for cutting once cooled; this helps maintain clean edges!
- These bars can be stored in an airtight container for up to a week—perfect for meal prep!
Make these once, and I wager they will invade your dreams every night too! – Nagi x
FAQ – Apple Pie Oatmeal Bars
How long will these oatmeal bars keep?
These Apple Pie Oatmeal Bars can be stored at room temperature in an airtight container for about 3-4 days. After that, their quality starts to decline, with them being approximately 90% as good on day 5 and around 80% by day 7. If you want to extend their shelf life, consider refrigerating them, where they’ll stay fresh for up to a week! Just remember to bring them back to room temperature or warm them slightly before enjoying.
❄️ Can I freeze these oatmeal bars?
Yes, you can absolutely freeze these Apple Pie Oatmeal Bars! To do so, let the bars cool completely after baking. Then, slice them into individual portions and wrap each piece tightly in plastic wrap. Place the wrapped bars in a freezer-safe bag or container and they’ll keep well for up to 3 months. When you’re ready to enjoy, simply thaw them in the fridge overnight or pop one in the microwave for a quick warm-up!
🌾 Are these bars gluten-free?
To make these Apple Pie Oatmeal Bars gluten-free, simply use certified gluten-free rolled oats. This is crucial because regular oats can often be processed in facilities that handle gluten-containing grains, leading to cross-contamination. By selecting gluten-free oats, you can enjoy these delicious bars without any worry!
Can I reduce the sugar or substitute it with sweeteners?
No, you cannot reduce the sugar without affecting the texture and taste of the bars—trust me, I tried! The honey (or maple syrup) not only adds sweetness but also helps bind the ingredients together. If you’re looking for a lower-sugar option, I recommend using ripe bananas as a natural sweetener instead of honey; however, this will alter the flavor slightly and may affect the moisture level.
Why do I need to set aside the apple filling before assembling?
Setting aside the apple filling allows the flavors of cinnamon and lemon juice to meld beautifully with the apples. This step enhances the overall taste of your bars. Plus, letting it sit helps release some moisture from the apples which can prevent your bars from becoming too soggy during baking—nobody wants a watery dessert!
💡 Can I add other fruits or nuts into this recipe?
Absolutely! You can customize these oatmeal bars by adding nuts like chopped walnuts or pecans for extra crunch or mix in dried fruits like raisins or cranberries for added sweetness. Just remember that adding additional ingredients might require slight adjustments in baking time—keep an eye on those golden edges! 🍏🍎
Did you really test this recipe multiple times?
Yes, I tested these Apple Pie Oatmeal Bars countless times (I lost count after ten 😅). Each iteration helped me perfect the balance of flavors and textures. Cooking is all about experimenting until you find that perfect combination—and trust me when I say that this recipe is a crowd-pleaser every time!
Troubleshooting
I will continue to add more to this Troubleshooting section as I start seeing questions coming through from people who have made the recipe.
Troubleshooting tips
“My bars turned out too thin! 😩”
- You may not have pressed the oatmeal mixture firmly enough into the baking dish. If the base is too loose, it won’t hold its shape during baking. Make sure to really pack it down!
- Another possibility is that you didn’t use an 8×8 inch baking dish, which can affect how thick your bars turn out. Double-check your dish size for next time!
- I bet they were still YUM though!
“My oatmeal bars are way too dry! 😶”
- If you used too much rolled oats or not enough applesauce, the mixture can dry out during baking. Be sure to measure accurately and keep that applesauce in mind as a moisture contributor!
- Overbaking can also lead to dryness; if your oven runs hot, try checking for doneness a few minutes early.
- I bet they were still YUM though!
“The top of my bars is way too dark! 😱”
- If you baked them longer than recommended, they could easily become overly browned. Ovens vary, so keeping an eye on them during the last few minutes is key.
- Using a darker baking dish can also cause the bottom and top to brown faster, so consider using a light-colored one next time!
- I bet they were still YUM though!
“My apple filling was mushy and watery! 🍏”
- This could happen if your apples were too ripe or if they released too much moisture while sitting with the sugar and lemon juice. Try using firmer varieties of apples next time for better texture!
- Not straining excess liquid from the apple mixture before adding it to the bars can also contribute to this problem. A quick strain can help keep things just right!
- I bet they were still YUM though!