The Best Soft Chocolate Chip Cookies: Melt-in-Your-Mouth …
I’ve always had a soft spot for chocolate chip cookies, especially those warm, gooey ones that seem to melt in your mouth. The inspiration for my version of The Best Soft Chocolate Chip Cookies came during a late-night binge at a beloved local bakery where I’d indulge in their freshly baked cookies. They were so good that I found myself thinking about them for days, and eventually, I decided it was time to create my own version at home—one that would be just as delicious but without the hefty price tag and the late-night drive!
After countless attempts (I lost count somewhere around 15), I finally nailed down the perfect recipe. Let’s just say there were some epic fails along the way—like the batch that turned into pancake-like disasters or the time I accidentally mistook baking soda for baking powder. Each iteration was an adventure in cookie science, with me tinkering with ratios and baking times to achieve that elusive balance of softness and chewiness that I craved. Honestly, if my kitchen could talk, it would either laugh or weep at my obsession!
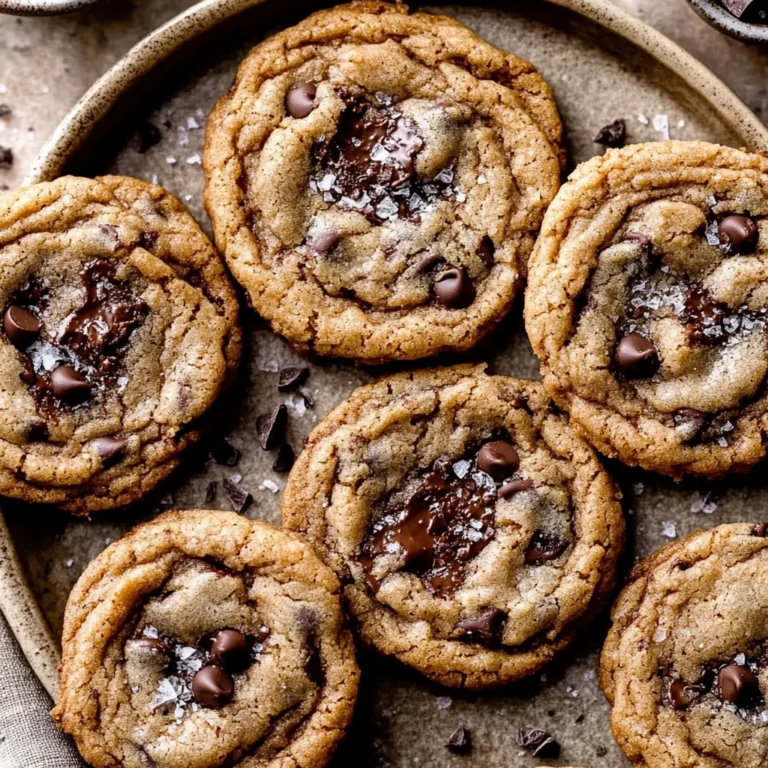
But let me tell you, all those trials were absolutely worth it! The final result? Decadently soft and chewy chocolate chip cookies that are perfect for any occasion—they practically beg to be devoured! With an irresistible buttery flavor, a texture so melt-in-your-mouth you’ll want to hug each cookie, and a delightful crisp edge that gives way to gooey chocolate chunks, these cookies are nothing short of magical. I can’t wait for you to try them; trust me, once you bite into one of these beauties, you’ll be hooked!
These The Best Soft Chocolate Chip Cookies are….
….the ultimate indulgence for chocolate chip cookie lovers everywhere!
1. They deliver a deep, rich flavor that’s truly irresistible, thanks to the perfect blend of brown and granulated sugar. The brown sugar not only adds moisture but also brings out subtle caramel notes that elevate each bite, making these cookies a standout treat.
2. Enjoy a perfectly soft and chewy texture that you can’t resist! The combination of all-purpose flour and the right ratio of wet ingredients ensures that these cookies stay tender in the middle while achieving a slight crispness on the edges — exactly how I like my cookies!
3. A key technique in this recipe is chilling the dough before baking. This step prevents spreading, allowing the cookies to maintain their thick shape and resulting in a delightful contrast between the soft interior and slightly crisp exterior.
4. They offer incredible value compared to store-bought alternatives. With simple pantry staples, you can whip up a batch of The Best Soft Chocolate Chip Cookies at home, ensuring freshness and flavor without breaking the bank or sacrificing quality.
PS These cookies yield about 24 generous servings, making them perfect for sharing or indulging throughout the week!
Ingredients for the The Best Soft Chocolate Chip Cookies
Each ingredient in this dish plays an essential role in flavor and texture. Here’s what you’ll need:
2 cups all-purpose flour: Provides the structure and chewy texture of the cookies.
1 teaspoon baking soda: Acts as a leavening agent to help the cookies rise.
1 teaspoon salt: Enhances the sweetness and balances flavors.
1 cup unsalted butter (softened): Contributes richness and moisture for a soft bite.
3/4 cup brown sugar (packed): Adds depth of flavor with its caramel notes and moisture.
3/4 cup granulated sugar: Sweetens the cookies while helping to create a crisp edge.
1 tablespoon vanilla extract: Infuses a warm, aromatic flavor that complements the chocolate.
2 large eggs: Binds ingredients together and adds moisture for a tender crumb.
- 2 cups semi-sweet chocolate chips: Provides bursts of rich chocolate flavor in every bite.
You Must Chill the Dough. No Exceptions!
I know, I know. Chilling the dough feels like a cruel twist after all the mixing and creaming you just did. I tried skipping this step—just to see if I could get away with it—and let’s just say my cookies turned into glorified hockey pucks. Trust me, you don’t want to go there!
So why is chilling the dough essential? Think of it as giving your cookie dough a little spa day. When you chill the dough, the butter firms up, which prevents it from spreading too much in the oven. This means that your cookies will hold their shape better, resulting in softer centers and perfectly chewy edges that would make any cookie lover swoon.
What does chilling the dough do?
- Improves texture — Chilled dough results in thicker cookies that stay soft and chewy inside rather than spreading out into flat discs.
- Enhances flavor — Chilling allows time for the flavors to meld together; since we’re working with brown sugar and vanilla, this step makes them sing!
- Creates more color — The longer chilling time contributes to a deeper golden color as they bake, making those chocolate chips pop.
- Aids in moisture retention — Resting gives flour more time to absorb moisture from the wet ingredients, leading to a more tender crumb.
- Increases shelf life — Cookies made from chilled dough tend to stay fresh longer because they are less prone to drying out quickly.
Different chilling times
- 30 minutes (good) — This is the bare minimum for some improvement; cookies are softer but still spread more than ideal.
- 1 hour (better) — Noticeable difference! The texture is improved, but flavor hasn’t fully developed yet.
- ⭐️ 12 hours⭐️ — Optimal! The base recipe achieves peak chewiness and flavor. Cookie bliss awaits!
- 24 hours (excellent) — Even deeper flavors develop, with a slightly more robust texture; pure cookie nirvana.
- Beyond 48 hours (diminishing returns) — While flavors deepen further, there’s a higher risk of the dough drying out if not stored properly.
Now, here’s your warning: Don’t skip the chilling step thinking “I can just bake them now!” This is the most common mistake people make when trying to rush their baking. Trust me—your future self will thank you for waiting!
How to make The Best Soft Chocolate Chip Cookies

Are you ready to see how straightforward it is to make the The Best Soft Chocolate Chip Cookies of your dreams??
1. PREPARE THE DOUGH
Let’s get that cookie dough ready for baking magic!
1. Preheat – Preheat your oven to 350°F (175°C). This ensures that your cookies will bake evenly and come out perfectly soft and chewy.
2. Whisk – In a mixing bowl, whisk together the 2 cups of all-purpose flour, 1 teaspoon of baking soda, and 1 teaspoon of salt. This helps to aerate the flour and distribute the baking soda and salt evenly throughout your dough.
3. Cream – In another bowl, cream together the softened 1 cup of unsalted butter with 3/4 cup of brown sugar and 3/4 cup of granulated sugar until smooth. You want this mixture to be light and fluffy, which creates a lovely texture in your cookies.
4. Beat – Beat in the 2 large eggs one at a time, then stir in the 1 tablespoon of vanilla extract. This step adds richness and flavor—don’t skip the vanilla!
5. Blend – Gradually blend the dry ingredients into the wet mixture. Mix just until combined; overmixing can lead to tougher cookies.
6. Fold – Fold in the 2 cups of semi-sweet chocolate chips gently, ensuring they are evenly distributed throughout the dough for that delightful chocolatey goodness in every bite.
HANDY TIPS
- Make it ahead: You can prepare the dough ahead of time, refrigerate it for up to 3 days, and bake fresh cookies whenever you want!
- For extra chewiness: Consider chilling your dough for about 30 minutes before baking.
- Experiment with flavors: Add nuts or use different types of chocolate chips for a fun twist!
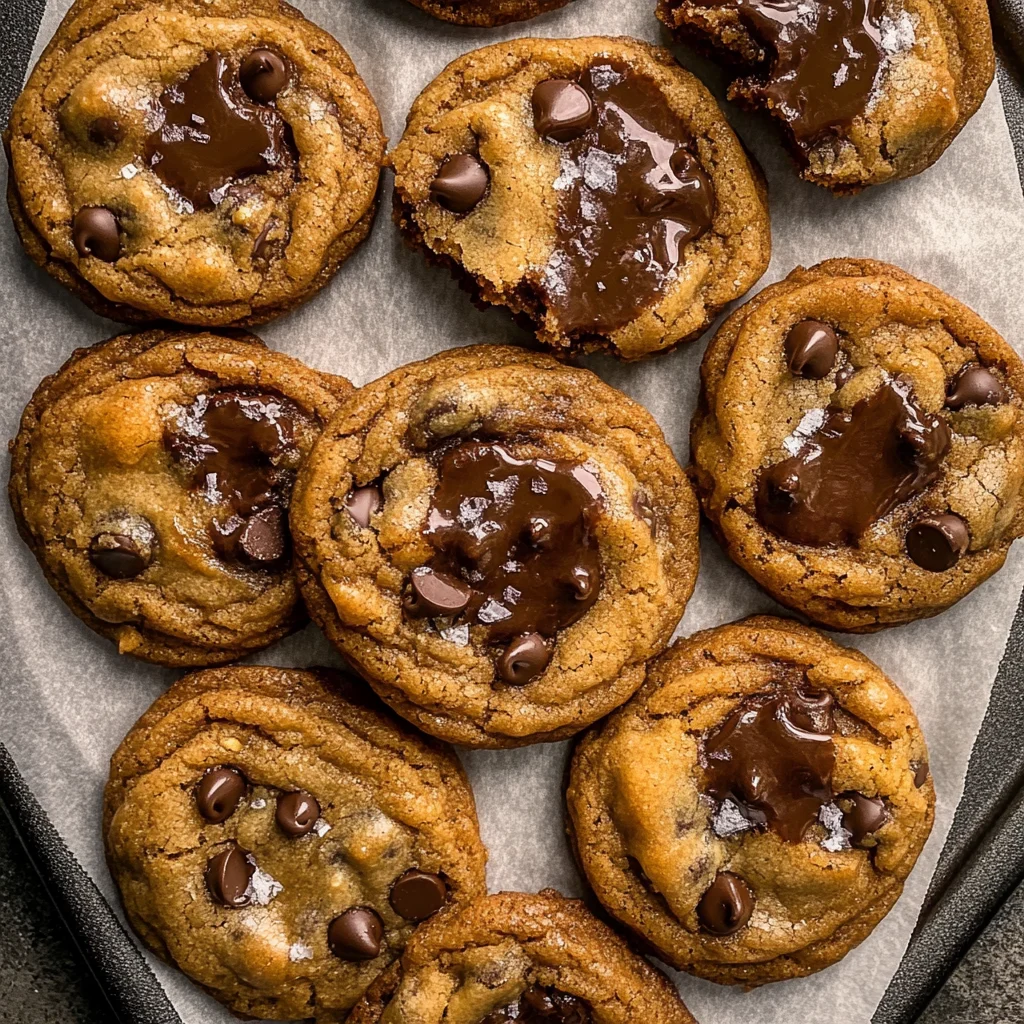
2. BAKE THE COOKIES
Now we’re ready to bake these beauties!
7. Drop – Drop rounded tablespoons of dough onto ungreased baking sheets, spacing them about 2 inches apart. This allows room for spreading during baking—if they are too close together, they will merge into one giant cookie!
8. Bake – Bake for 9 to 11 minutes in the preheated oven or until the edges are golden brown but the centers are still soft-looking. Remember, they will continue cooking as they cool!
9. Cool – Let the cookies cool on the baking sheet for a few minutes before transferring them to wire racks to cool completely. ⚠️ Cooling is crucial—if you move them too soon, they’ll fall apart!
HANDY TIPS
- Smaller cookies? They work really well! Roll them into balls instead of discs and bake for about 12 to 14 minutes.
- Log form — very handy! Roll into a big log, refrigerate for about 12 hours, then cut into thick slices for perfectly shaped cookies every time!
Make these once, and I wager they will invade your dreams every night too! – Nagi x
FAQ – The Best Soft Chocolate Chip Cookies
How long will these cookies keep?
These cookies can stay fresh for about 5 days at room temperature in an airtight container. After day 3, I’ve noticed they are still around 97% as good but start to lose some of that delightful softness. If you want them to last even longer, you can refrigerate them for up to a week, but be prepared for a slight change in texture—less soft and more chewy!
❄️ Do I really have to chill the dough? YES YOU DO.
Chilling the dough is essential for achieving that perfect soft and chewy texture. If you’re wondering why, it’s because chilling allows the cookie fat to solidify, which helps prevent spreading during baking. I recommend chilling the dough for at least 30 minutes. If you can manage it, letting it rest overnight enhances the flavor even more! Don’t skip this step unless you want flat cookies.
🥶 Can I freeze the cookie dough?
Absolutely! Freezing the dough is a great option if you want freshly baked cookies on demand. To freeze, scoop rounded tablespoons of dough onto a baking sheet lined with parchment paper and freeze until firm. Then transfer the frozen dough balls into a zip-lock bag and store them in the freezer for up to 3 months. When ready to bake, just add an extra minute or two to the baking time while they are still frozen!
🌾 Can these be made gluten-free?
Yes, you can! To make gluten-free cookies, simply substitute all-purpose flour with a 1: 1 gluten-free flour blend. I recommend using one that contains xanthan gum (or adding it separately) to mimic the structure that gluten provides. In my tests, this swap worked wonderfully without compromising on texture or taste!
Can I reduce the sugar or substitute with sweeteners?
No, you cannot reduce the sugar—believe me, I tried! Lowering the sugar content results in a cookie that doesn’t hold its shape and lacks that signature chewiness. However, if you’re looking for alternatives, you could use coconut sugar or a sugar replacement like erythritol; just note that sweetness levels might differ slightly.
Why do we cream the butter and sugars together?
Creaming butter and sugars together is a critical step because it incorporates air into your mixture, creating a lighter texture in your finished cookies. This process also helps dissolve the sugars better than when mixed directly with dry ingredients. Trust me; it’s worth taking those extra few minutes—your cookies will thank you for it!
💡 Can I add nuts or other mix-ins?
Definitely! While this recipe focuses on semi-sweet chocolate chips, feel free to customize your cookies by adding chopped nuts like walnuts or pecans (about 1 cup should do). You can also throw in different types of chocolate—dark chocolate or white chocolate chips work beautifully too! Experimentation is half the fun; just remember not to overload your dough too much!
Troubleshooting
I will continue to add more to this Troubleshooting section as I start seeing questions coming through from people who have made the recipe.
Troubleshooting tips
“My cookies were not as thick as yours! 😩”
- Your butter might have been too warm when you creamed it with the sugars. If the butter is too soft, it can cause your cookies to spread out more than desired.
- You may have overmixed your dough after adding the flour, which can lead to a thinner texture. Mixing just until combined is key!
- If you didn’t chill your dough before baking, that could also be a factor. Chilling helps firm up the butter and keeps cookies from spreading.
I bet they were still YUM though!
“My cookies came out wonky! 🤷♀️”
- If you didn’t drop rounded tablespoons of dough, your cookies could end up unevenly shaped. Using a cookie scoop ensures uniform size and shape.
- You might have underbaked them slightly, leading to a soft structure that flattens as they cool. Make sure to check for golden edges!
- Not using parchment paper or greasing your baking sheet can result in sticking and wonky shapes. A good non-stick surface helps maintain form.
I bet they were still YUM though!
“The surface of my cookies split and had massive crevices 😭”
- Overmixing your dough after adding the dry ingredients can lead to gluten formation, causing cracks on the surface. Mix gently!
- If you used too much baking soda, it can create excess leavening, resulting in cracks as they bake. Measure carefully for best results!
- Baking at too high a temperature can also cause rapid rising and cracking. Make sure your oven is properly calibrated to 350°F (175°C).
I bet they were still YUM though!
“My cookies came out tough and dry! 😩”
- Too much flour can make your cookies dense and dry. Always spoon and level flour when measuring instead of scooping directly from the bag.
- If you baked them for too long, even by a minute or two, it can lead to dryness. Keep an eye on those golden edges!
- Not using enough butter or sugar will definitely affect moisture levels in your cookies. They rely on these for that soft, chewy texture.
I bet they were still YUM though!
The Best Soft Chocolate Chip Cookies
Ingredients
Method
- Preheat the oven to 350°F (175°C).
- In a mixing bowl, whisk together the flour, baking soda, and salt.
- In another bowl, cream together the softened butter, brown sugar, and granulated sugar until smooth.
- Beat in the eggs one at a time, then stir in the vanilla.
- Gradually blend the dry ingredients into the wet mixture.
- Fold in the chocolate chips.
- Drop rounded tablespoons of dough onto ungreased baking sheets.
- Bake for 9 to 11 minutes in the preheated oven, or until the edges are golden brown.
- Let the cookies cool on the baking sheet for a few minutes before transferring to wire racks to cool completely.