Strawberry Cookies: Chewy and Deliciously Sweet Treats
I first stumbled upon the idea of Strawberry Cookies during a visit to a quaint little café that had just opened up in my neighborhood. They served these delightful cookies that were so soft and chewy, infused with real strawberries, and I was immediately hooked. The combination of sweet fruit and cookie goodness was something I’d never thought to put together before, but it was love at first bite! I decided to recreate them at home because, let’s be honest, who doesn’t want a stash of homemade cookies without the café price tag? Plus, I figured if I could nail it, I’d have an endless supply for my late-night cravings.
Let me tell you, perfecting my version of Strawberry Cookies was no walk in the park. It took me five attempts (yes, five!) to get them just right—each one more hilariously disastrous than the last. From cookies that spread out like pancakes to batches that tasted like cardboard, I really put my baking skills to the test. With each iteration, I focused on achieving that perfect balance between softness and chewiness while making sure the strawberry flavor truly shined through. Spoiler alert: there were some epic kitchen failures along the way!
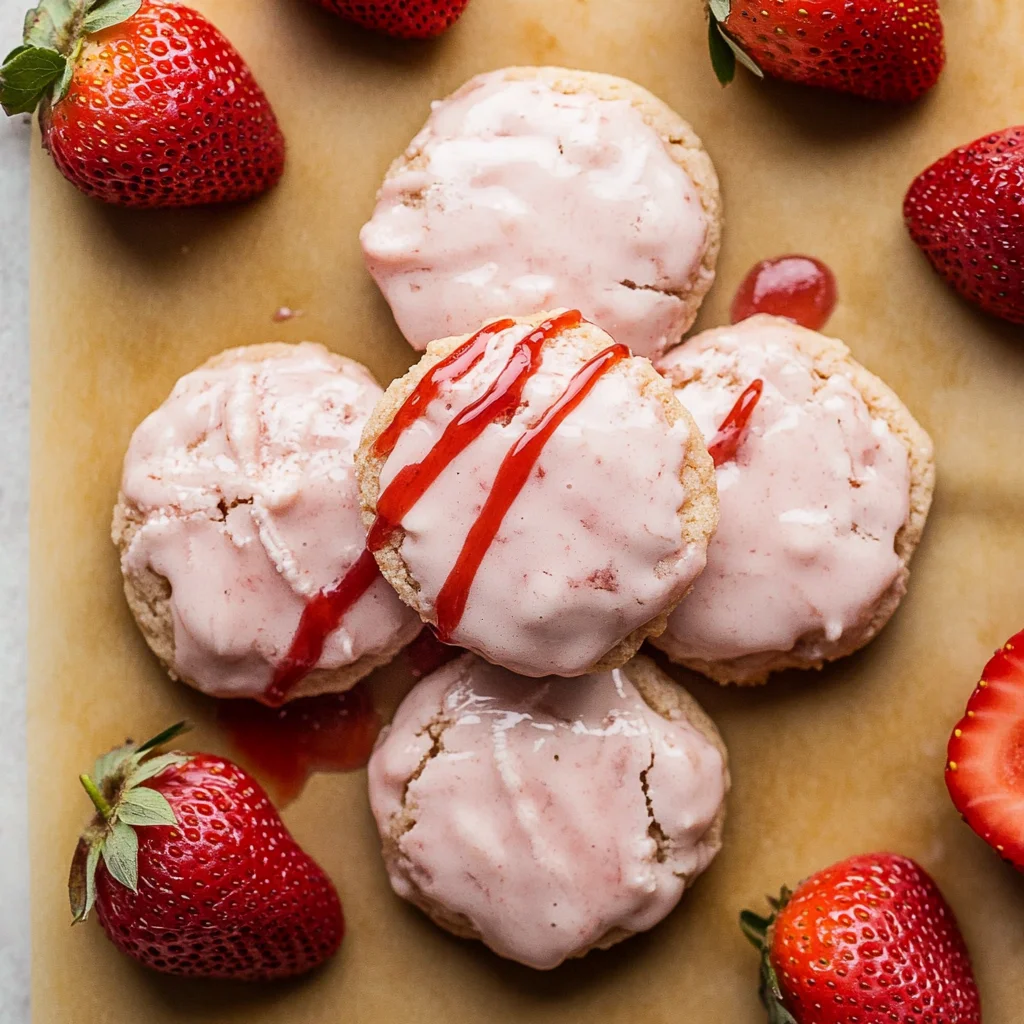
But oh boy, was it worth it! The final result is a batch of Strawberry Cookies that are unbelievably soft and chewy, bursting with fresh strawberry flavor in every bite. They have this delightful texture that’s slightly crisp on the outside yet pillowy inside, and the strawberry bits add a juicy sweetness that’s simply irresistible. Trust me when I say you’ll want to make these again and again—I can’t wait for you to try them!
These Strawberry Cookies are….
….the ultimate treat for strawberry lovers, combining freshness and sweetness in every bite!
1. They deliver a burst of strawberry flavor that is unparalleled, thanks to the generous addition of fresh strawberries. This not only enhances the sweetness but also infuses the cookies with a delightful aroma, making your kitchen smell like a summer garden.
2. Incredible texture — soft and chewy with just the right amount of crispness on the edges. The combination of all-purpose flour and the precise balance of baking powder and baking soda creates a cookie that has both structure and tender insides, ensuring each bite is a perfect experience.
3. A key technique is using softened unsalted butter, which allows for better incorporation of air during mixing. This step is crucial as it contributes to the cookies’ lightness while still maintaining that desirable chewy texture, elevating them above ordinary cookie recipes.
4. Great value — these Strawberry Cookies are not only easy to make at home but also cost-effective compared to gourmet bakery options. With simple ingredients like flour and sugar, you can whip up a batch that feels special without breaking the bank.
PS These cookies yield about 24 medium-sized treats, making them perfect for sharing or indulging all week long!
Ingredients You’ll Need
Each ingredient in this dish plays an essential role in flavor and texture. Here’s what you’ll need:
2 cups all-purpose flour: Provides the structure and base for a chewy cookie.
1 teaspoon baking powder: Helps the cookies rise for a light, soft texture.
1/2 teaspoon baking soda: Adds leavening to create a tender crumb.
1/4 teaspoon salt: Enhances the sweetness and balances flavors.
1/2 cup unsalted butter (softened): Contributes richness and moisture for a tender bite.
1 cup granulated sugar: Sweetens the cookies and aids in browning.
1 large egg: Binds the ingredients together while adding moisture.
1 teaspoon vanilla extract: Infuses warmth and depth of flavor.
- 1 cup fresh strawberries (chopped): Adds refreshing sweetness and vibrant fruity notes.
You Must Fold in the Strawberries Gently. Trust Me!
I know, I know—this sounds like a step that can be rushed or overlooked. I tried to shortcut it, thinking I could just mix those strawberries in with wild abandon. Spoiler alert: my cookies turned out like a colorful strawberry explosion instead of the soft, chewy delights I was aiming for. It’s tempting to be impatient, but trust me on this one!
Gently folding in the strawberries is crucial because it preserves their shape and prevents them from breaking down too much. Think of it like cradling delicate fruit rather than tossing them into a blender! This technique ensures that your cookies are infused with bursts of fresh strawberry flavor without turning your dough into mushy madness.
What Does Gentle Folding Do?
- Texture — By folding gently, you maintain the integrity of the strawberries, ensuring they don’t disintegrate into the batter and create a gummy texture.
- Flavor Distribution — This technique allows for even distribution of strawberry flavor pockets throughout each cookie rather than a uniform mush.
- Visual Appeal — Whole pieces of strawberries make for stunning cookies, creating delightful pops of pink against the golden dough.
- Moisture Control — Over-mixing can lead to excess moisture release from the strawberries, making cookies soggy instead of delightfully chewy.
- Structure — Preserving the chunks helps maintain cookie structure as they bake; otherwise, they might collapse into flat blobs.
Different Folding Techniques
- Quick Stir (poor) — A quick stir will break down strawberries completely, resulting in doughy blobs that lack texture and flavor contrast.
- Moderate Fold (okay) — This gets some chunks but still risks too much breakdown; cookies will taste good but lack that delightful burst of fresh fruit.
- Gentle Fold (great) — Perfectly maintains strawberry structure, leading to soft, chewy cookies with beautiful pops of fruit throughout.
- Super Gentle Fold (best) — Delicate handling preserves every bit of strawberry goodness—this is what dreams are made of!
Be warned: the most common mistake is over-mixing when adding those beautiful strawberries. Don’t treat them like an enemy! Gently fold them in with care or risk turning your cookies from heavenly delights into a sad strawberry soup. Trust me—you want these to look as good as they taste!
How to make Strawberry Cookies

Are you ready to see how straightforward it is to make the Strawberry Cookies of your dreams??
1. PREPARE THE DOUGH
Let’s get that delicious dough ready for baking!
1. Preheat – Preheat the oven to 350°F (175°C). This step is crucial because a properly preheated oven ensures even baking and helps the cookies rise perfectly.
2. Whisk – In a mixing bowl, whisk together the flour, baking powder, baking soda, and salt until well combined. This will ensure that all the leavening agents are evenly distributed throughout the flour, leading to consistent cookie texture.
3. Cream – In another bowl, cream the softened butter and sugar until light and fluffy. Use an electric mixer or a wooden spoon—this incorporates air into the mixture, resulting in a tender cookie.
4. Add – Add the egg and vanilla extract to the butter mixture and mix until fully combined. The egg acts as a binder, giving your cookies structure while adding richness.
5. Combine – Gradually add the dry ingredients to the wet ingredients, mixing until just combined. Be careful not to overmix; you want those gluten strands to stay relaxed for soft cookies!
6. Fold – Gently fold in the chopped strawberries using a spatula or wooden spoon. This helps preserve the integrity of the strawberries so they don’t get mushy in your dough.
HANDY TIPS
- For best results, use fresh strawberries—frozen ones can release too much moisture.
- If you want extra strawberry flavor, consider adding a teaspoon of strawberry extract when you add the vanilla!
2. BAKE THE COOKIES
Time to bring these beauties to life in the oven!
7. Scoop – Using a cookie scoop (or two spoons), drop dough onto a baking sheet lined with parchment paper, spacing them about 2 inches apart. This allows room for spreading during baking.
8. Bake – Bake in the preheated oven for 10-12 minutes or until the edges are lightly golden and the cookies look set but still soft in the center. You’ll know they’re done when your kitchen smells like strawberry heaven!
9. Cool – Remove from the oven and let cool on the baking sheet for 5 minutes before transferring to a wire rack. This cooling time helps them firm up without losing their chewy texture.
HANDY TIPS
- For smaller cookies, you can roll them into balls instead of discs; bake for about 12-14 minutes.
- Want an impressive presentation? Try sprinkling some coarse sea salt on top right before baking!
Make these once, and I wager they will invade your dreams every night too! – Nagi x
FAQ – Strawberry Cookies
How long will these cookies keep?
Strawberry cookies are best enjoyed fresh, but they can last for about 3-5 days when stored properly. I recommend keeping them in an airtight container at room temperature. After day 1, I’d rate their quality at around 97% as good, dropping to about 85% by day 3, and around 75% by day 5. If you want to retain that fresh-baked taste for longer, consider freezing them!
❄️ Can I freeze these cookies?
Absolutely! To freeze strawberry cookies, allow them to cool completely after baking. Then, place them in a single layer on a baking sheet and freeze until solid. Once frozen, transfer the cookies to a zip-top freezer bag or airtight container for up to 3 months. When you’re ready to enjoy them, simply let them thaw at room temperature for about 30 minutes or pop them in the microwave for a few seconds (but be careful not to overdo it!).
🌾 Can these be made gluten free?
Yes, you can make gluten-free strawberry cookies using a good quality all-purpose gluten-free flour blend. While I haven’t tested this exact recipe with gluten-free flour myself (yet!), many blends perform similarly to regular flour in cookie recipes. Just ensure your blend contains xanthan gum or add a teaspoon of it for better texture. Keep in mind that the cookies might have a slightly different texture—sometimes denser or crumblier—but still delicious!
Can I reduce the sugar or substitute with sweeteners?
No, you cannot reduce the sugar—I tried this numerous times (I know, I’m a bit mad 😅). The sugar not only sweetens the cookies but also helps with moisture and texture. Substituting with sweeteners like stevia or erythritol may yield unpredictable results since they behave differently in baking. If you’re looking for lower-sugar alternatives, consider using unsweetened applesauce to replace some of the butter while maintaining sweetness.
Why do I need to cream the butter and sugar until fluffy?
Creaming the butter and sugar is crucial because it incorporates air into the mixture, which helps give your cookies that desirable soft and chewy texture. If you skip this step or don’t cream long enough (aim for about 2-3 minutes), your cookies may turn out dense rather than light. Think of it as giving your cookie dough a little workout—it needs that oxygen!
What if my cookie dough is too sticky?
If your dough feels overly sticky, it might be due to the moisture content from your strawberries or if you measured your flour too lightly. You can fix this by adding a tablespoon of flour at a time until you reach a workable consistency. Just remember—don’t go overboard! Too much flour will lead to dry cookies.
Can I add other flavors or mix-ins?
Definitely! This recipe serves as a great base for creativity. You can add chocolate chips, nuts (like pecans or walnuts), or even lemon zest for a citrusy twist. Just keep in mind that adding too many mix-ins might alter the balance of wet and dry ingredients, so adjust accordingly if you do! Happy experimenting!
Troubleshooting
I will continue to add more to this Troubleshooting section as I start seeing questions coming through from people who have made the recipe.
Troubleshooting tips
“My cookies were too flat! 😩”
- Your butter may have been too warm. If the butter is overly soft or melted, it can cause the cookies to spread excessively during baking. Aim for softened butter that’s pliable but still cool to the touch.
- You might not have chilled your dough before baking. Chilling helps solidify the fat in the cookies, preventing them from spreading too much. Next time, try refrigerating your dough for at least 30 minutes.
- You may have accidentally used too little flour. If you didn’t spoon and level your flour properly, you could end up with less than 2 cups, which can lead to flatter cookies. I bet they were still YUM though!
“My cookies turned out tough and dry! 😢”
- You might have overmixed your dough after adding the dry ingredients. Overmixing can develop gluten in the flour, making your cookies tough instead of soft and chewy. Mix just until combined next time!
- If you used a low-fat butter substitute or margarine, that could contribute to dryness as those options often contain water instead of fat. Using full-fat unsalted butter is key for the perfect texture.
- You may have baked them for too long. Every oven is different, so keep an eye on them! They should be lightly golden around the edges but still soft in the center when you pull them out. I bet they were still YUM though!
“My cookies are unevenly browned! 🔥”
- You might not have rotated your baking sheet halfway through baking. Ovens can have hot spots, so rotating ensures even cooking and browning all around.
- If your cookie dough balls were different sizes, they’ll bake at varying rates. Make sure to scoop uniform amounts of dough for consistent results next time!
- You may have placed your cookies too close together on the baking sheet, affecting airflow and heat distribution during baking. Give them some space to shine! I bet they were still YUM though!
“The surface of my cookies cracked and split! 😭”
- Your dough might have been overmixed after adding the strawberries. This can lead to a drier texture that causes cracking during baking. Mix gently and only until combined!
- If you didn’t chill your dough before baking, this could also lead to surface cracks as the fat melts quickly in a hot oven. A quick chill can help maintain shape and texture.
- The temperature of your oven could be too high; if it runs hotter than set, it can cause rapid expansion leading to cracks on the surface of your cookies. Use an oven thermometer if you’re unsure about your oven’s accuracy! I bet they were still YUM though!
Strawberry Cookies
Ingredients
Method
- Preheat the oven to 350°F (175°C).
- In a mixing bowl, whisk together the flour, baking powder, baking soda, and salt.
- In another bowl, cream the softened butter and sugar until light and fluffy.
- Add the egg and vanilla extract to the butter mixture and mix until combined.
- Gradually add the dry ingredients to the wet ingredients, mixing until just combined.
- Fold in the chopped strawberries gently.
- Using a cookie scoop, drop dough onto a baking sheet lined with parchment paper.
- Bake in the preheated oven for 10-12 minutes or until the edges are lightly golden.
- Remove from the oven and let cool on the baking sheet for 5 minutes before transferring to a wire rack.