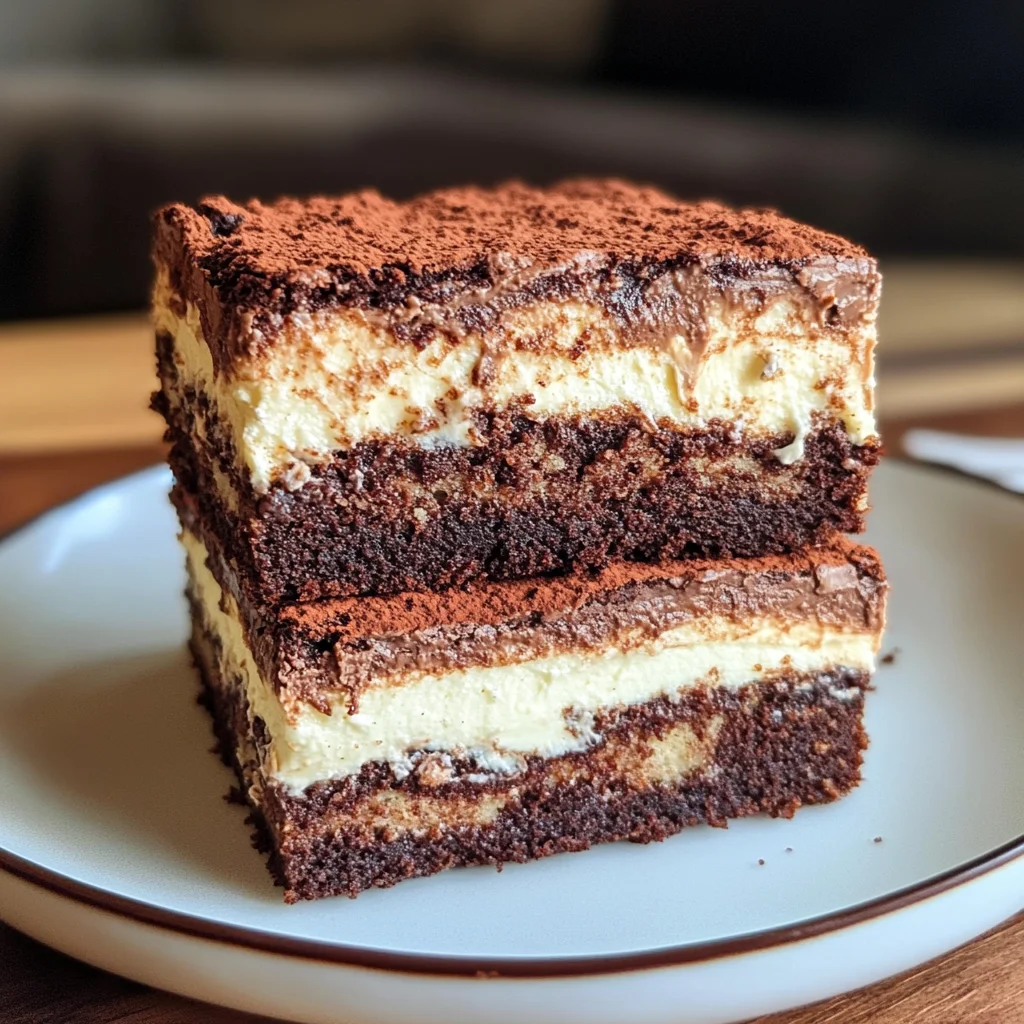
Tiramisu Brownies
If you’re looking for a dessert that will wow your friends and family, these Tiramisu Brownies are just the ticket! Combining the rich, fudgy texture of brownies with the classic flavors of tiramisu, this dessert is a delightful twist that feels both indulgent and comforting. Perfect for busy weeknights or special gatherings, these brownies are sure to become a favorite in your home.
What makes this recipe even more special is how easily it comes together. With simple steps and readily available ingredients, you’ll find yourself whipping these up in no time. Trust me, once you take a bite of that creamy mascarpone layer paired with espresso-soaked ladyfingers, you’ll understand why this has earned its spot as a beloved treat!
Why You’ll Love This Recipe
- Easily Accessible Ingredients: Most of these ingredients are pantry staples, making it easy to whip up whenever you’re craving something sweet.
- Decadent Flavor Combination: The fusion of rich chocolate brownies and coffee flavors creates a dessert experience like no other.
- Family-Friendly Delight: Kids and adults alike will adore the fudgy texture and creamy topping. It’s a great way to introduce new flavors!
- Make-Ahead Convenience: These brownies can be made in advance and stored in the fridge, allowing the flavors to meld beautifully over time.
Ingredients You’ll Need
Gathering your ingredients is part of the fun! You’ll love how simple and wholesome they are. Here’s what you need for these delicious Tiramisu Brownies:
For the Brownies
- 100 g dark or semi-sweet chocolate (finely chopped)
- 50 g natural cocoa powder
- 230 g unsalted butter (roughly cubed)
- 4 large eggs (room temperature)
- 150 g granulated sugar
- 100 g brown sugar
- 100 g all-purpose flour
For the Topping
- 250 g mascarpone cheese (cold)
- 200 g whipping cream (cold)
- 50 g powdered sugar
- 1/2 teaspoon vanilla extract
- 2 teaspoons espresso powder
- 150 g hot water
- 1 tablespoon coffee liqueur or dark vanilla extract (alcohol-free) (e.g. Kahlua – optional)
For Assembly
- 12 ladyfingers
- 1 tablespoon cocoa powder (for dusting)
Variations
This recipe is wonderfully flexible! Feel free to get creative with some delicious twists:
- Add Some Nuts: Chopped walnuts or hazelnuts can add a lovely crunch.
- Chocolate Swirl: Fold in some chocolate chips into your brownie batter before baking for extra richness.
- Fruit Flavors: Consider layering fresh berries on top before serving for a refreshing contrast.
- Dairy-Free Option: Substitute mascarpone with a dairy-free cream cheese alternative for a lactose-free version.
How to Make Tiramisu Brownies
Step 1: Melt the Chocolate and Butter
Start by melting the dark chocolate and cubed butter together in a heatproof bowl over simmering water. Stir occasionally until completely smooth. This step is crucial as it ensures that your brownies will have that luxurious fudgy texture.
Step 2: Mix the Sugars and Eggs
In another bowl, whisk together the granulated sugar, brown sugar, and eggs until light and fluffy. This process introduces air into your mixture which helps create that perfect brownie lift!
Step 3: Combine Wet Ingredients
Once your chocolate mixture has cooled slightly, pour it into the egg mixture. Stir until well combined; this adds richness to your batter that balances out beautifully with the cocoa powder.
Step 4: Add Dry Ingredients
Sift in the cocoa powder and flour gently folding them into the mix. Be careful not to overmix—this will keep your brownies soft and fudgy!
Step 5: Bake
Pour your brownie batter into a prepared baking dish and spread evenly. Bake at 350°F (175°C) for about 30-35 minutes or until a toothpick inserted comes out with moist crumbs. Allow them to cool before adding any toppings!
Step 6: Prepare Espresso Mixture
While your brownies cool, dissolve espresso powder in hot water. If using coffee liqueur or dark vanilla extract, mix it in now. This adds an aromatic kick that truly captures tiramisu’s essence.
Step 7: Assemble
Soak each ladyfinger briefly in your coffee mixture then layer them atop your cooled brownies.
Step 8: Make Mascarpone Cream
Whip cold whipping cream with powdered sugar until stiff peaks form. Gently fold in cold mascarpone cheese along with vanilla extract until incorporated—this will give you that luscious tiramisu-like cream!
Step 9: Top Brownies
Spread the mascarpone mixture over the soaked ladyfingers generously. Dust with cocoa powder for that final touch.
Step 10: Chill & Serve
Refrigerate for at least two hours before serving—this allows all those wonderful flavors to come together beautifully! Cut into squares and enjoy every delicious bite of these Tiramisu Brownies!
Pro Tips for Making Tiramisu Brownies
Creating the perfect Tiramisu Brownies can be a delightful experience, especially with these handy tips!
- Use high-quality chocolate: The chocolate you choose makes a big difference in flavor. Opt for dark or semi-sweet chocolate that you love to eat on its own for the best results.
- Chill your mascarpone and whipping cream: Cold ingredients whip better, creating a light and airy mascarpone cream that beautifully complements the fudgy brownies.
- Don’t skip the espresso powder: This ingredient adds depth and enhances the chocolate flavor, giving your brownies that authentic tiramisu taste.
- Let them cool completely: Allowing your brownies to cool before slicing helps them set properly, leading to cleaner cuts and a nicer presentation.
- Experiment with flavors: If you want to mix things up, try adding a hint of almond extract or a sprinkle of cinnamon to the brownie batter for a unique twist.
How to Serve Tiramisu Brownies
Serving Tiramisu Brownies is as much about presentation as it is about flavor. Here are some ideas to make them shine at your next gathering!
Garnishes
- Grated chocolate: A sprinkle of finely grated chocolate on top adds an elegant touch and reinforces the rich chocolate flavor.
- Whipped cream dollops: Add a few dollops of freshly whipped cream on top or beside each brownie for extra creaminess.
- Cocoa powder dusting: A light dusting of cocoa powder right before serving not only looks beautiful but also enhances the dessert’s flavor.
Side Dishes
- Fresh berries: A side of mixed fresh berries, such as strawberries or raspberries, provides a refreshing contrast to the rich brownies.
- Vanilla ice cream: A scoop of vanilla ice cream pairs perfectly with warm brownies, creating a delightful combination of textures and temperatures.
- Coffee: Serve with a cup of freshly brewed coffee or espresso to amplify the coffee notes in the brownies and enhance your dessert experience.
- Fruit salad: A light fruit salad can balance out the richness of the brownies, making for a well-rounded dessert table.
With these serving suggestions and pro tips, your Tiramisu Brownies will surely impress family and friends alike! Enjoy every delicious bite!
Make Ahead and Storage
These Tiramisu Brownies are perfect for meal prep, making them a fantastic option to have on hand for unexpected guests or a sweet treat throughout the week.
Storing Leftovers
- Allow the brownies to cool completely before storing.
- Place them in an airtight container.
- Store at room temperature for up to 3 days.
- For longer freshness, refrigerate for up to a week.
Freezing
- Cut the brownies into squares.
- Wrap each square tightly in plastic wrap.
- Place wrapped brownies in a freezer-safe bag or container.
- Freeze for up to 3 months.
Reheating
- Thaw frozen brownies in the refrigerator overnight before reheating.
- Microwave individual squares for about 10-15 seconds until warm.
- Alternatively, reheat in an oven at 350°F (175°C) for about 5 minutes.
FAQs
Here are some common questions you might have about Tiramisu Brownies:
Can I use different types of chocolate for Tiramisu Brownies?
Yes! You can use milk chocolate or bittersweet chocolate based on your preference. Just remember that darker chocolate will give a richer flavor.
How do I make Tiramisu Brownies gluten-free?
To make these brownies gluten-free, substitute all-purpose flour with a gluten-free flour blend. Ensure that all other ingredients are also gluten-free.
Can I replace mascarpone cheese in Tiramisu Brownies?
If you can’t find mascarpone cheese, you can use cream cheese mixed with a little heavy cream to achieve a similar creamy texture.
Final Thoughts
I hope you find joy in making these delightful Tiramisu Brownies! Their rich flavors and delightful textures make them truly special. Don’t hesitate to share this recipe with friends and family, and most importantly, enjoy every bite of your creation. Happy baking!
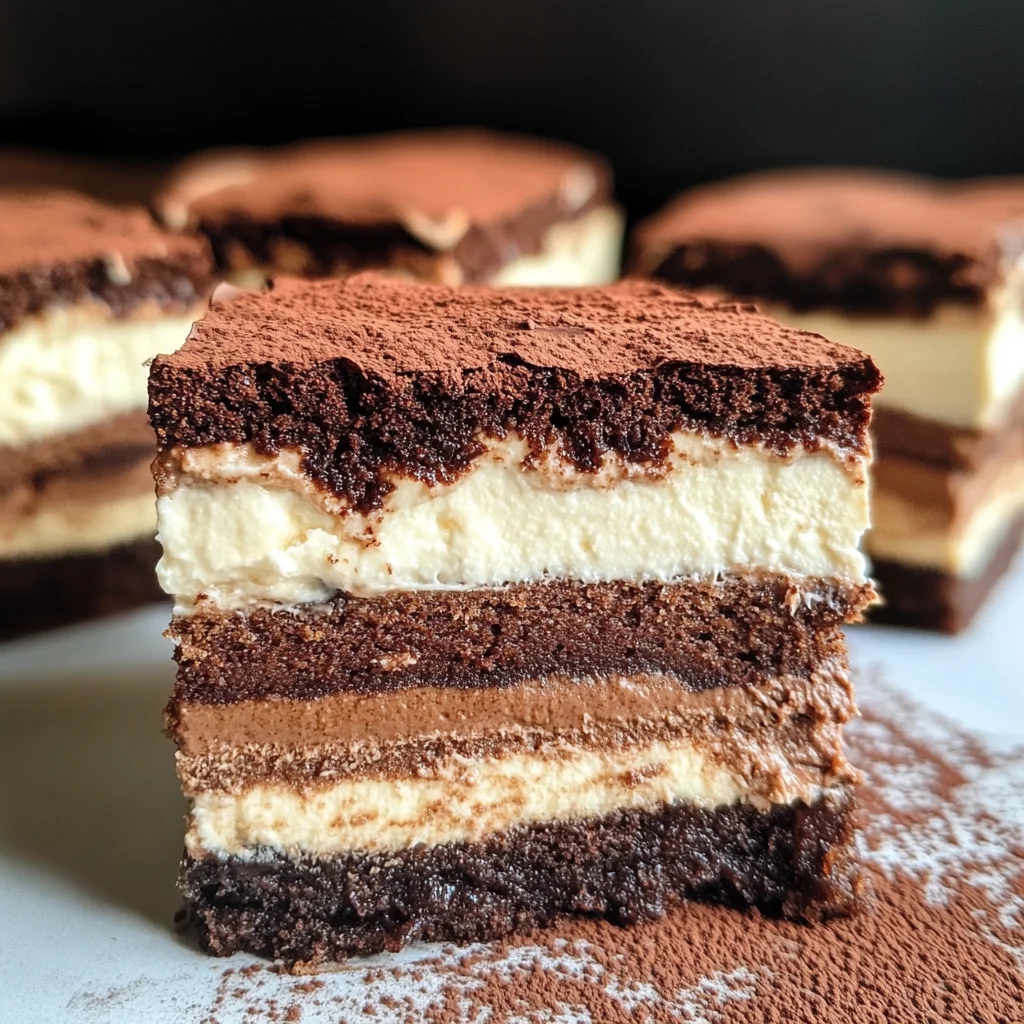
Tiramisu Brownies

Indulge in the delightful taste of Tiramisu Brownies, a decadent dessert that marries the rich, fudgy texture of brownies with the classic coffee flavors of tiramisu. These brownies are perfect for impressing family and friends at gatherings or simply satisfying your sweet tooth on a cozy night in. With layers of creamy mascarpone and espresso-soaked ladyfingers, each bite is an experience of indulgence. Plus, this recipe comes together easily with simple ingredients you likely already have on hand. Get ready to enjoy a delicious twist on a beloved dessert that will surely become a staple in your home!
- Prep Time: 20 minutes
- Cook Time: 35 minutes
- Total Time: 55 minutes
- Yield: 12 servings 1x
- Category: Dessert
- Method: Baking
- Cuisine: Italian-inspired
Ingredients
- 100 g dark or semi-sweet chocolate (finely chopped)
- 50 g natural cocoa powder
- 230 g unsalted butter (roughly cubed)
- 4 large eggs (room temperature)
- 150 g granulated sugar
- 100 g brown sugar
- 100 g all-purpose flour
- 250 g mascarpone cheese (cold)
- 200 g whipping cream (cold)
- 50 g powdered sugar
- 1/2 teaspoon vanilla extract
- 2 teaspoons espresso powder
- 150 g hot water
- 12 ladyfingers
- 1 tablespoon cocoa powder (for dusting)
Instructions
- Preheat oven to 350°F (175°C). Melt dark chocolate and butter in a heatproof bowl over simmering water until smooth.
- In another bowl, whisk granulated sugar, brown sugar, and eggs until fluffy. Combine with melted chocolate mixture.
- Sift in cocoa powder and flour; gently fold until just blended.
- Pour batter into a prepared baking dish and bake for 30-35 minutes. Allow to cool completely.
- Dissolve espresso powder in hot water; soak ladyfingers briefly in this mixture.
- Whip cold whipping cream with powdered sugar until stiff peaks form, then fold in mascarpone cheese and vanilla extract.
- Layer soaked ladyfingers over cooled brownies, spread mascarpone cream on top, and dust with cocoa powder.
- Refrigerate for at least two hours before serving.
Nutrition
- Serving Size: 1 serving
- Calories: 290
- Sugar: 20g
- Sodium: 75mg
- Fat: 20g
- Saturated Fat: 10g
- Unsaturated Fat: 9g
- Trans Fat: 0g
- Carbohydrates: 28g
- Fiber: 2g
- Protein: 4g
- Cholesterol: 80mg